3D Scanning vs. Photogrammetry Part 1 - The Theory
 Lukas
Zmejevskis
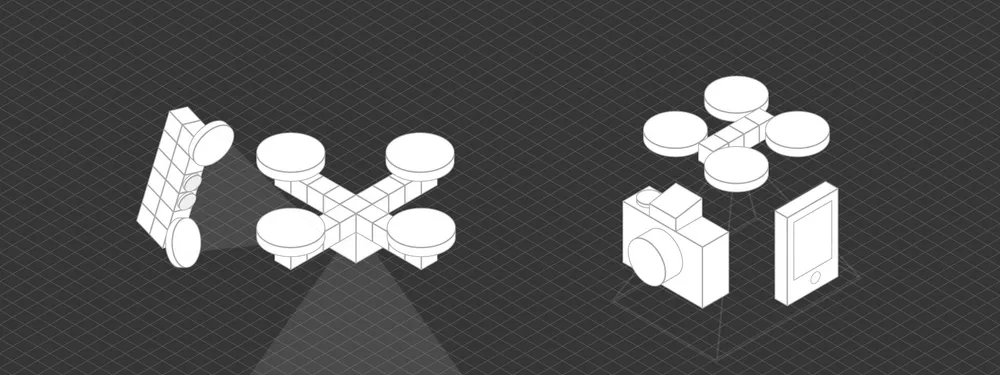
3D scanning is most commonly associated with using special hardware to obtain 3D models. 3D photogrammetry is also technically a 3D scanning technique that can supplement 3D scanning hardware or compete directly with it. This will be a series of articles exploring 3D scanning and photogrammetry's differences, similarities, and use cases. In the first part, I am going to go over the theory of photogrammetry and 3D scanning. What are the expected differences between the two, and maybe we can bust some myths?
What is a 3D scanner?
A 3D scanner is a piece of hardware that helps you obtain a 3D model of a scene or an object. It can use one or a combination of various technologies and hardware modules to achieve that purpose.
A 3D scanner most commonly contains regular cameras, IR-sensitive cameras, and various lasers and lights (or even projectors). This allows a 3D scanner to rely not only on external lighting but also on reflections caused by the device itself. So, its own lighting, which can be invisible to the human eye, can have various predefined patterns and calibrations.
That would be the main difference between using a calibrated device with its own light source and relying completely on the data found on the scene, which is applicable to photogrammetry. Thus, a 3D scanner approach adds more fixed variables on which to base our data.
Different Scanner Tech
Most commonly, we find scanners that use lasers for:
-
Time-of-flight (ToF) sensors measure the time it takes for a laser to return after hitting the object.
-
Triangulation: Uses a laser and a camera; the camera detects the laser's deformation to calculate depth.
-
Structured light scanner - projects a pattern of light (grids or stripes) onto an object, then captures distortions with cameras. Sources for these patterns can also be non-laser-based.
-
LiDAR—Light Detection and Ranging—is similar to ToF and measures laser travel duration. LiDAR sensor arrays usually include other sensors (GPS, IMU) and moving hardware capable of measuring the entire environment around them.
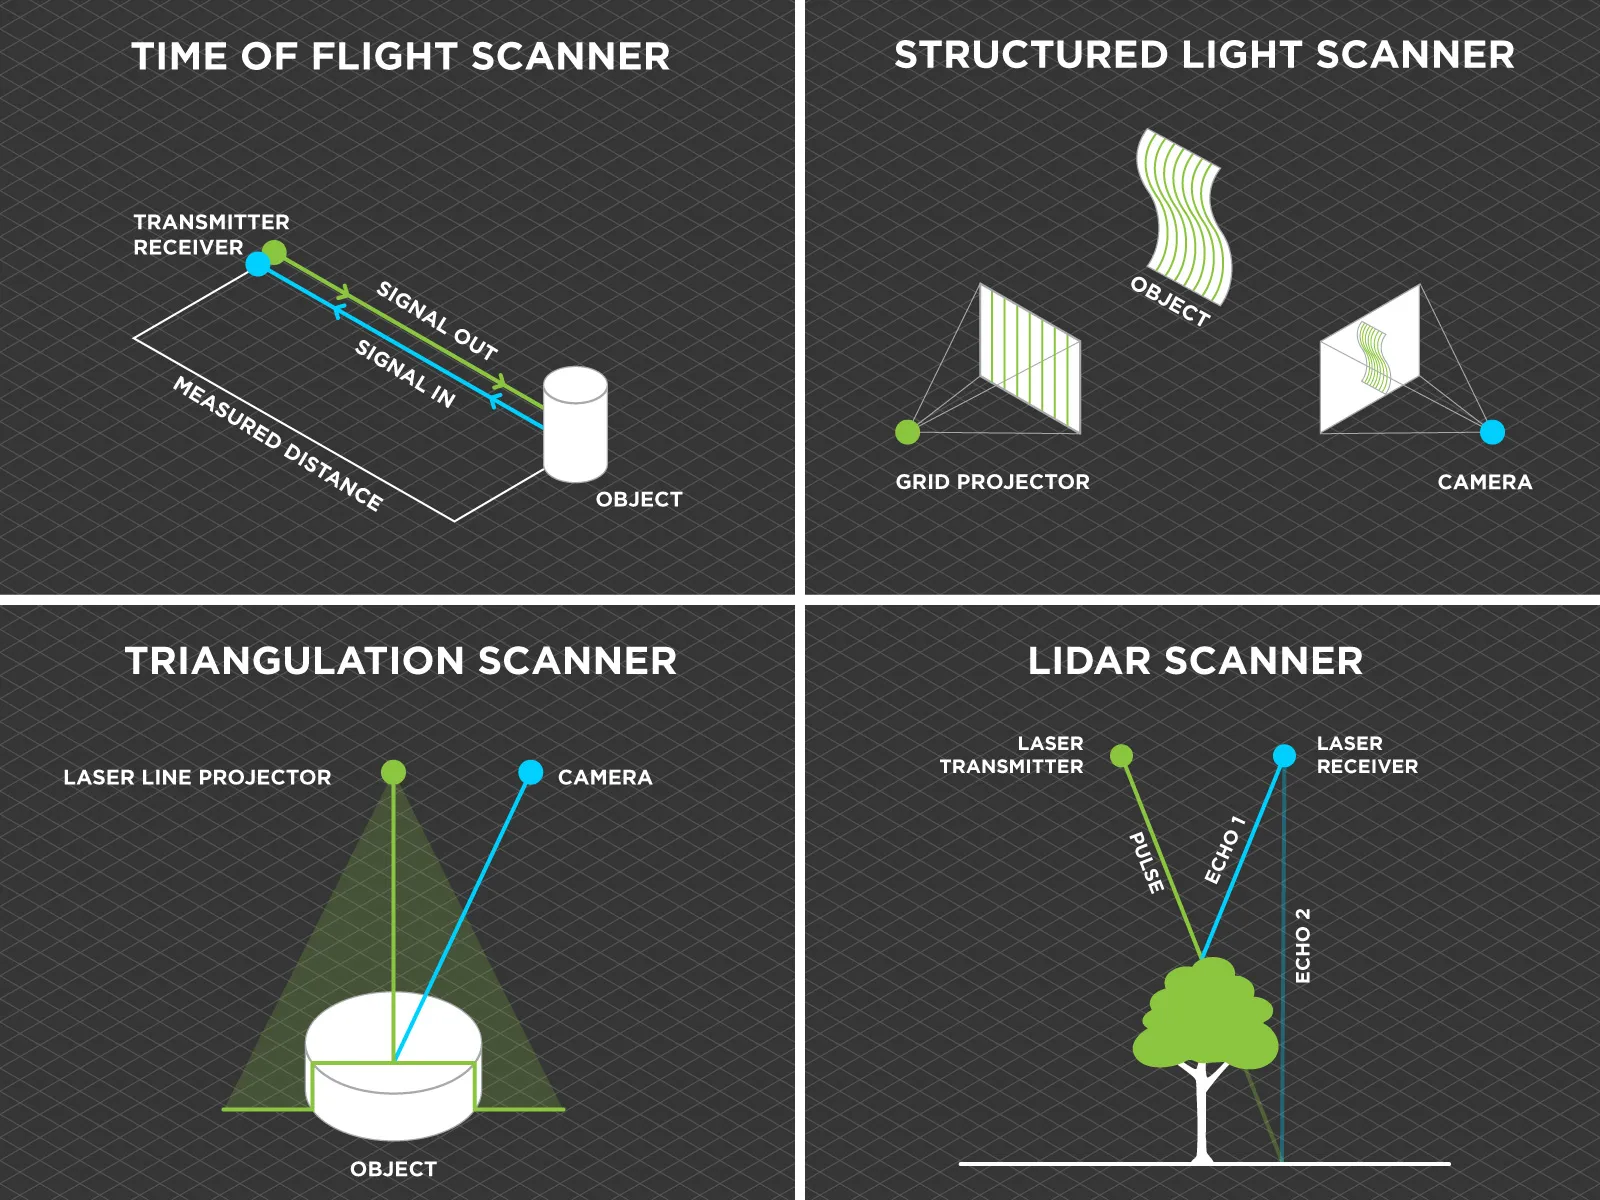 These systems can or need to incorporate visible light cameras, sometimes in stereo photographic configurations (meaning two cameras with a known distance between them, like eyes). Some technologies can use various wavelengths of lasers; for example, ToF sensors are more commonly found operating with infrared light, which is not visible to us. At the same time, similar structured light scanners can work with visible light, too. So everything is based on emitting and collecting electromagnetic waves reflected from the object and processing that data on the fly (or in post-production) to calculate depth. These are the fundamentals of how most 3D scanners work.
Implied Differences with Photogrammetry
Given that 3D scanners utilize more data and hardware than photogrammetry, an initial thought is that they should provide superior results faster for the price of the hardware. This is not a universal truth, and the boring answer, as always, is that it depends.
I will try to explain the pros and cons of 3D scanning vs. photogrammetry objectively.
-
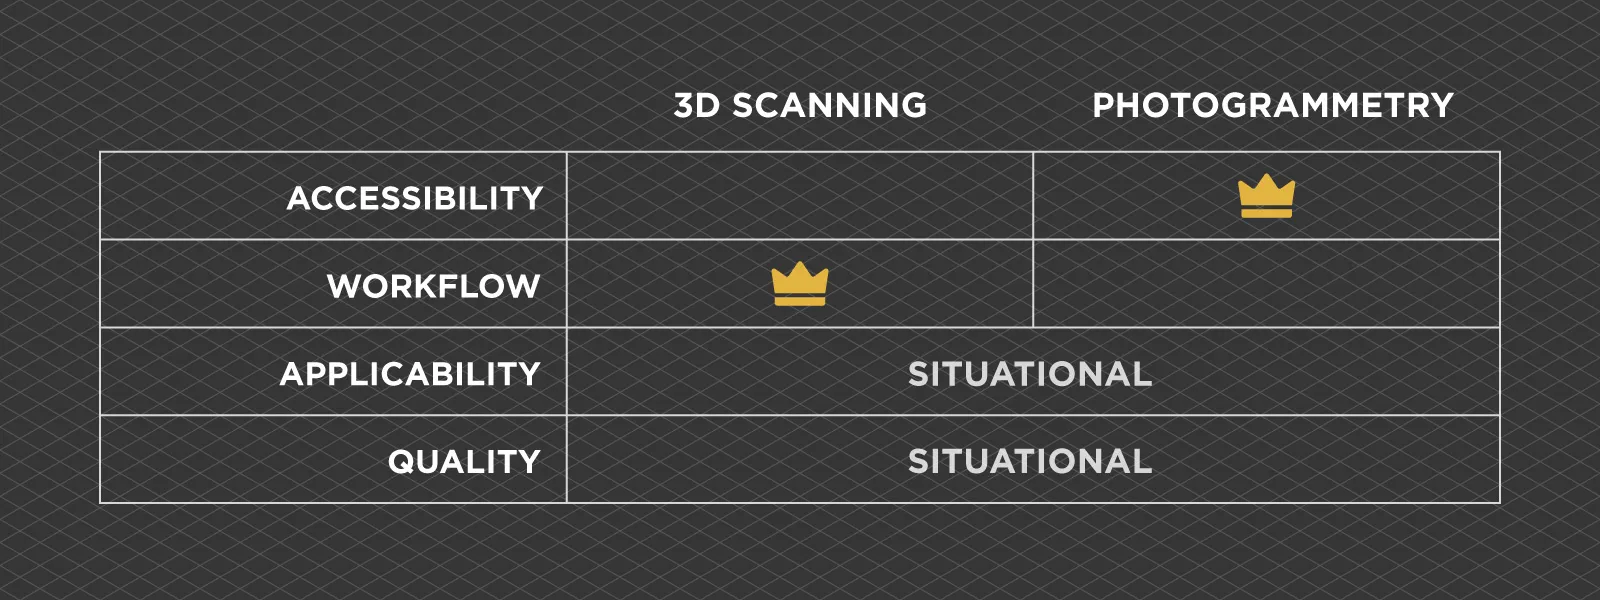
Accessibility. This one is relatively easy because photogrammetry requires only a camera. Cameras as dedicated devices are relatively rare and expensive these days, but a decent camera is an essential part of a modern smartphone, which almost everyone has. Any 3D scanner system requires additional hardware, sometimes even a computer alongside it, to operate. So, the accessibility pro goes to photogrammetry.
-
Workflow. In most common scenarios, a 3D scanner has an advantage here. It is never as simple as walking around with a scanner and getting your result—but often, data processing steps do not take as long as photogrammetric processing. So we can say that a 3D scanner is usually faster, but in the context of the entire workflow of obtaining a model, the difference can be negligible.
-
Applicability. Both technologies and techniques have limitations. Laser scanners and photogrammetry struggle with reflective surfaces. Photogrammetry is more challenging with featureless surfaces, while IR-based scanners can not see dark absorptive objects. IR-based scanners can not work in sunlight, while photogrammetry does not generally work with incorrect lighting. Both solutions have workarounds in many scenarios, but overall, I would say that they are tied. Each use case must be evaluated to determine which technique is best.
-
Quality. An extremely contentious topic, with as many answers as there are opinions. There are just too many variables to say which is the more accurate solution, and again, each use case would have to be individually evaluated. Never believe anyone staunchly saying that either solution is superior, period. This is not how things work in the real world.
 Common Use Cases
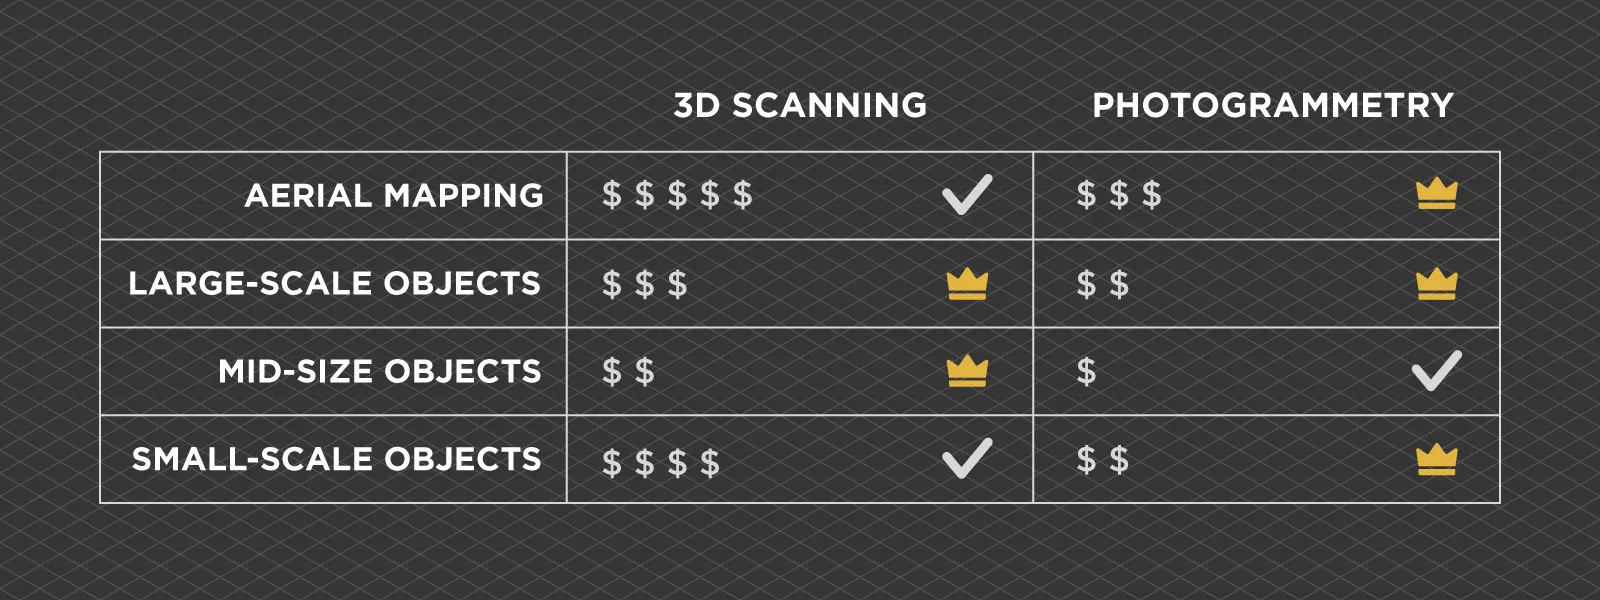
So, what are common use cases for these 3D capture approaches? I decided to categorize use cases and my logic around scale, so these are my opinions, starting with large scale and going down.
-
Aerial large-scale mapping. Flying cameras (drones) are a dime a dozen these days, so photogrammetry has a firm hold on these kinds of use cases. Flying LiDAR, of course, exists and is used, but this is at the very high end of the spectrum. Aerial photogrammetry has become ubiquitous for large-scale monitoring, measurements, construction, mining, remote sensing, and inspection cases worldwide.
-
Large-object terrestrial scanning. Here, laser scanning solutions take a good chunk from photogrammetry because terrestrial scanners are more accessible than flying ones. It still usually remains a domain for high-end professional work in construction, planning, and preservation, while photogrammetry is the more accessible and often as good an alternative.
-
Mid-size object scanning. Take vehicles as an example. This is where things shift to 3D scanner favor because mid-size objects are most favorable for 3D scanners due to many things. Scanners can become faster overall in this scale and utilize markers practically; oftentimes, textures are not an issue. For example, in reverse engineering cases. If we shift our focus to asset creation, where technical accuracy is less critical but textures are, the winner here is photogrammetry. The most common use cases are game, movie, VFX, VR asset creation, visual preservation, quick documentation for reference, scans for procedural generation, and various textural maps.
-
Smaller and tiny objects. This is where both solutions go back and forth. Anything from the size of a bicycle to a fist is a toss-up between the two approaches; scale is the least important variable here. Smaller than a fist and into the macro territory—at some point, photogrammetry takes over because of the current resolution of scanners.
 Additional Comments
I have purchased a 3D scanner, which I will use against photogrammetric techniques once I master it. I also got an iPhone capable of LiDAR scanning and will test that as well by comparing its regular camera to the module.
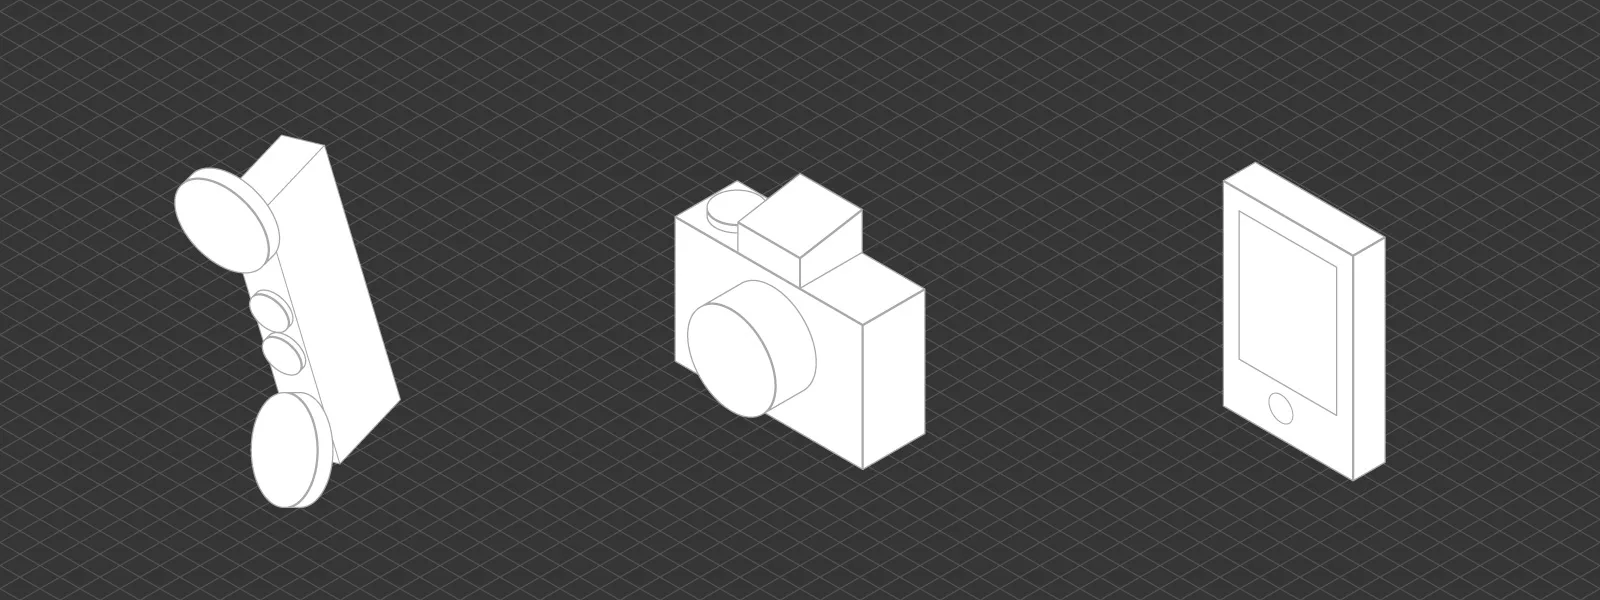
The scanner in question is a Revopoint Miraco Plus, a mid-tier scanner capable of mid to small-size scans. It appears to have two sets of stereo cameras + an additional RGB camera for textures, an IR laser projector in the middle, and a light. It comes with an extensive kit for markers for calibration and scale bars for accurate scaling. It is somewhat of a hybrid solution; it is very interesting to see how it stacks up to photogrammetry.
 Conclusion
I hope this article serves as a quick primer on the technology. In the upcoming parts, I will dive into more details, provide examples, and compare our photogrammetry software and workflows in general. I will be absolutely transparent even if the results are unfavorable towards photogrammetry. Still, honestly, I do not think that will be the case. From what I presented in theory, it should be an interesting back-and-forth.

Photographer - Drone Pilot - Photogrammetrist. Years of experience in gathering data for photogrammetry projects, client support and consultations, software testing, and working with development and marketing teams. Feel free to contact me via Pixpro Discord or email (l.zmejevskis@pix-pro.com) if you have any questions about our blog.
Related Blog Posts
Our Related Posts
All of our tools and technologies are designed, modified and updated keeping your needs in mind
Viltrox 14mm vs. Pergear 14 mm Lens – Choosing for Interior Photogrammetry
Ultrawide-angle lenses are most commonly used in photogrammetry for interior scanning. I am planning to do an interior-type construction site scan, so I need a lens for my Sony full-frame camera. There are plenty of premium wide-angle options, but I need something that provides the best image qualit
Gaussian Splatting vs. Photogrammetry
Every few years, something new shows up online claiming to “revolutionize” 3D reconstruction. A while back it was NeRFs. Now it is Gaussian splatting — with endless YouTube clips of people walking through photorealistic 3D scenes that seem to render instantly.
Photo Dynamic Range - Real Life Tests and Advice
Dynamic range is an inescapable term when talking about digital photo or video capture. Our human vision has an incredible ability to adapt, allowing us to perceive both very dark and very bright scenes. When a digital imaging sensor or even a chemical negative captures a scene frozen in time, it is
Ready to get started with your project?
You can choose from our three different plans or ask for a custom solution where you can process as many photos as you like!
Free 14-day trial. Cancel any time.
.svg@webp)