.svg@webp)
DJI Drone Settings and Features - DJI Fly App Extensive Guide Part 1
 Lukas
Zmejevskis
Lukas
Zmejevskis
The best flying cameras on the market today are DJI drones. They are the best tools for video, photo or 3D photogrammetry scan creation. However, the tool is only as capable as the user. In this and the next articles, we will go over every single setting and feature available in the most popular DJI drones in a clear and concise manner. This should help define the capability and may answer questions for those who have yet to master the DJI Fly app and any DJI drone that is controlled by this app.
Content Capture Settings
We begin with content capture, arguably the most essential part of any drone. We will go over each capture mode and its variants in a few senteces.
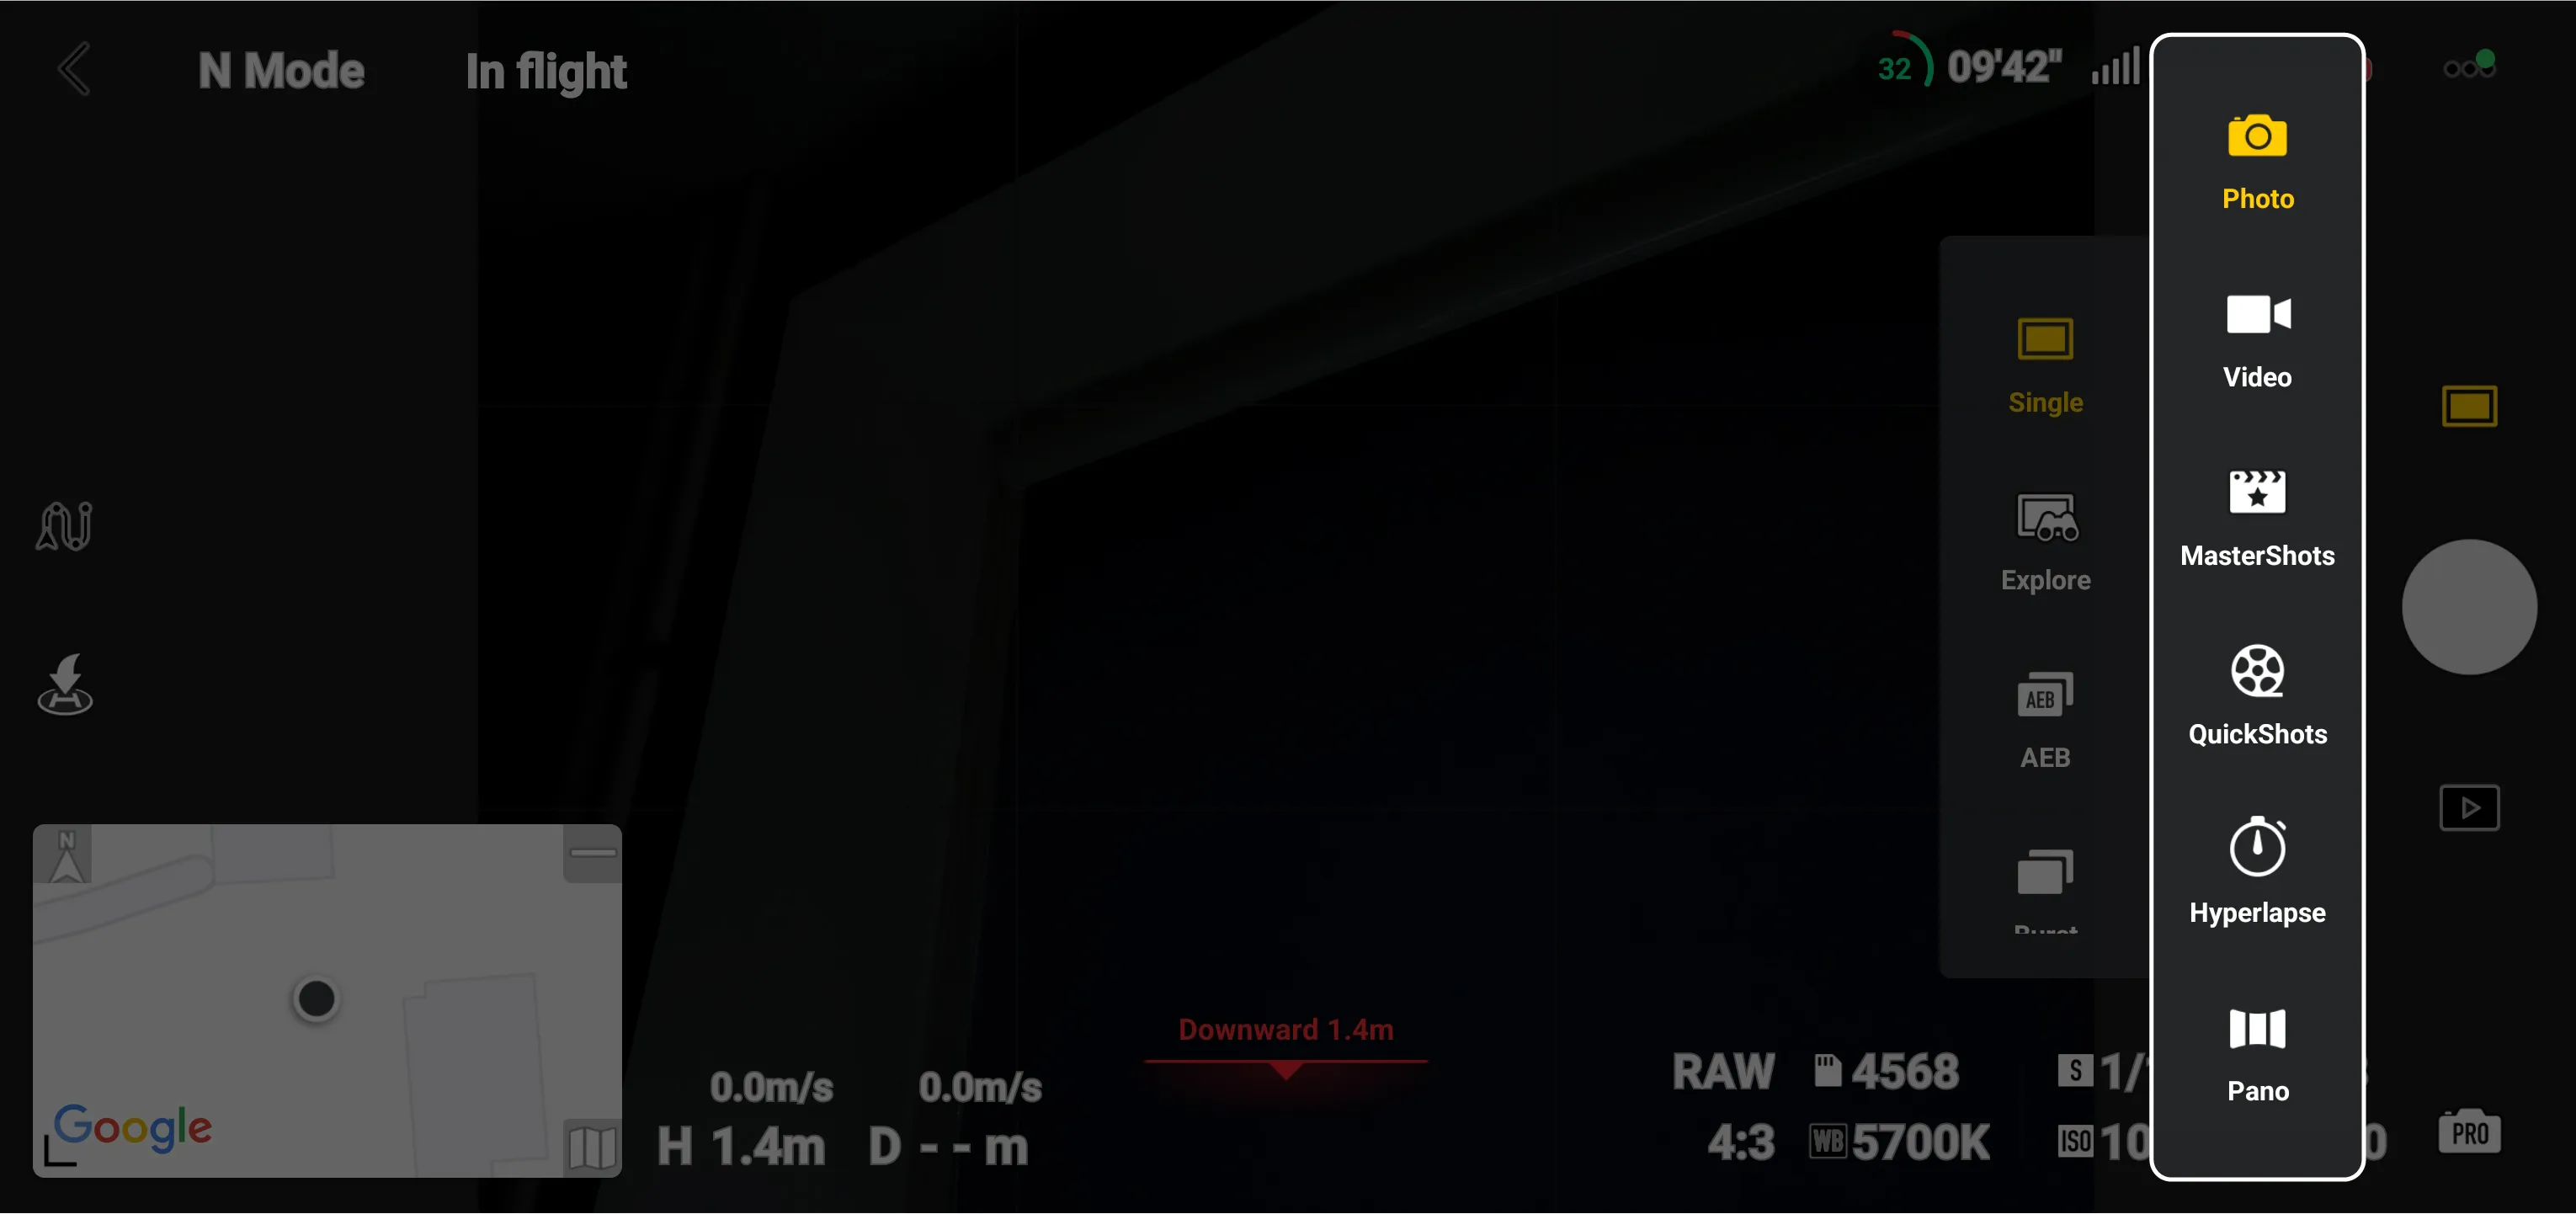 Photo-capturing modes:
- Single - takes a single photo.
- Explore - enables a lot of digital zoom.
- AEB - automatic exposure bracketing. Takes three or five photos for HDR image creation.
- Burst - takes a bunch of pictures in a rapid succession.
- Timed Shot - takes a photo with an interval, every 2 - 3 - 5 - 7 - 10 seconds.
Video - video capture modes:
- Normal - normal video capture with all possible formats.
- Night - night capture mode with some limitations.
- Explore - limited video capture, but with lots of digital zoom enabled.
- Slow Motion - video capture with high frame rate options.
MasterShots are a group of predefined shots for videos taken in a single flight. To use them, you only need to select the subject and press go.
Quickshots - a group of predefined shots from which you can choose to execute either one after selecting your subject on the screen:
- Dronie - the drone flies backward and up while keeping the subject in the frame.
- Rocket - the drone flies up while keeping the subject in the frame.
- Circle - drone circles around the subject while it is in the frame.
- Helix - drone makes a spiral around the subject
- Boomerang - elliptical Shot around the subject, off center.
- Asteroid - drone orbits around the subject while the camera is facing forward.
Hyperlapse - moving timelapse capture modes:
- Free - fly manually while the drone takes photos at intervals and creates a video from them. A video will be generated after all hyperlapse flights.
- Circle - select a subject to track, and the drone will rotate around it while taking photos.
- CourseLock - the camera will face a fixed direction while photos are taken, irrespective of how you fly.
- Waypoint - create a waypoint path that will be used for hyperlapse capture.
Pano - a few types of panorama capture:
- Sphere - spherical 360-degree panorama.
- 180 - half of a spherical panorama.
- Wide-angle - 9 photo panorama.
- Vertical - a group of photos stitched from bottom to top.
Camera Settings Group
Camera settings are largely exposure and format settings for photos and videos. Sometimes, these settings are different depending on which capture mode you are in. We will explore these in Single photo mode and Normal video mode, which have all the options available. If you do not see any of these, you might be in a mode that does not allow something.
Exposure Tab - Identical in Photo and Video modes.
- ISO - adjust the sensor's ISO sensitivity.
- Shutter - adjust the shutter speed expressed in fractions of a second.
- Aperture—Adjust the lens's aperture. This applies only to the Mavic series drones, as Air and Mini drones do not have
- adjustable apertures.
- M.M - exposure compensation setting. PLUS means a brighter frame, MINUS darker. Expressed in EV increments.
 Photo Mode Format Tab
- White Balance - choose white balance in Kelvin.
- Format - JPEG, RAW, or JPEG+RAW - your photo format saving choice.
- Aspect Ratio - aspect ratio of saved photos. It does not affect raw images; 4:3 is the original aspect ratio.
- Resolution - saved photo resolution.
- Storage - a card or internal memory choice for saving photos.
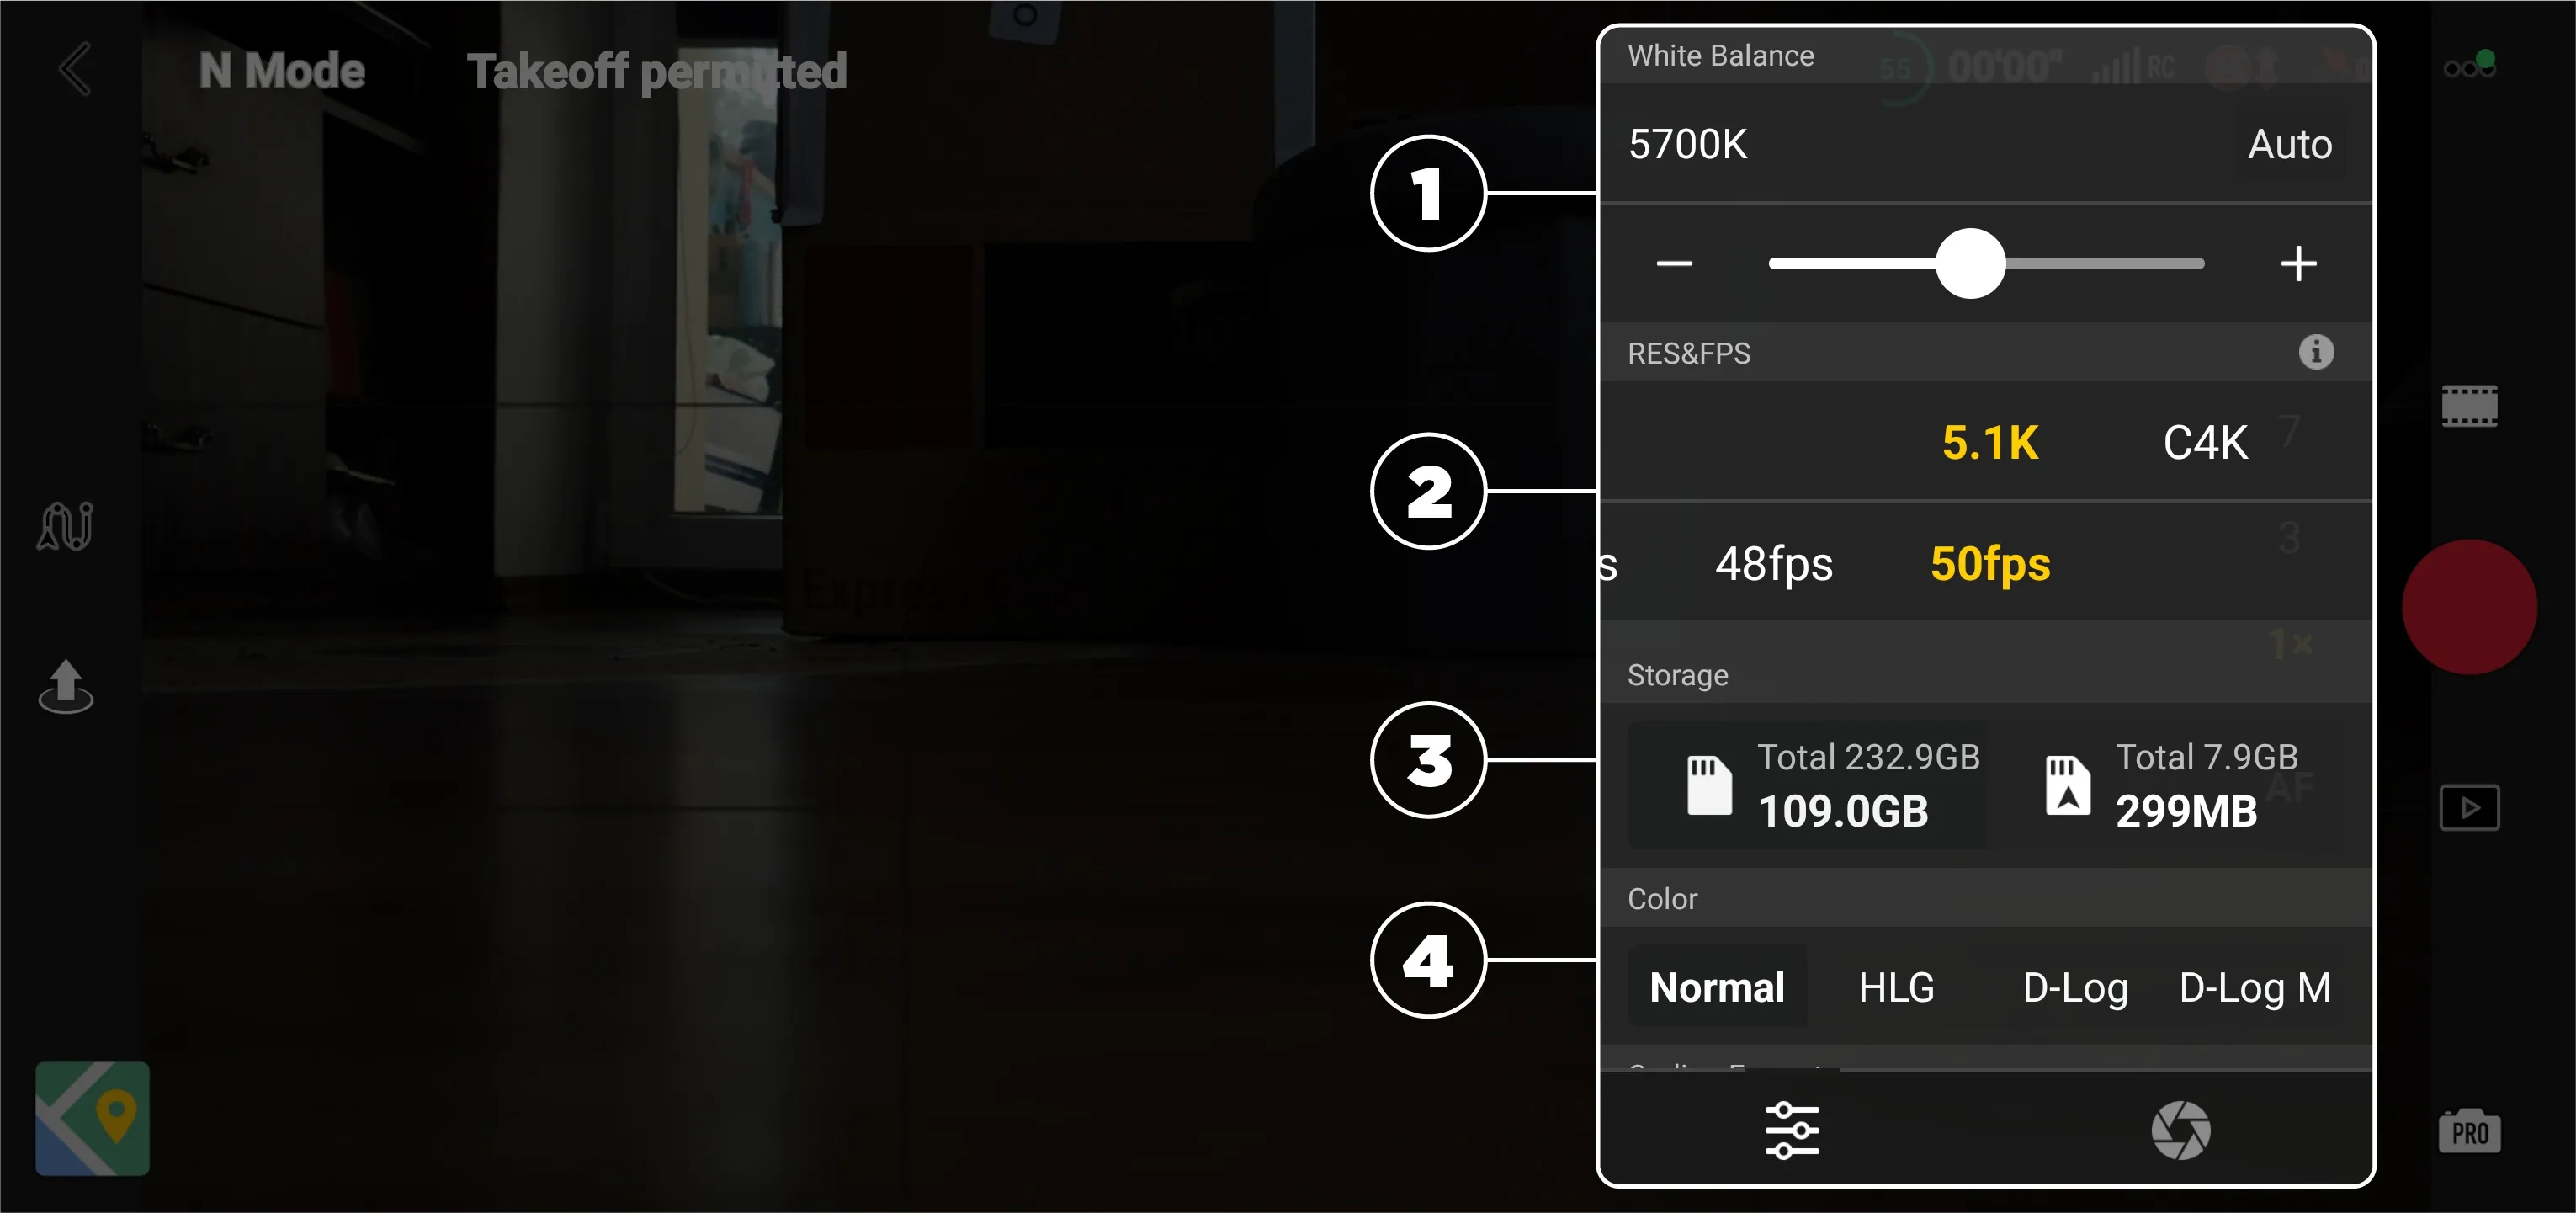 Video Mode Format Tab
- White Balance - choose white balance in Kelvin.
- RES and FPS - resolution and fps sliders for your videos. These can vary a lot according to the selected capture mode.
- Storage - a card or internal memory choice for saving photos.
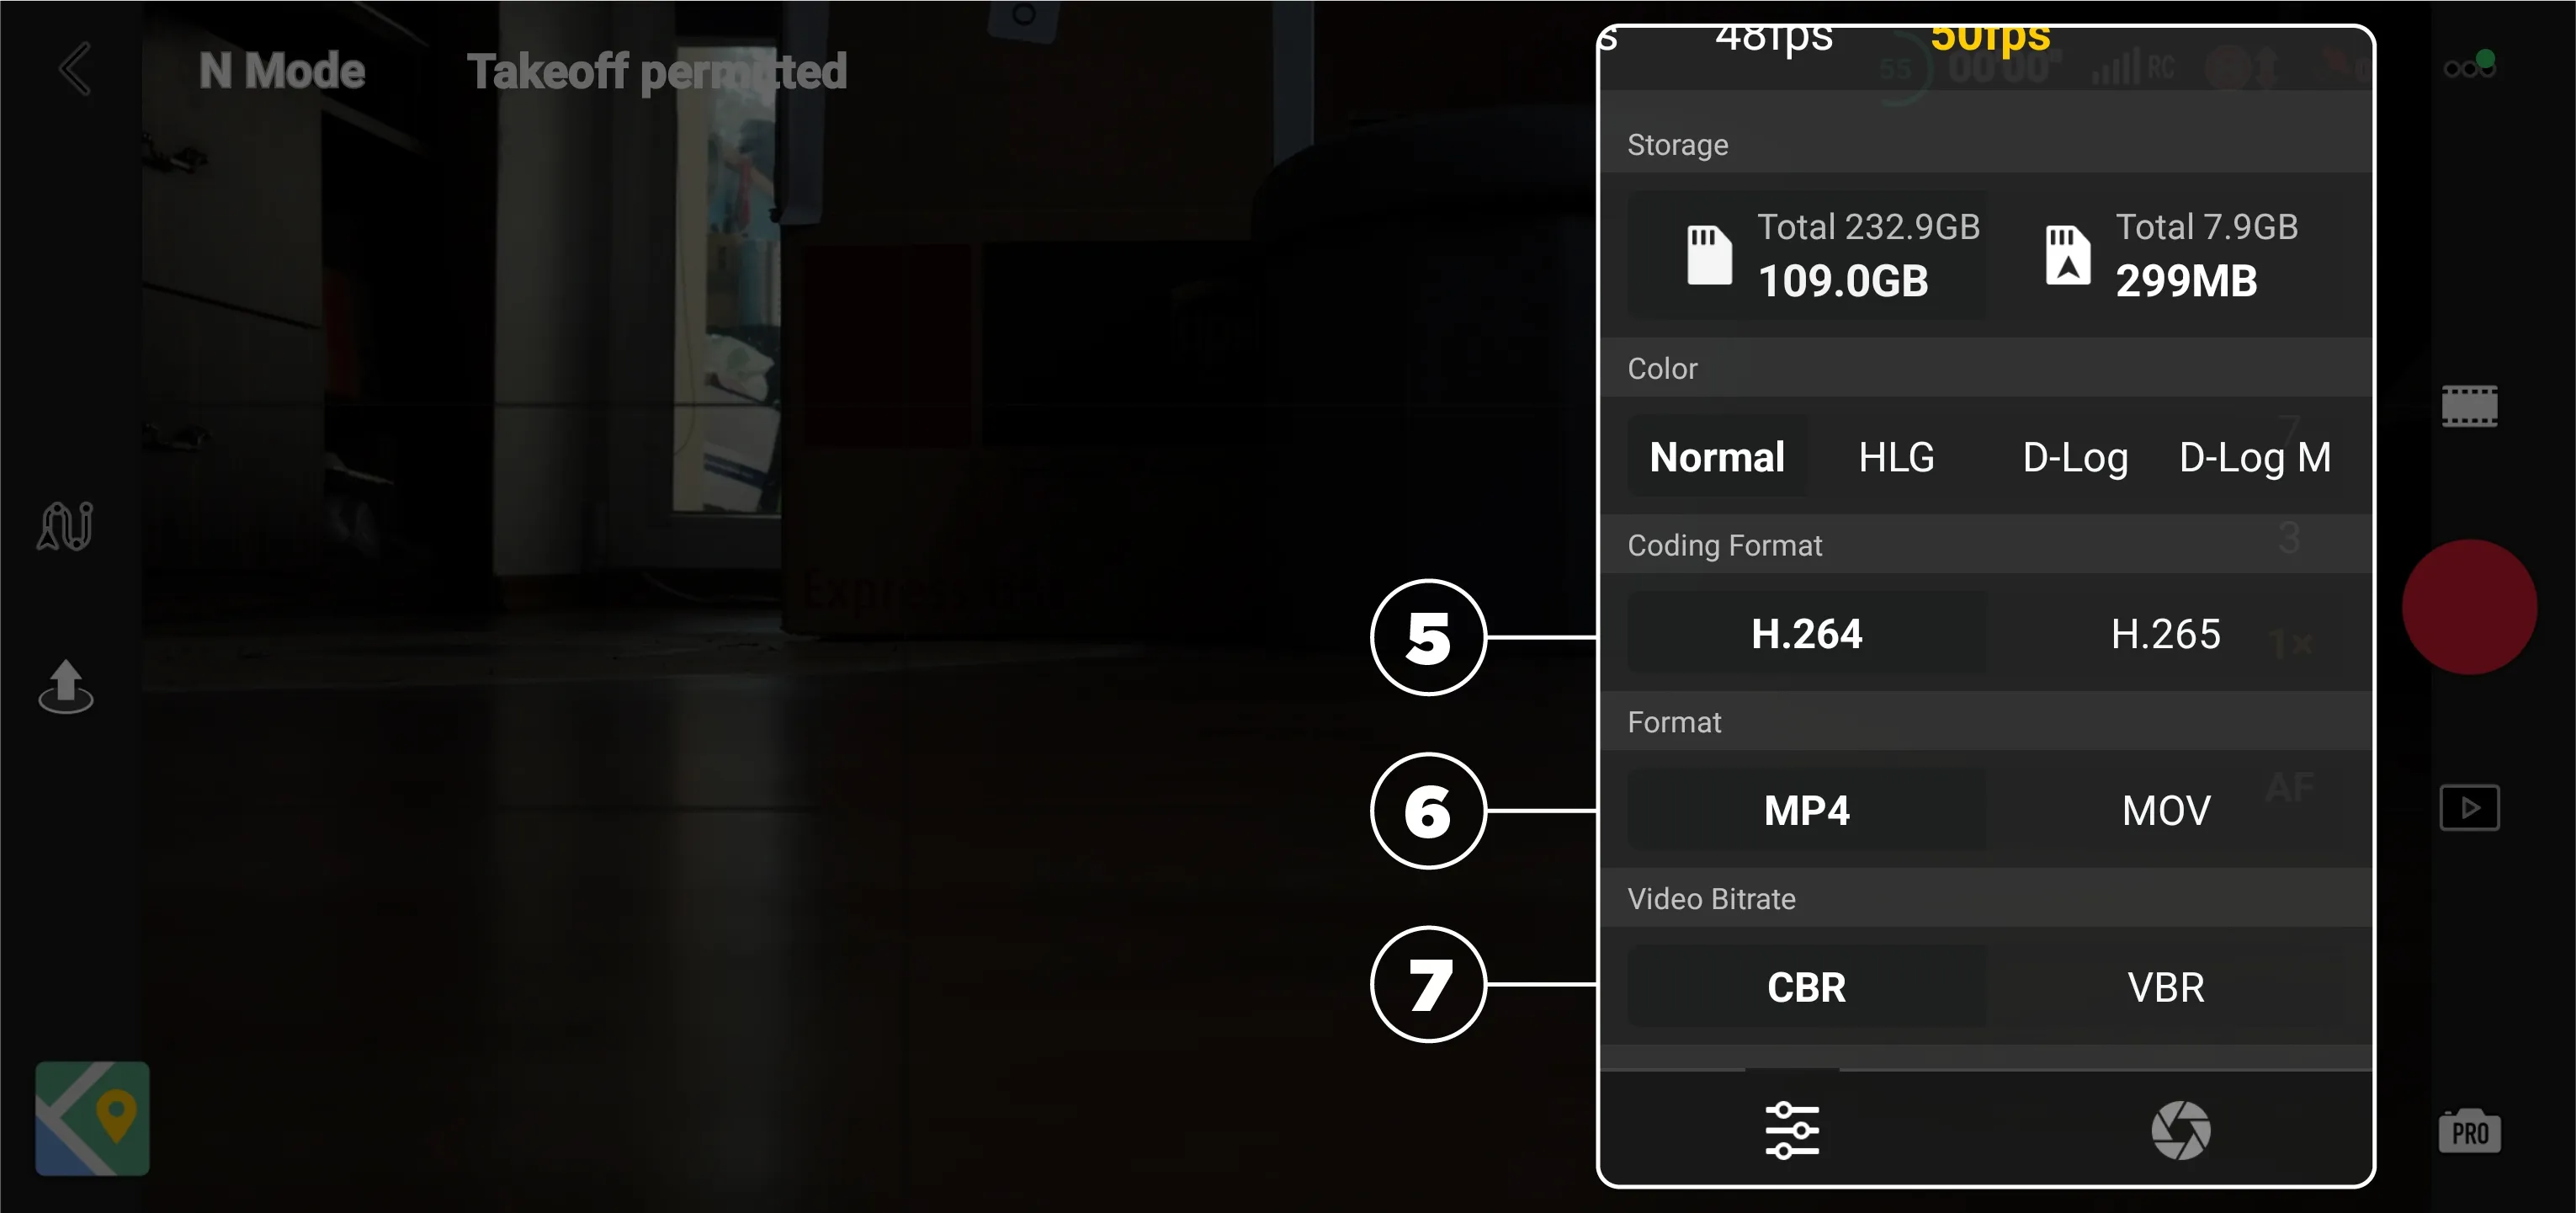
- Color - video color mode selector with various different color gamuts.
- Coding format - video encoding format, usually a choice between h.264 and a more advanced h.265.
- Format - file extension choice between .mp4 and .mov.
- Video Bitrate - CBR - constant bit rate or VBR - variable bit rate selection.
Main Camera View
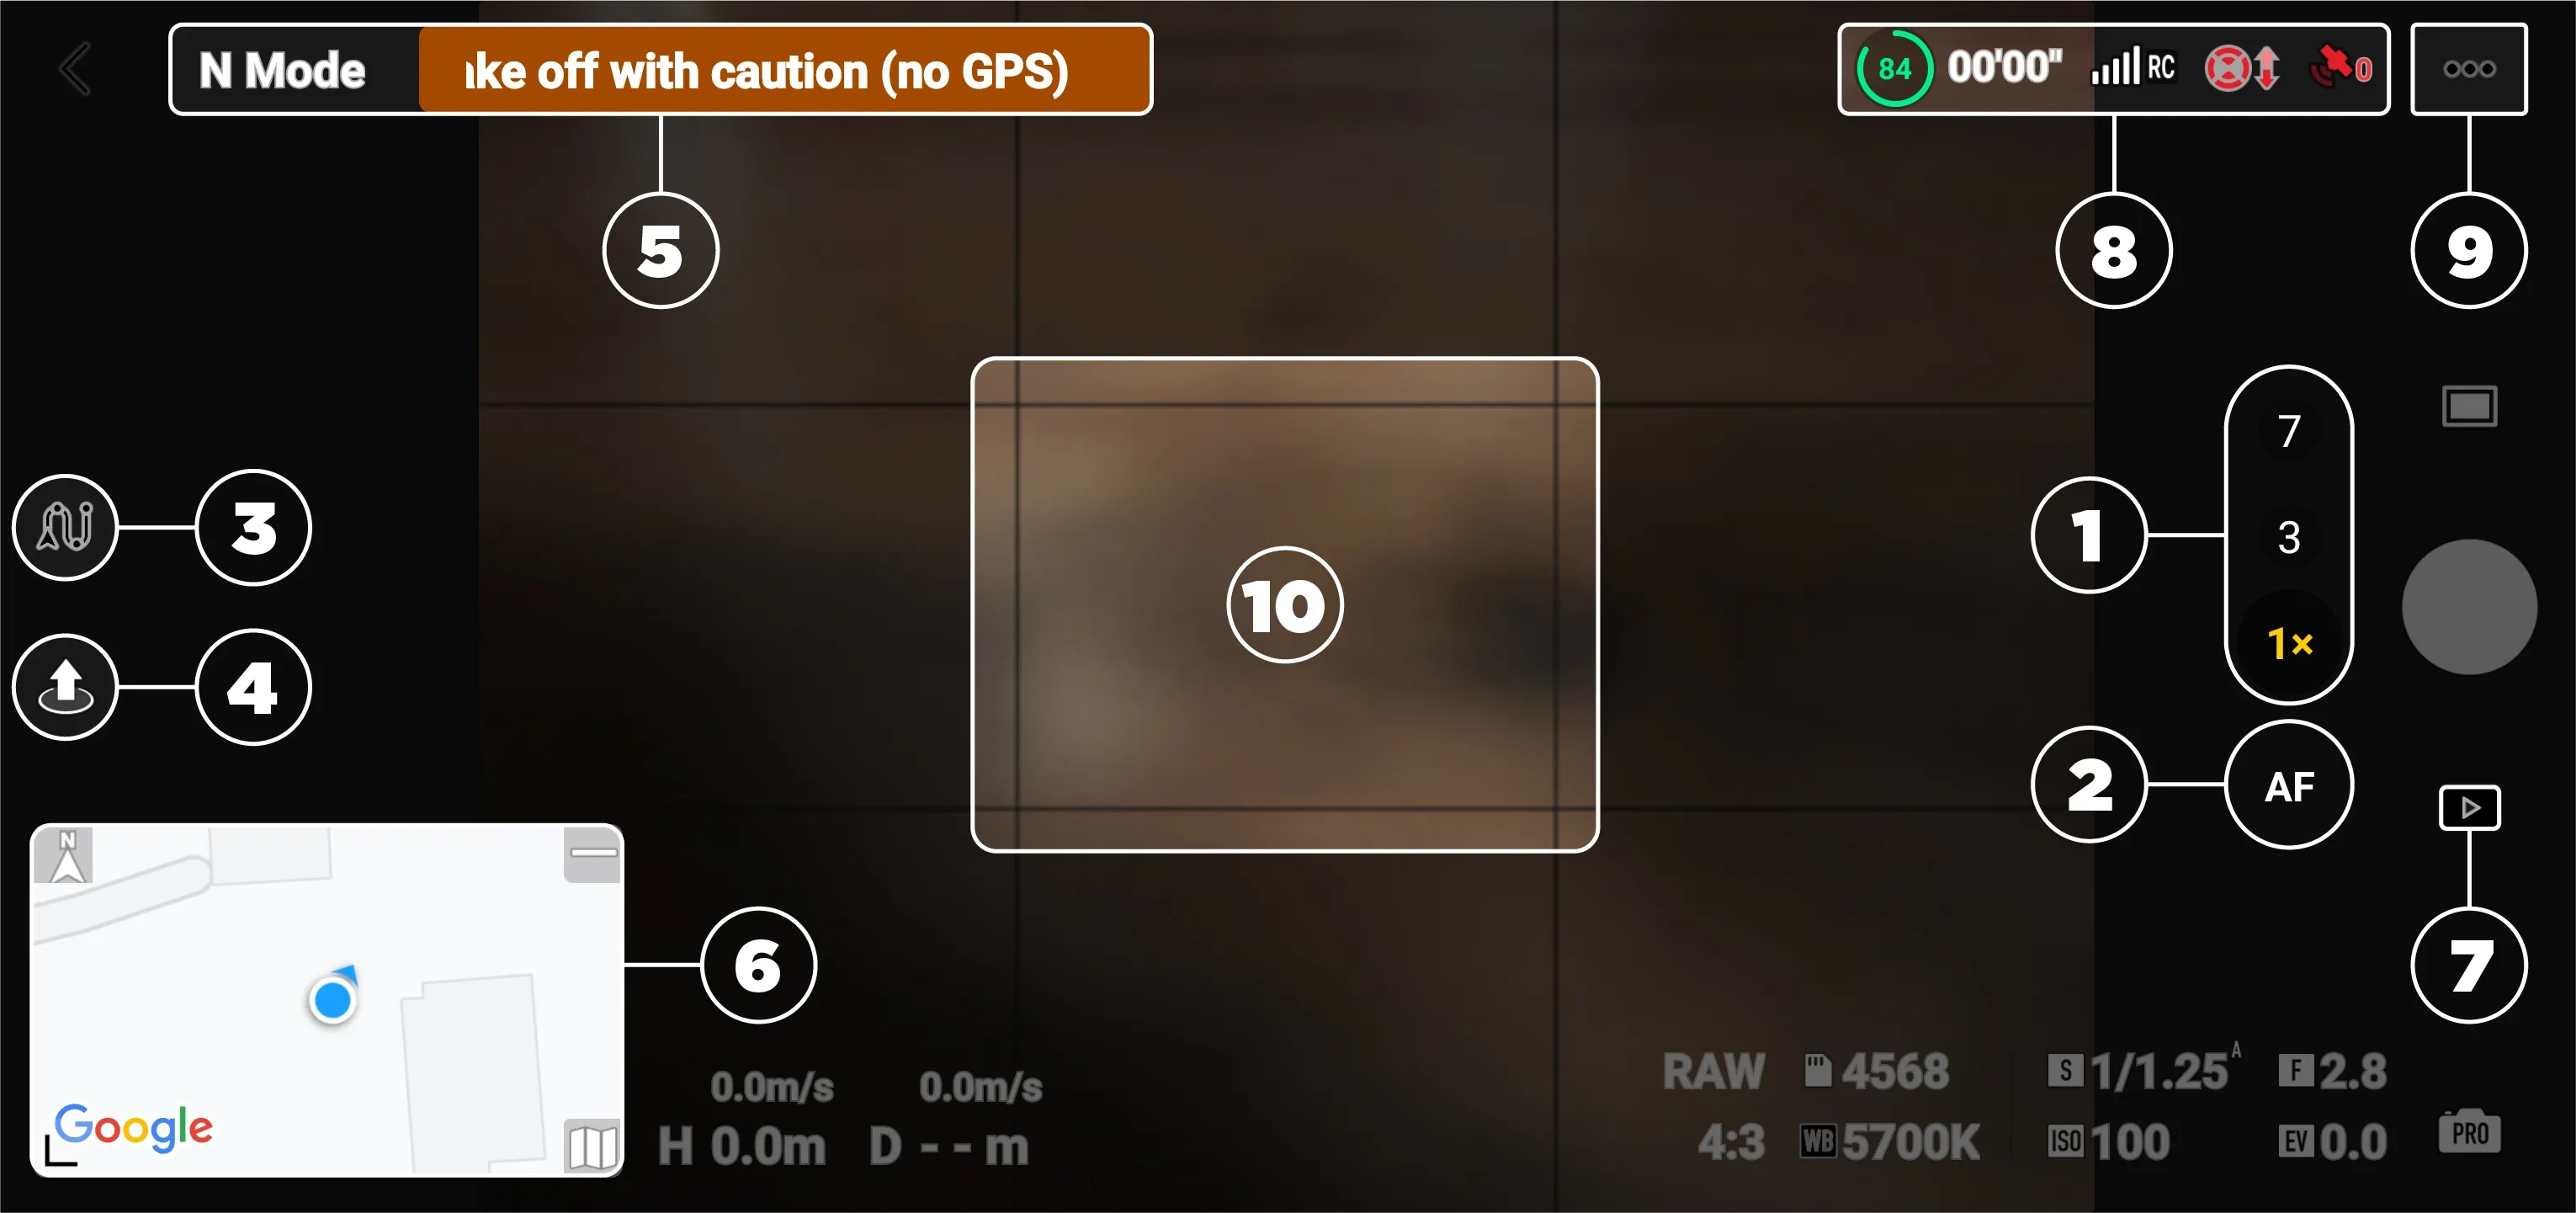
There are a few features and settings you can access from the main camera view screen of the DJI Fly app:
- Camera lens selection: On drones with multiple cameras, you can tap to select which camera to use, while on the Mini 3 and 4, you will find a camera orientation toggle.
- Auto—Manual focus selector: You can tap and drag to switch between auto and manual and focus manually.
- Waypoints - This brings up the waypoints interface. More on that later.
- Takeoff button - starts the drone and takes off to a height of about 1.2 meters.
- Status bar: You can tap on this bar to quickly see the checklist, warning messages, and a couple of essential settings.
- Map, camera, compass toggle—here, you can choose from different information displays; you can choose a map or a compass with drone orientation, or with drones with obstacle avoidance cameras, you can actually see live feeds of those. You can also maximize or minimize the map and this entire module.
- Album - see the thumbnails and low-resolution previews for the content you captured.
- Top status icons—You can tap on any of the four status icons in the top right corner to get more information about battery, RC connection, obstacle avoidance, and GPS signal.
- Drone settings - various other settings, which we will analyze in the following article.
- Tracking selection—Tracking is done by drawing on the camera view with your finger. This will select your subject and bring up three tracking options: ActiveTrack, Spotlight, and POI. Active Track offers automatic flight and tracking. Spotlight keeps your subject in frame while you fly, while POI mode orbits around your subject while keeping it in frame. The small red X cancels the tracking.
![]()
Waypoints Interface
When you activate the waypoints, it brings up a new interface that is dedicated to creating and executing a waypoint flight. There are two methods of marking waypoints and making the drone's path. The first method is to fly to a spot and register a waypoint for the current drone location (by pressing the fn button as the interface suggests), and the other is to tap on the map. The same applies to adding a POI - a point of interest. In waypoints, this means a subject that the camera should face.
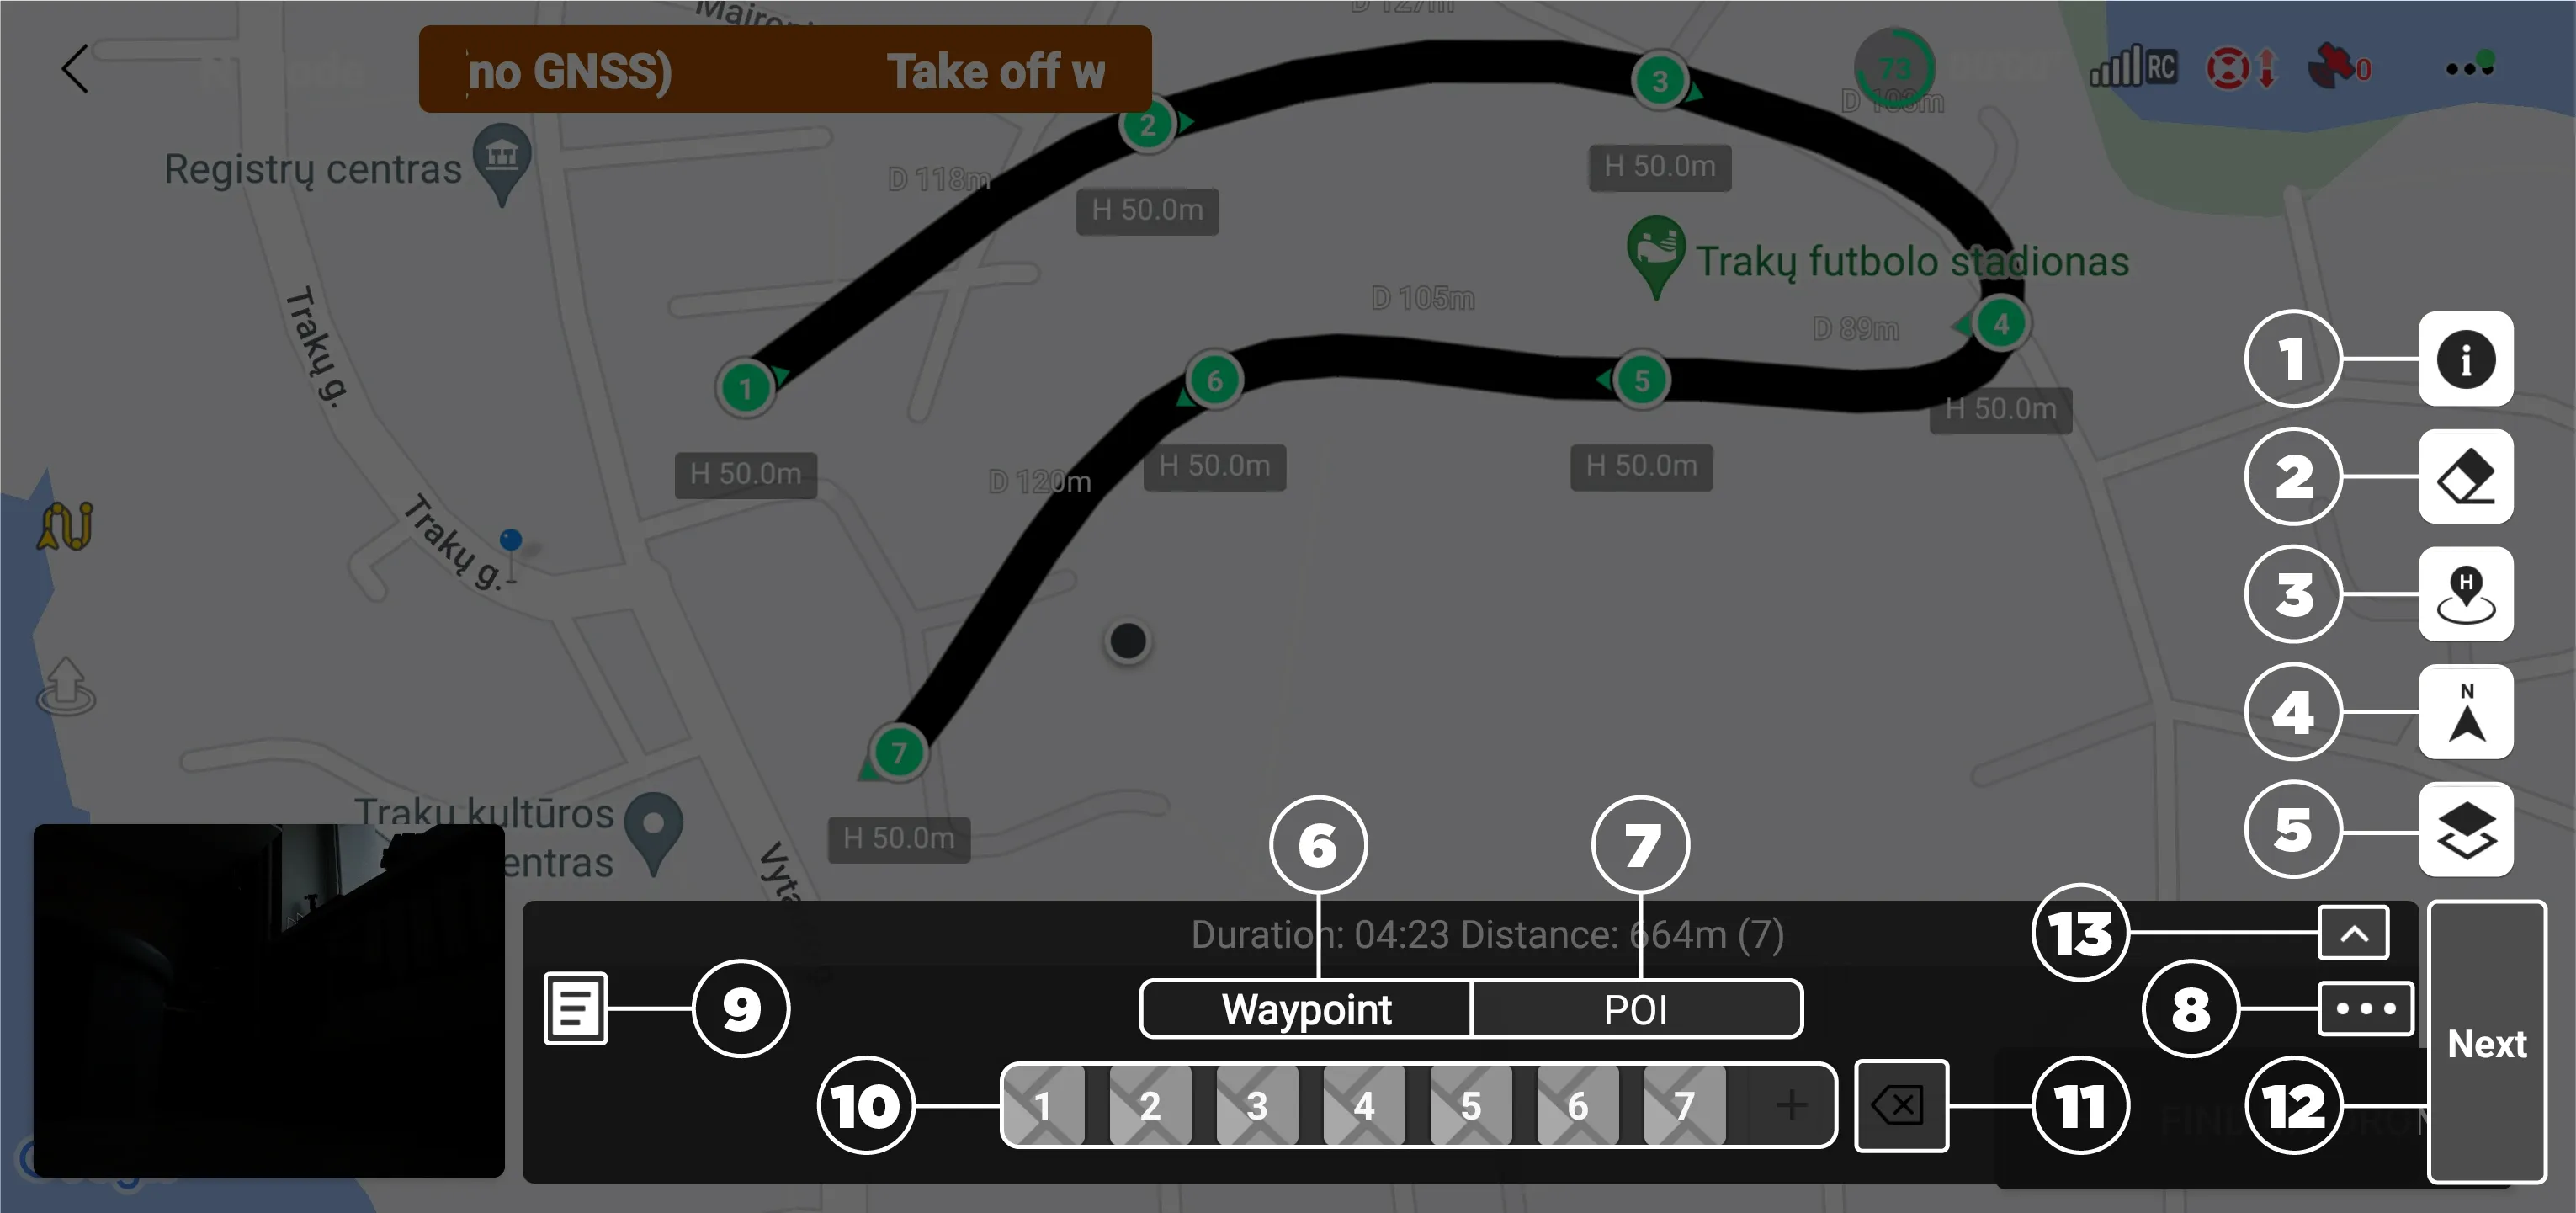
Let us look at the map interface, which is brought up when we tap on the map while waypoints are active:
- Map info icon - flight zone legend.
- The eraser button - does not appear to do anything in this case. Usually, it deletes a little pin you can place by tapping on the map when waypoints are not activated.
- Home button - centers the map around the drone or home point.
- Orientation button - changes the map orientation.
- Layers button - choose which map layers are displayed: standard, satellite, or mixed.
- Waypoint—toggle waypoint adding. If this button is active, tapping on the map will register a new waypoint.
- POI - if this button is active, a tap on the map will register a new POI spot.
- Three dots - global waypoint flight settings.
- Page icon - opens the waypoint archive. Here, you can load previous waypoint plans.
- Waypoint or POI buttons—here, you can tap on a waypoint or a POI spot and adjust its settings. There are quite a few settings per waypoint, but these are self-explanatory.
- Delete arrow - erases the last waypoint or POI spot in the list.
- Next button - Goes to the global settings for waypoints and the launch procedure.
- Little Arrow - minimizes the interface to a thin ribbon.
DJI Fly App Welcome Screen
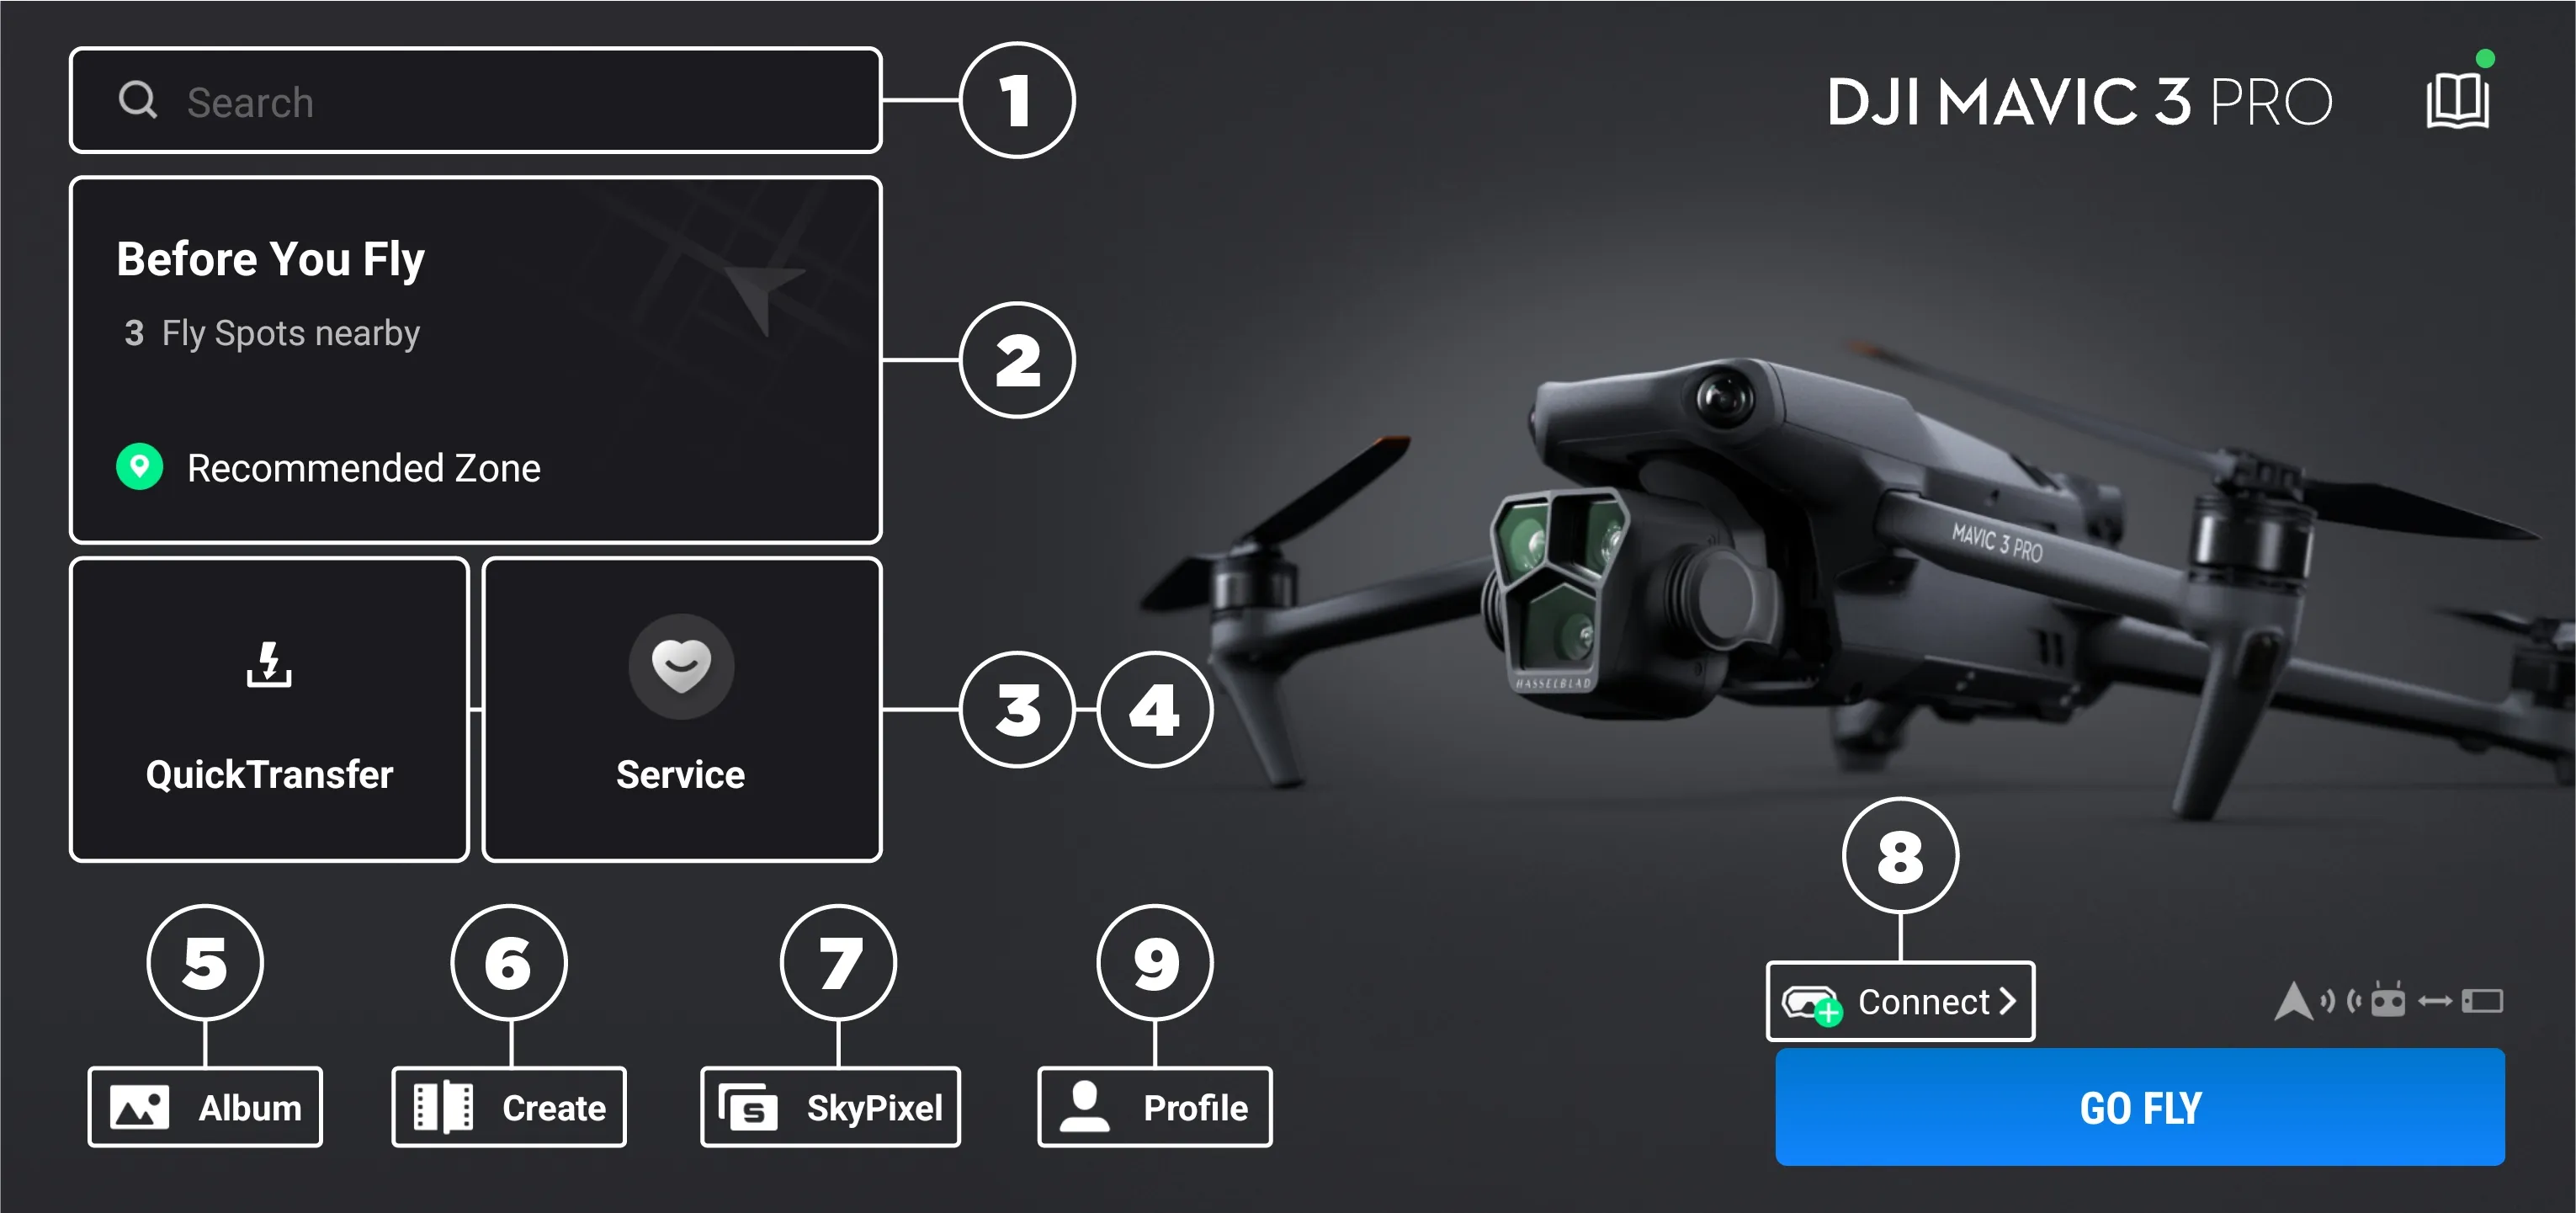
The welcome screens are mostly self-explanatory hyperlinks and a few real menu items:
- Search - a hyperlink to DJI help searches.
- Before You Fly - opens the map with flight zone information.
- Quick Transfer - tells you how to enter quick transfer mode, which transfers media files via wifi to your device.
- Service - opens a DJI service hyperlink.
- Album - see the thumbnails and low-resolution previews for the content you captured.
- Create - opens a simple clip editor.
- Skypixel - goes to the Skypixel site.
- Connect - this button opens a guide on how to connect the DJI Goggles.
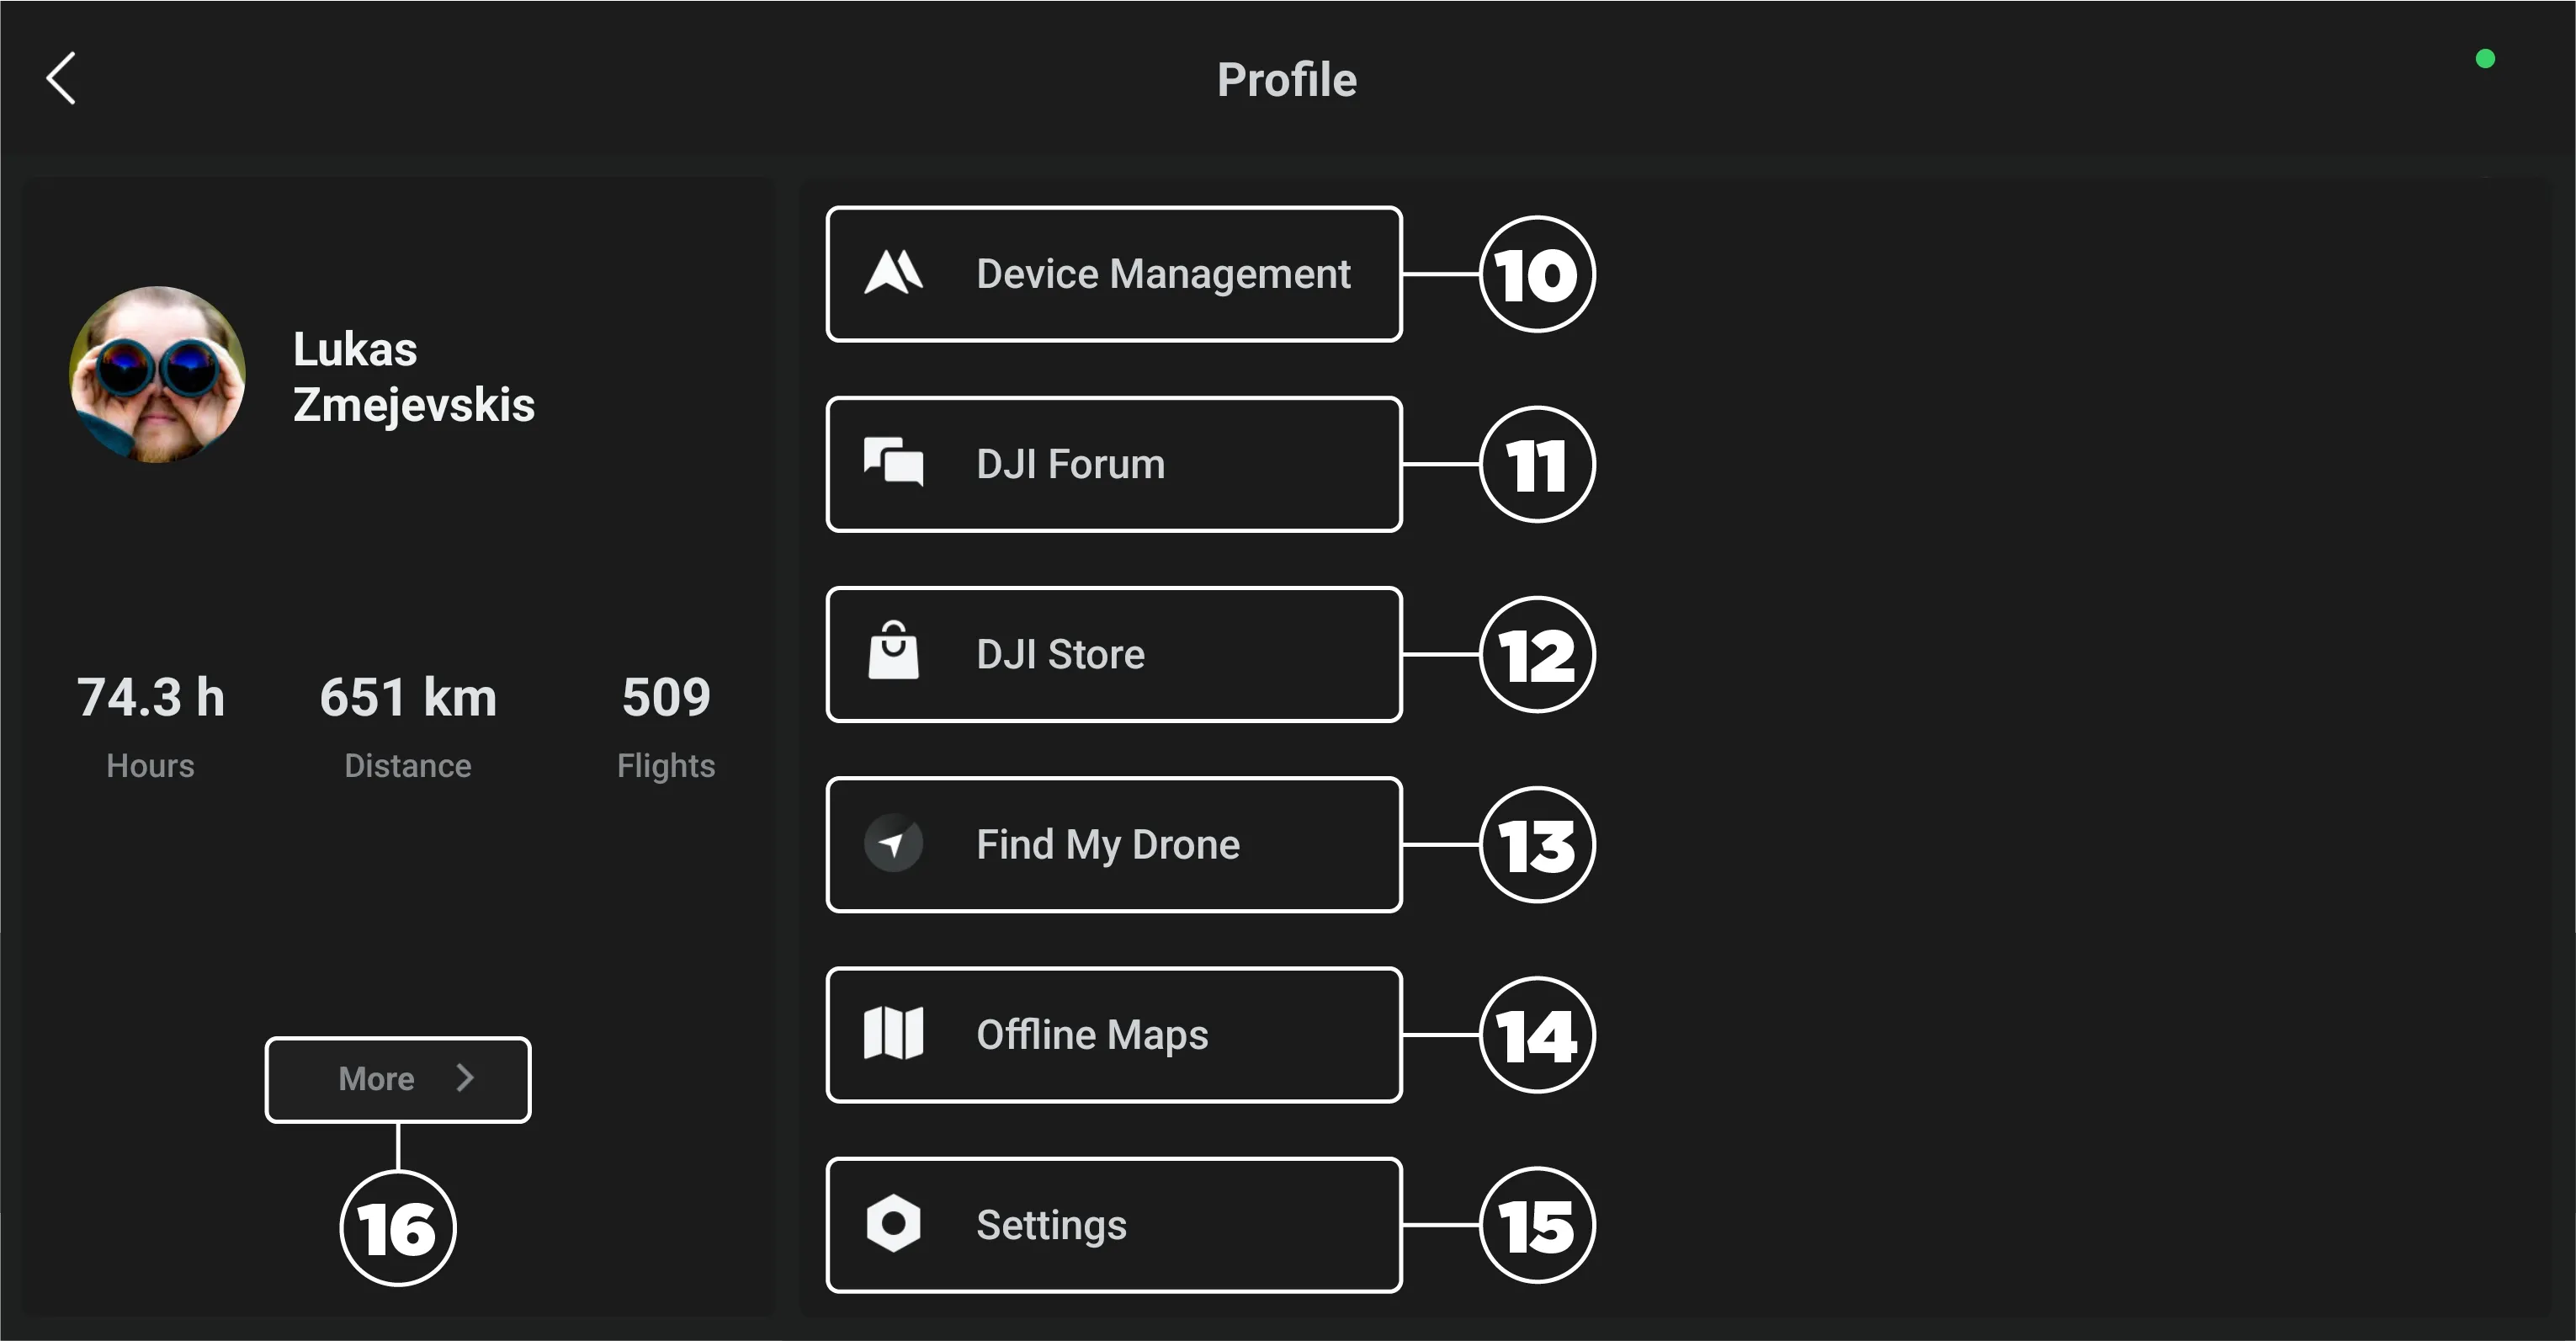
- Profile - profile opens up a menu where you log in and see your profile and devices. There are quite a few additional menu items here:
- Device management shows the devices you own,
- DJI Forum - opens the forum.
- DJI Store - opens the store on the web.
- Find My Drone shows the map where your drone was last seen. If it's still online, you can trigger beeping from here.
- Offline maps - allows pre-downloading areas of the map for offline use.
- Settings open a few more options for updates, data synchronization, cache clearing, a beginner guide, etc. They are mostly self-explanatory. You can also log out from here.
- More - this button opens your flight logs.
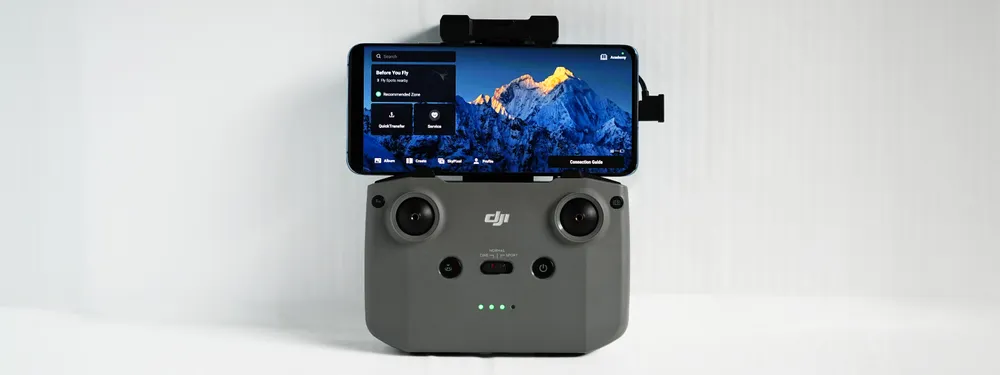
DJI RC2 and DJI RC
DJI RC and RC2 run stripped-down versions solely for the DJI Fly app, so everything we described above applies here, too. However, people often forget that these controllers have a couple of additional features. As with any Android phone, you can swipe down to access system settings and notifications. Here you will find:
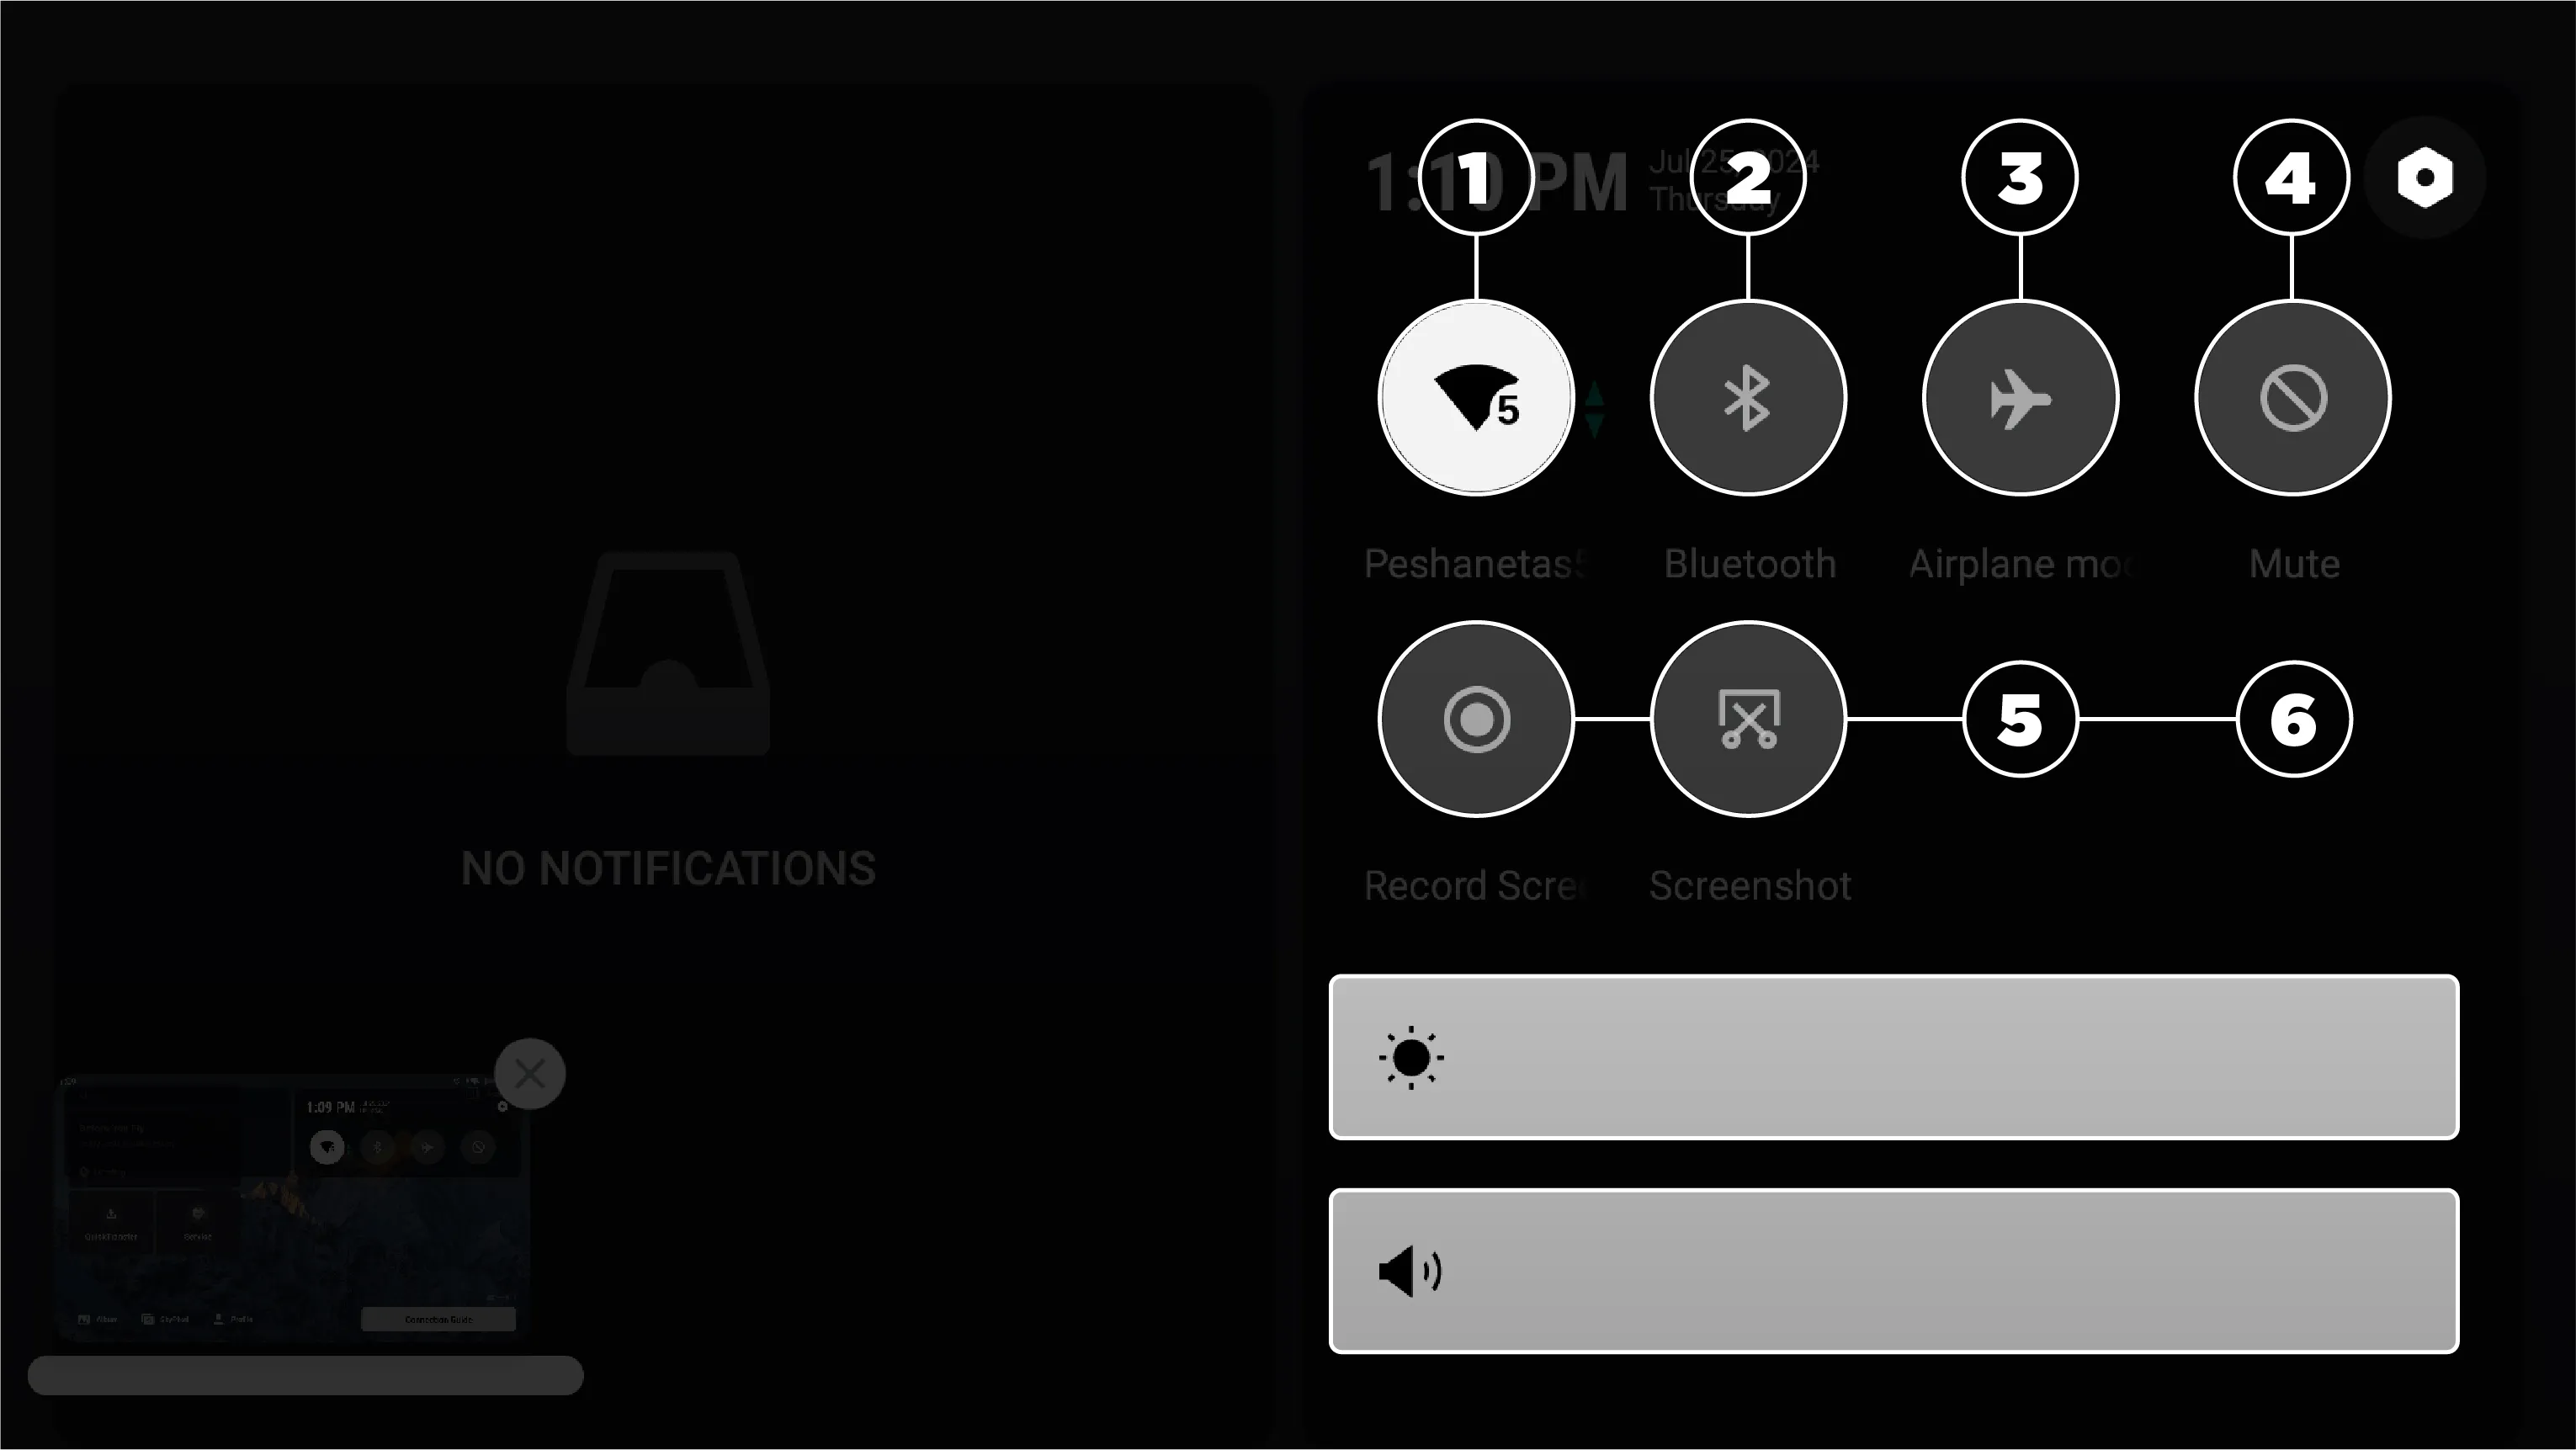
- Wifi Setting - to connect your remote to the internet.
- Bluetooth - to connect a Bluetooth device to your RC.
- Airplane mode - disables external connections.
- Mute - mutes all sounds.
- Record Screen - captures a screen recording of the remote. A video file will be stored internally afterward.
- Screenshot - takes a screenshot after a short delay.
Below these buttons are a screen brightness slider and a volume slider. On the top right corner is a tiny gear icon where you can find a few more system settings and information. Once you tap it, you will find the following:
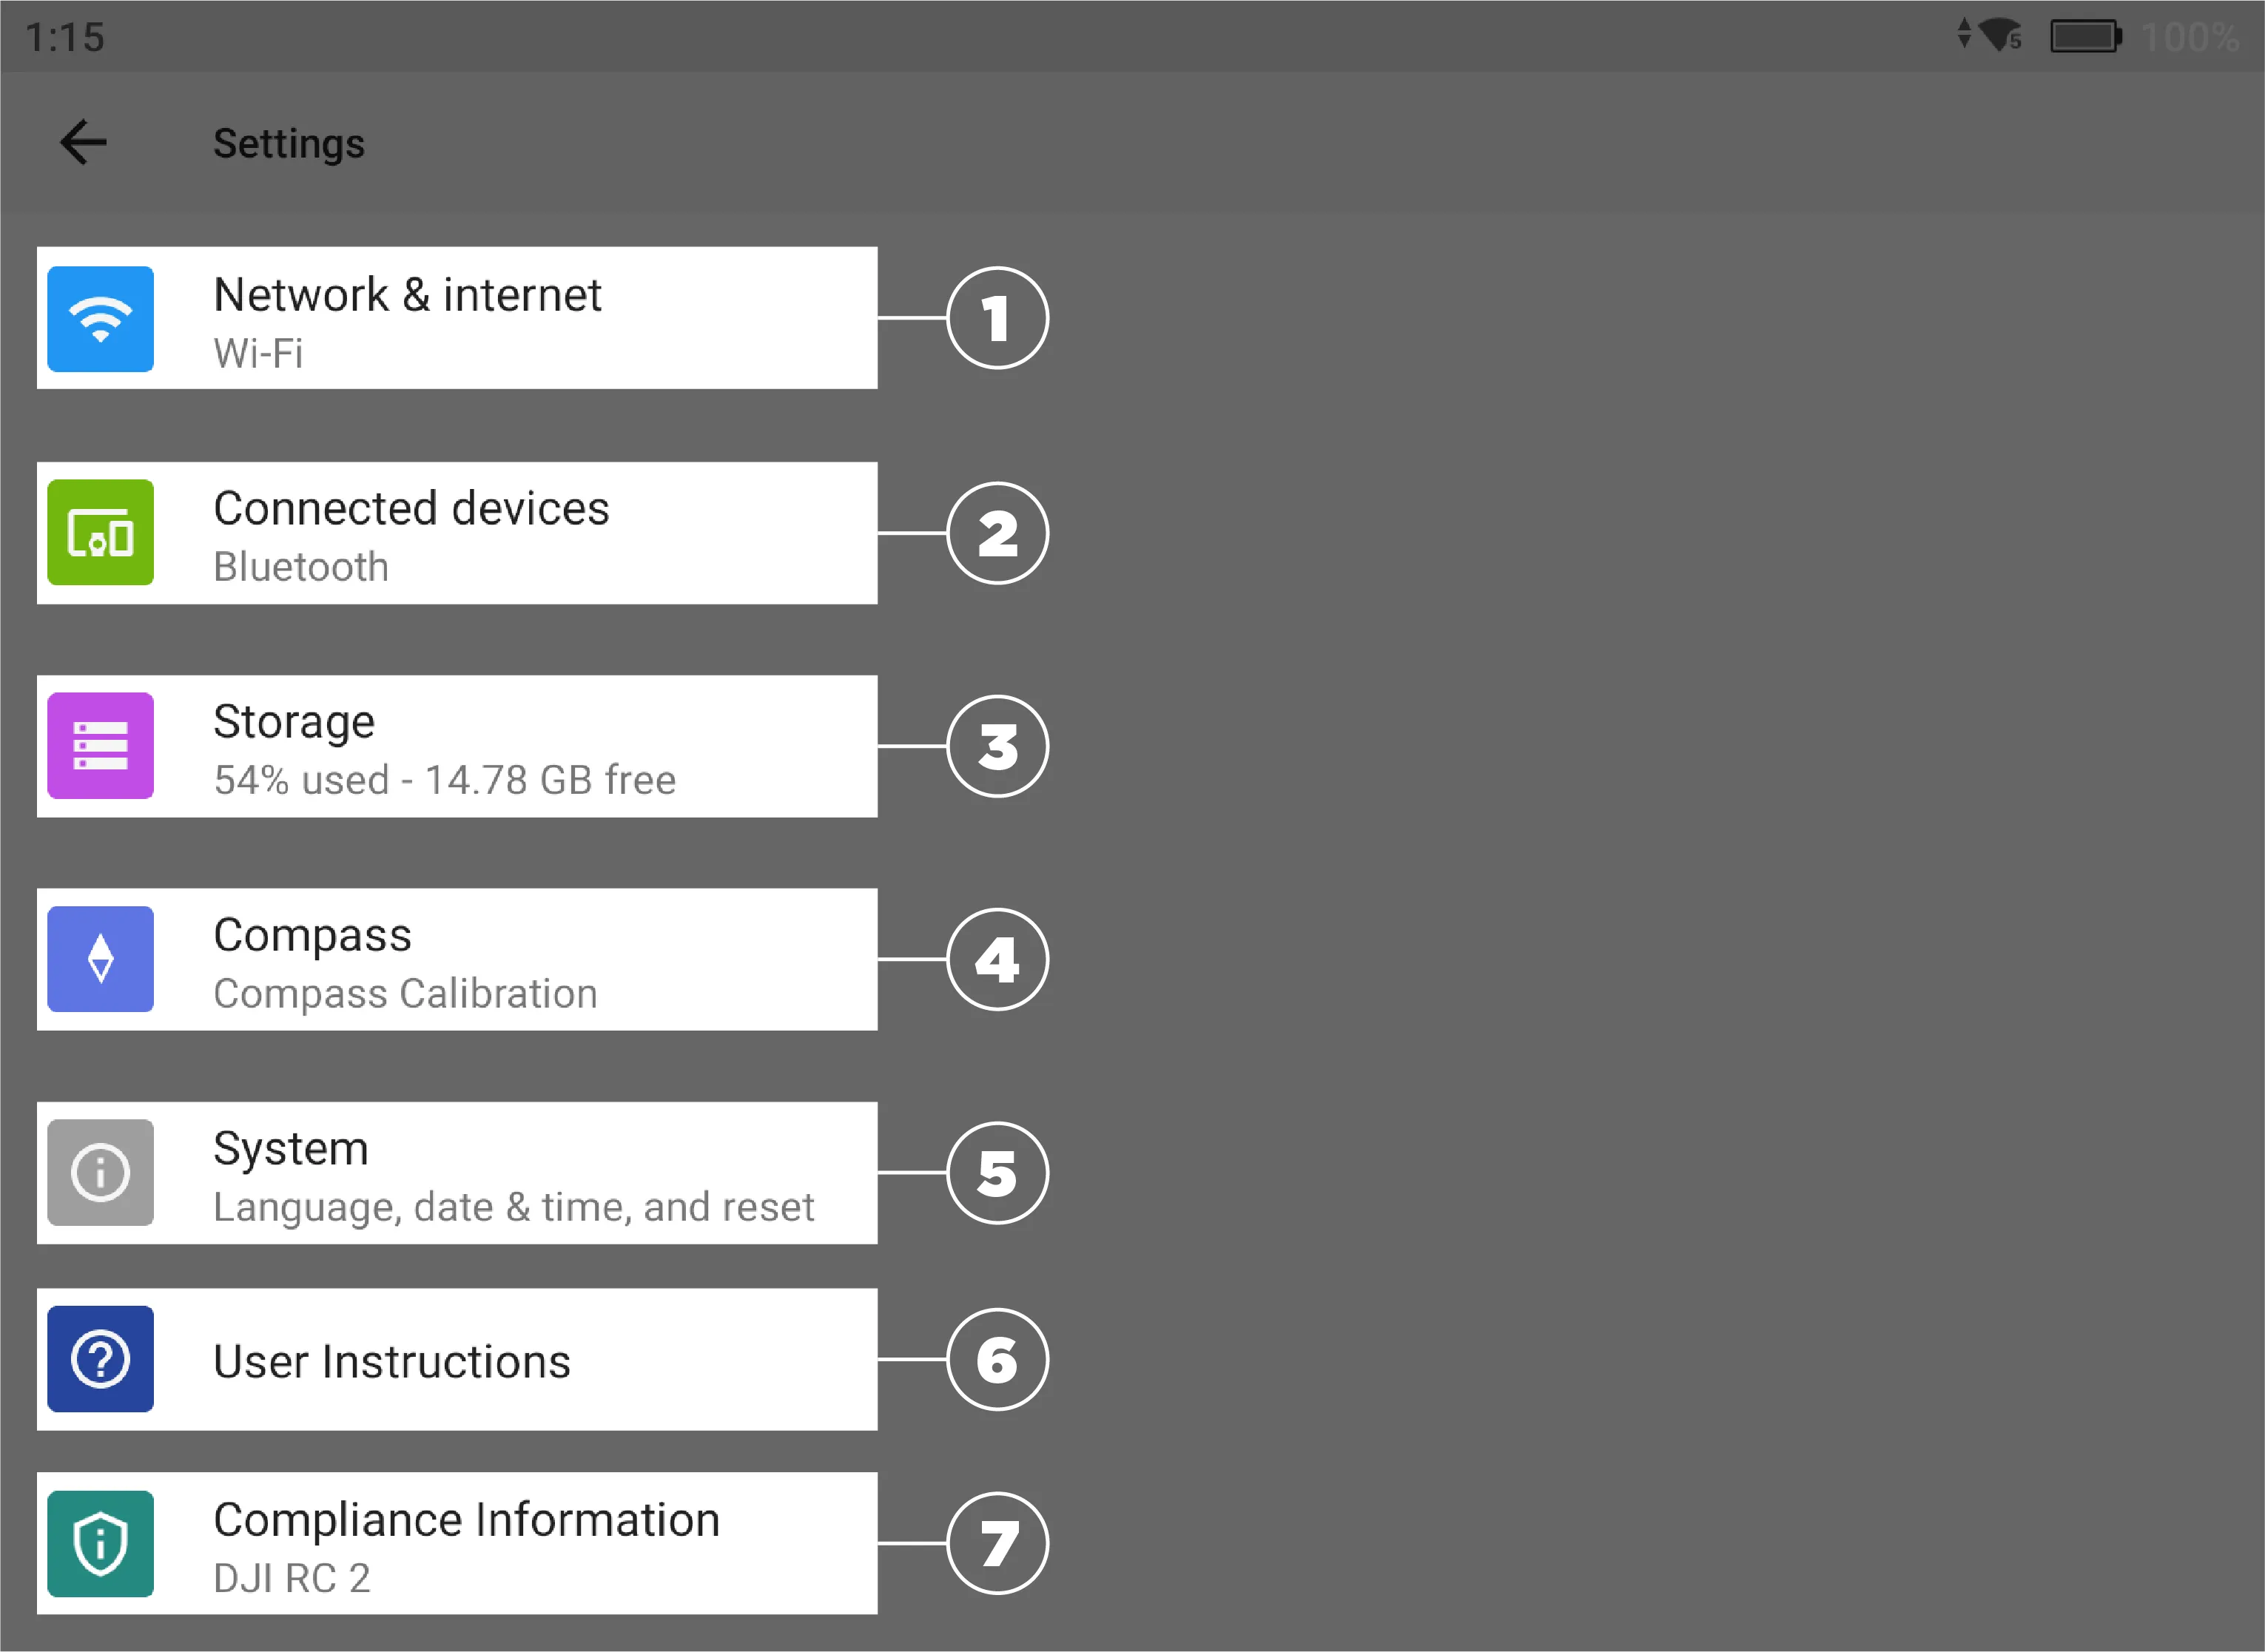
- Network and internet - same Wifi settings.
- Connected device - same Bluetooth settings.
- Storage - some information about the device's storage, including internal and SD cards, if there is one.
- Compass - Compass calibration interface.
- System - language, date, time, and total reset.
- User instructions - a small tutorial to familiarize yourself with the RC interface.
- Compliance information - will display some formal information about the device.
Conclusion
The following article will be part two, where we review all the settings in the drone settings menu, accessible by tapping the three dots in the top right corner. Those menus have too many items to cover in a single article. However, we hope we covered all of the core features from content capture, camera, welcome and main screen interfaces, and waypoints.
Photographer - Drone Pilot - Photogrammetrist. Years of experience in gathering data for photogrammetry projects, client support and consultations, software testing, and working with development and marketing teams. Feel free to contact me via Pixpro Discord or email (l.zmejevskis@pix-pro.com) if you have any questions about our blog.
Related Blog Posts
Our Related Posts
All of our tools and technologies are designed, modified and updated keeping your needs in mind
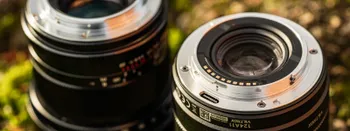
Viltrox 14mm vs. Pergear 14 mm Lens – Choosing for Interior Photogrammetry
Ultrawide-angle lenses are most commonly used in photogrammetry for interior scanning. I am planning to do an interior-type construction site scan, so I need a lens for my Sony full-frame camera. There are plenty of premium wide-angle options, but I need something that provides the best image qualit
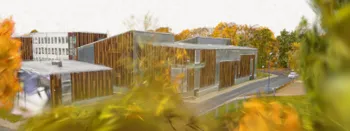
Gaussian Splatting vs. Photogrammetry
Every few years, something new shows up online claiming to “revolutionize” 3D reconstruction. A while back it was NeRFs. Now it is Gaussian splatting — with endless YouTube clips of people walking through photorealistic 3D scenes that seem to render instantly.
Photo Dynamic Range - Real Life Tests and Advice
Dynamic range is an inescapable term when talking about digital photo or video capture. Our human vision has an incredible ability to adapt, allowing us to perceive both very dark and very bright scenes. When a digital imaging sensor or even a chemical negative captures a scene frozen in time, it is
Ready to get started with your project?
You can choose from our three different plans or ask for a custom solution where you can process as many photos as you like!
Free 14-day trial. Cancel any time.