Photogrammetry with a Smartphone and Pixpro
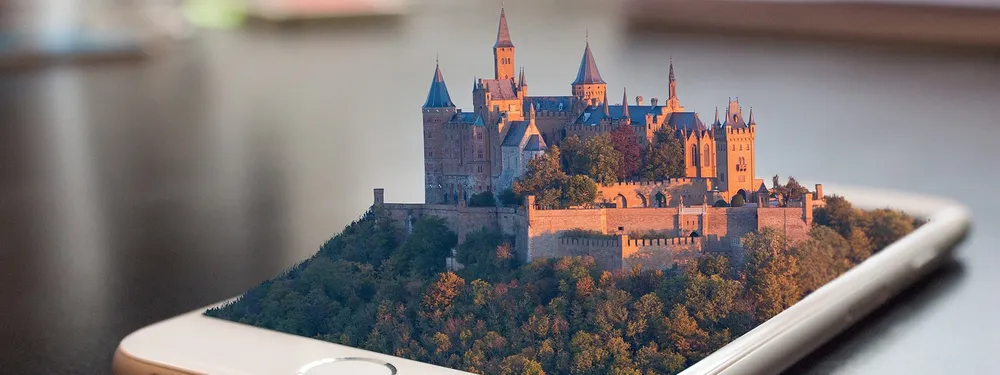
Have you ever wished that you could easily transfer a real object into a digital file? The technology is here, but many people simply don’t have access to high-end 3D modeling skills or services. However, there is another, much cheaper way to create 3D models corresponding to real-world objects using photogrammetry with a smartphone.
With the recent advancements in computer vision, computing devices, aerial capture technology, photogrammetry is becoming more accessible to game developers, photographers, as well as VFX artists. The easiest way to get into 3D scanning is photogrammetry with a smartphone. Here are the only requirements:
- Camera (preferably a good one);
- Photogrammetry software.
You can divide photogrammetry into 2 types of subjects: interior and exterior capture. There isn’t any real difference in how the subjects get processed and created into 3D, but how you take pictures.
Interior photogrammetry workflow
When it comes to capturing the objects, the best tools at your disposal will be:
- A camera that can handle lower lit situations (new smartphones can be decent at handling these situations as well);
- Tripod (if the space is actually really dark and you need longer exposure times);
- Tons of overlapping pictures.
Exterior photogrammetry workflow
Exterior captures can be somewhat easier, because they’re harder to mess up. You have a subject that you can walk (or fly) around and take overlapping photos along that path. The scale of the subjects can vary. You can capture everything from the exterior of a building to something as small as a pine cone. It all depends on what cameras you have access to.
How photogrammetry with a smartphone works?
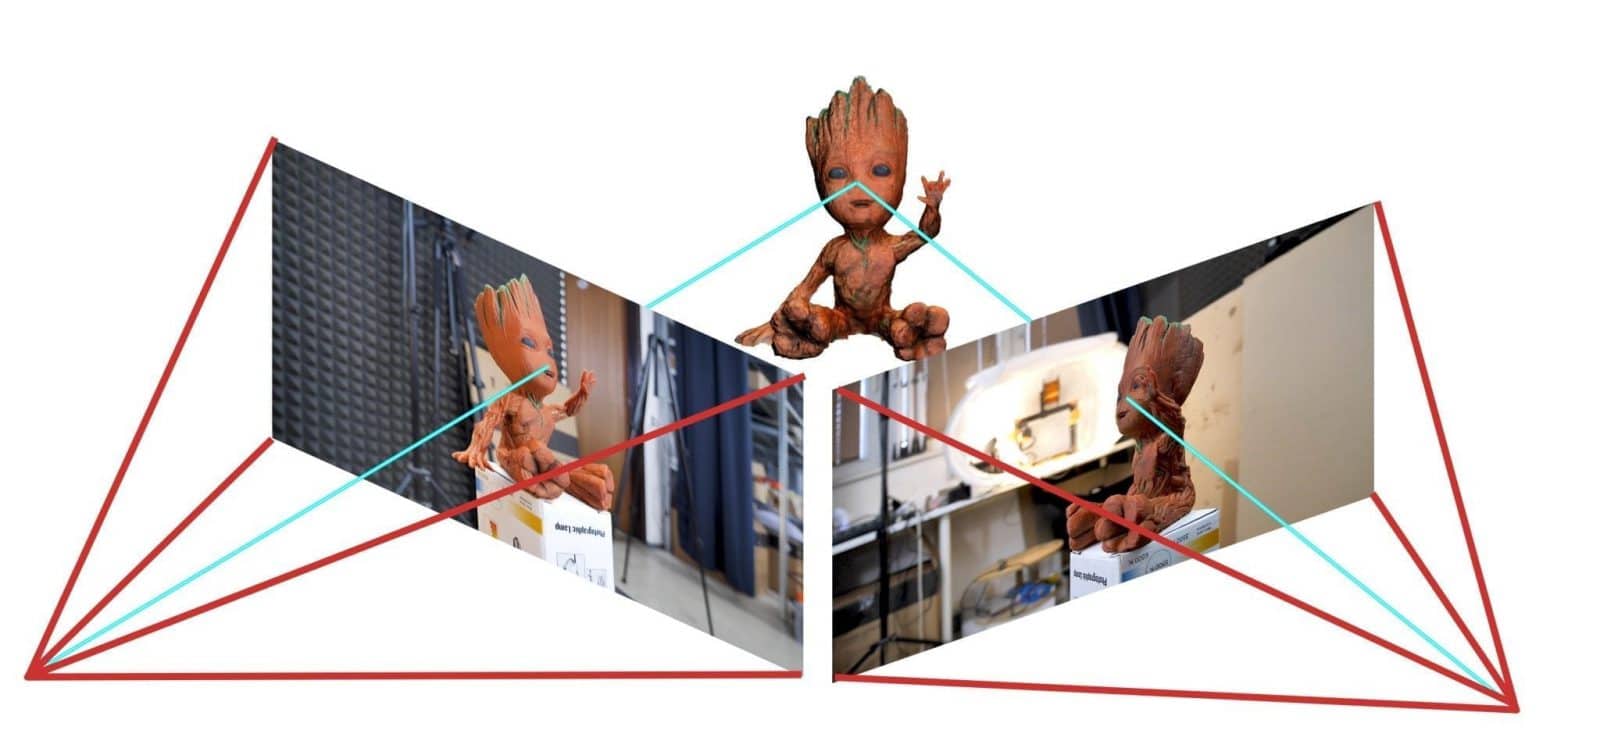
Photogrammetry is a process that estimates the three-dimensional coordinates of surface points using pictures of a single physical object taken from different angles. You take a bunch of pictures of the object from all the possible directions and use these photos as an input for a specialized software. The software will look for features that are visible in multiple pictures and try to identify from which point was the picture taken. Knowing the camera positions and orientations, it creates a 3D point that corresponds to the 2D feature on the photo (basically a few pixels).
Photogrammetry software and processing
Photogrammetry based software is one of the simplest and fastest ways of getting high-quality 3D models. It is often applied to create realistic scales of objects utilizing a series of overlapping or superimposed photographs. 3D modeling technology makes visualization process faster and easier than ever before.
If we have at least 3 photos taken from a different angle, we can already reconstruct the 3D model of the object. However, the more pictures, the more likely the 3D model will be realistic. Let’s talk about taking pictures more.
Taking pictures for a photogrammetric scan
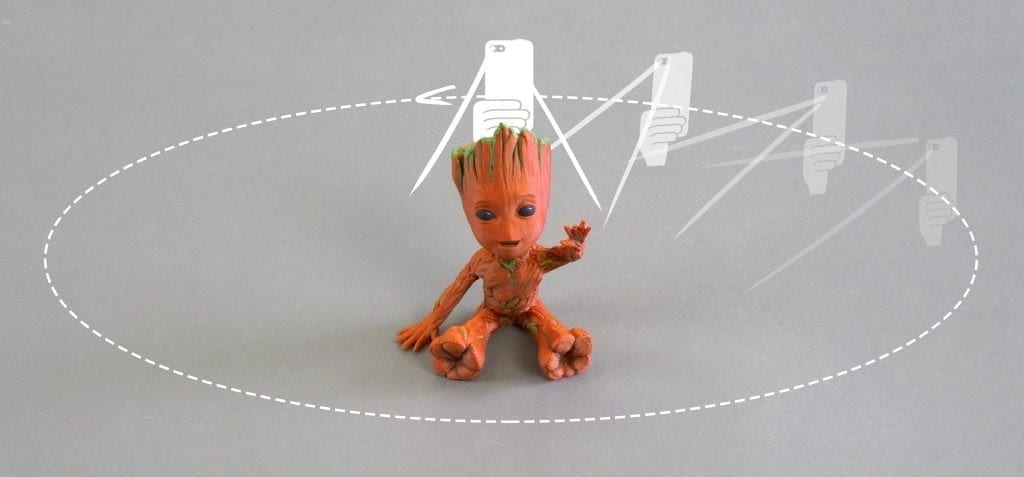
You’ll want to capture with your smartphone at least 20 pictures. During testing 50-80 pictures were shot to capture every detail. Keep in mind, that some pictures might get discarded if the program doesn’t find enough similarities with other pictures. Here are some tips of taking the best photos possible:
- Move around the target object in circles. Do not move the object or its surroundings between pictures.
- Overlap! You want to have each part of the model captured by at least 5 pictures. Ideally, you’d have about 60-80% overlap in succeeding pictures.
- Avoid hard shadows, use diffuse lighting or take the pictures outside on a semi-cloudy day.
- The object should make a significant portion of each image.
- Avoid moving targets (e.g. pets, unless they are sleeping).
- Avoid very glossy or transparent targets. Ideal targets for photogrammetry are textured or rough items (statues). If it’s an option, you can cover glossy or transparent objects with powder (flour) to avoid reflections. Or cover the glossy surface with a painters tape. Advanced users can also capture a video of the target and then convert it into individual frames. In this case, keep the shutter speed high (e.g. 1/80) to avoid blurry frames.
Just like any other 3D modeling technique, the final look using the smartphone could be not perfect – it needs specific features and a higher quality camera to make the object look more realistic. Therefore, some areas might be missing details, flat surfaces may not turn out completely flat, we can not always avoid the shadowing or the darkness.
The easiest way to get into photogrammetry – smartphone photography
Photogrammetry based software can outperform 3D scanners. You can recreate huge objects that would be nearly impossible to capture with traditional 3D scanning tools. It’s extremely affordable and chances are that you already have everything you need for photogrammetry – a camera (smartphone) and somewhat powerful PC.
Related Blog Posts
Our Related Posts
All of our tools and technologies are designed, modified and updated keeping your needs in mind
Sony A7 V Real-World Review: The Best Hybrid Sony Camera
The Sony A7 V is the most important full frame mirrorless camera in the Sony lineup, and one of the most important cameras overall in the industry.
The Cake is 3D – Food Photogrammetry Guide
Scanning foodstuffs can be fun and sometimes even useful. 3D asset creation for VFX, VR, and gaming industries is the most obvious use case, while showing off your homemade cake to your friends and family in 3D is more of a niche proposal.
Travel Photogrammetry - More Fun than 2D Photos
Sometimes a 2D photo does not do justice to a moment or a place, and you wish you had something more… dimensional. Something that captures shape, texture, and the little details that flat images tend to flatten even more.
Ready to get started with your project?
You can choose from our three different plans or ask for a custom solution where you can process as many photos as you like!
Free 14-day trial. Cancel any time.
.svg@webp)