.svg@webp)
RTK Drone Photos for Ground Control Points
 Lukas
Zmejevskis
Lukas
Zmejevskis
Real-time Kinematic—RTK—is a GPS positioning system that allows for much greater accuracy than any regular GPS device. Consumer-grade GPS is quite sufficient for daily tasks such as navigation, tracking, and photo tagging, but when it comes to surveying, we need more accuracy. RTK drones provide that accuracy to the photo metadata, while we use RTK rovers for collecting GCP marker data. But the two devices are conceptually the same.
RTK Drone as Rover
Why not use an RTK drone as a GCP rover? We can. From our experience, we see that any data collected on the scene will enhance the accuracy of a project or at least provide a frame of reference for validation. We tried that in the past and got great results, so we decided to implement a way to do that in our Pixpro photogrammetry software.
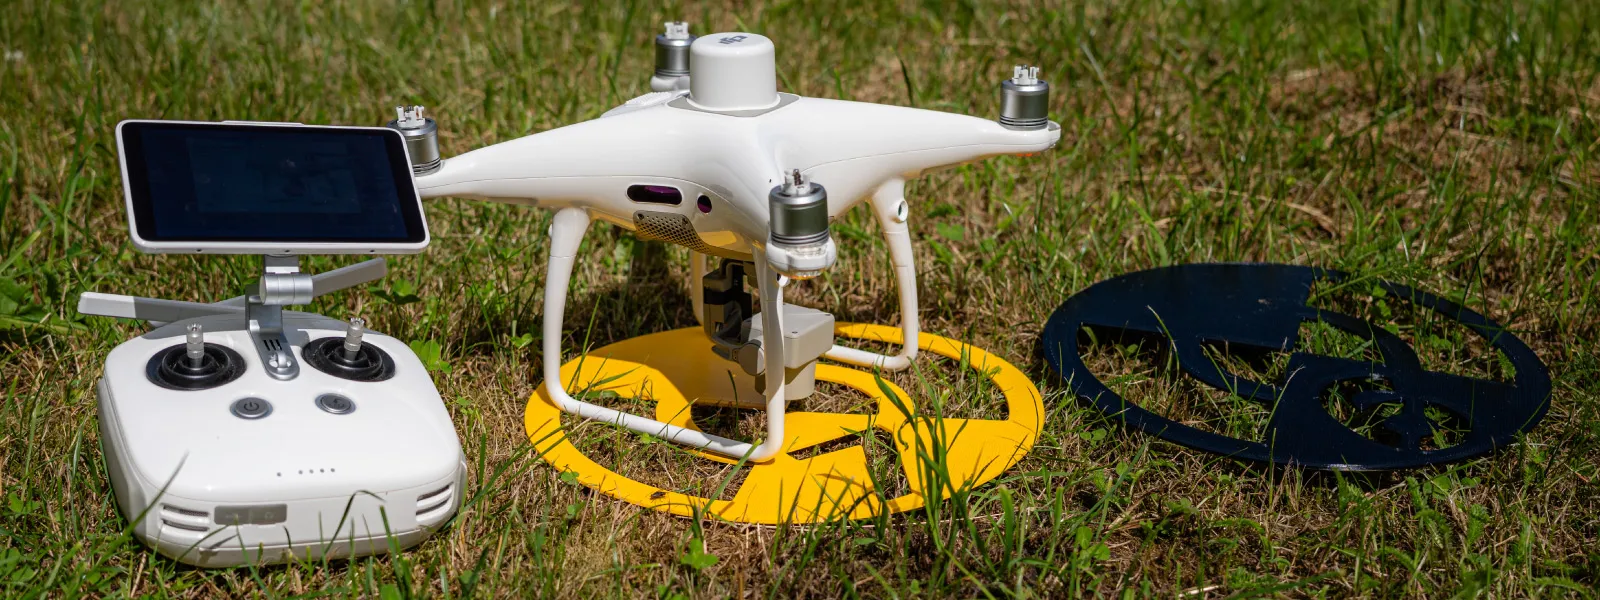
First, let's see what we need to do on the field and then how the workflow in Pixpro looks. Of course, you need an RTK drone to do this. Any DJI, Autel, or other enterprise drone with the RTK antenna will offer you data you can use. For our testing and examples, we are using the venerable DJI Phantom RTK drone along with the Litpos Lithuanian position correction system, which provides high-accuracy GPS.
You can also use the RTK drone as a GCP rover only while another non-RTK drone is doing the scan. With these phantom RTKs getting older, this will be a great use case if the drone's batteries become old and unsuitable for flight, as just operating the drone as a rover and carrying it around barely consumes any energy. The same would apply to drones with broken gimbals, motors, cameras, or other defects that would break the drone's flying functionality.
Workflow in the Field
Field workflow is not different from using classic GCP acquisition. Mark your GCP locations, measure them, and execute the scan. Only in this case are we using the same device for GCP measurement and area capture. To measure a GCP using your drone, follow a few steps:
-
Ensure that the RTK connection is stable and reliable even on the ground. Sometimes, the drone may take a while to connect to the services. You can try raising it above your head, which can make a difference in some cases.
-
Place your drone on the marked or marked spot, with the camera pointing directly down and right above the center of the marker.
-
Take at least three photos while the drone is on the spot. We recommend taking five photos, as multiple photos may provide a better result later.
After the GCP data collection is complete in this manner, you can do the scan (if it hasn't already been done), and the usual data collection process is complete.
Pixpro Photogrammetry Workflow
Our development team made the workflow as easy and seamless as possible. You will not find a better way of getting GCP data from photos right into your project or even for export purposes. With the data collected in the previously described manner, we only need to press a single button to create the GCPs in a Pixpro project and then follow the standard GCP referencing procedure.
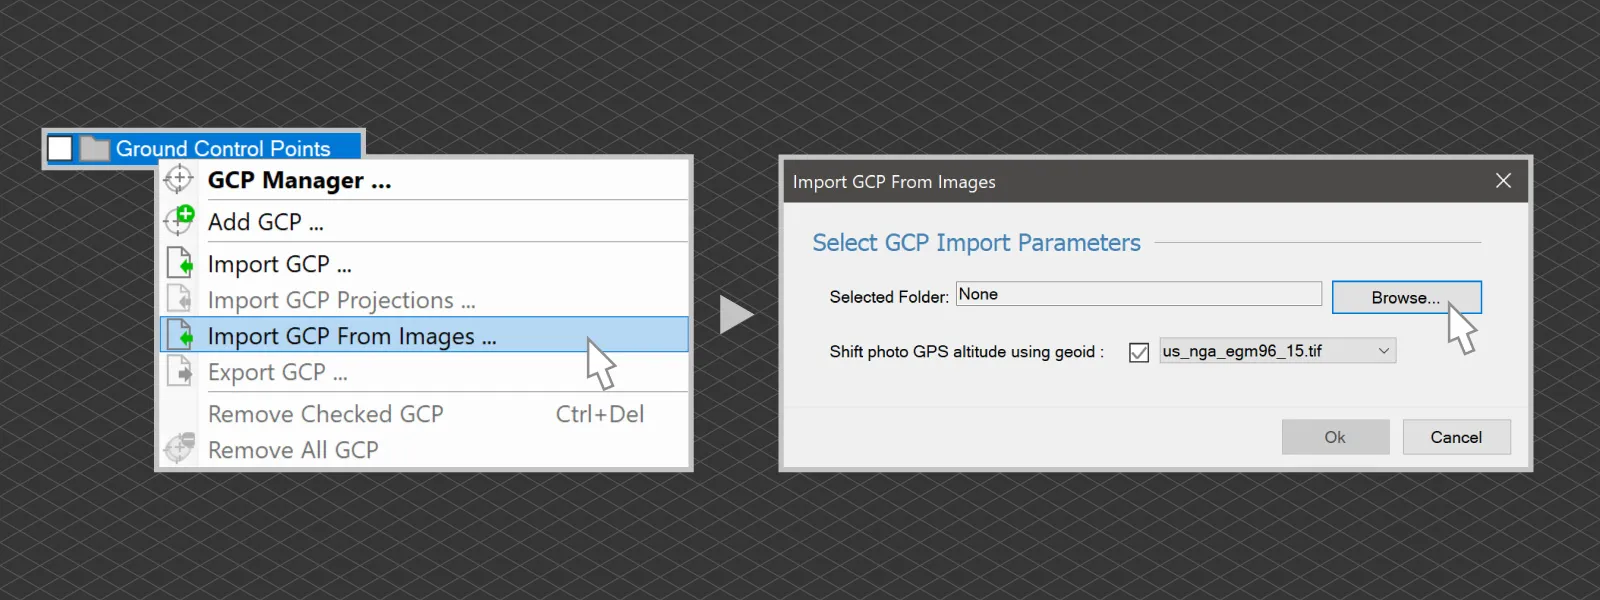
First, only the 3D reconstruction step with Pixpro will be run. While that is running, put your GCP photos in a separate folder. Once the 3D reconstruction is complete, right-click on the Ground Control Points layer in Pixpro and select the import GCP From Images option.
You will have two options here. First, select the GCP photo folder you created. Second - choose an appropriate GPS altitude geoid for transformation; in our case, we are using an EGM96 geoid. This will vary depending on your region, and you can add any geoid to Pixpro photogrammetry software.
 Once you are done, GCPs will appear in the Ground Control Points layer group. The data will be parsed and analyzed automatically. Any number of photos you make per GCP will be used, and values will be calculated with an intelligent averaging algorithm. Now, these GCPs are ready for projecting onto photos, or they can even be exported as a CSV file for use in other applications or for other purposes.
Our RTK Drone GCP Example
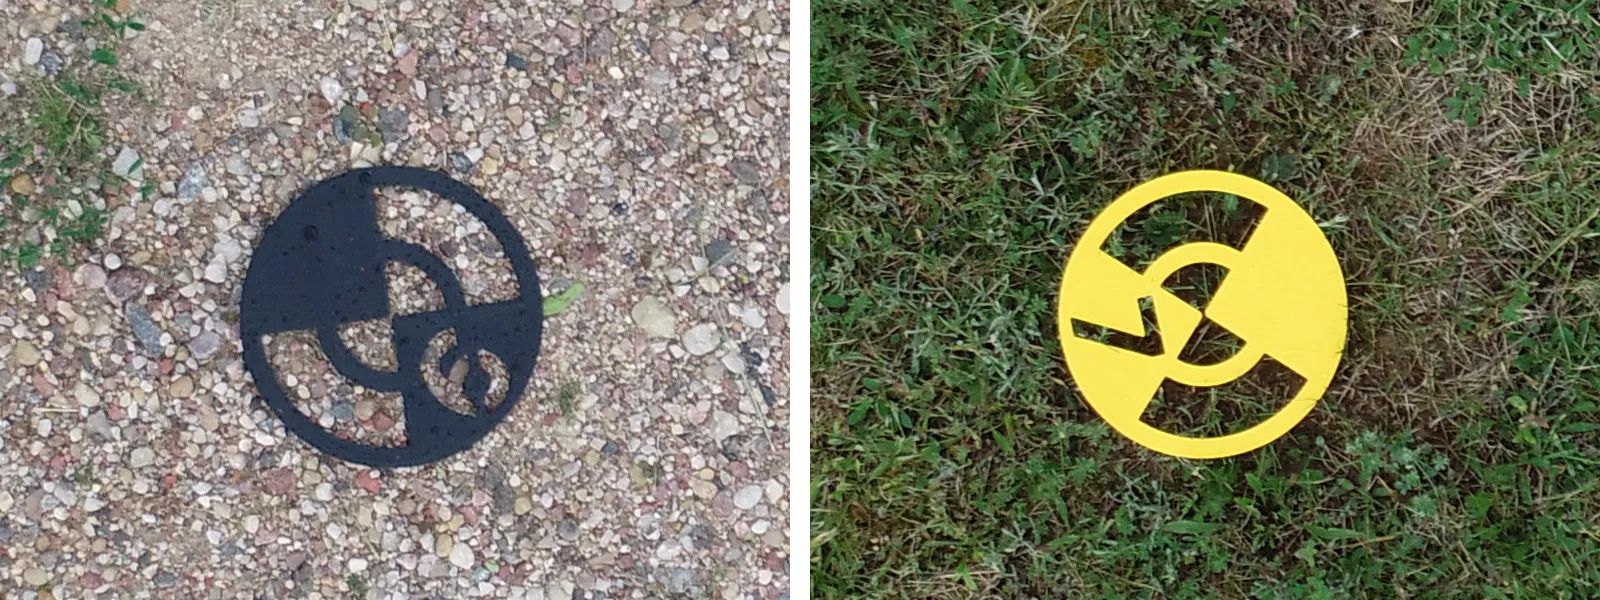
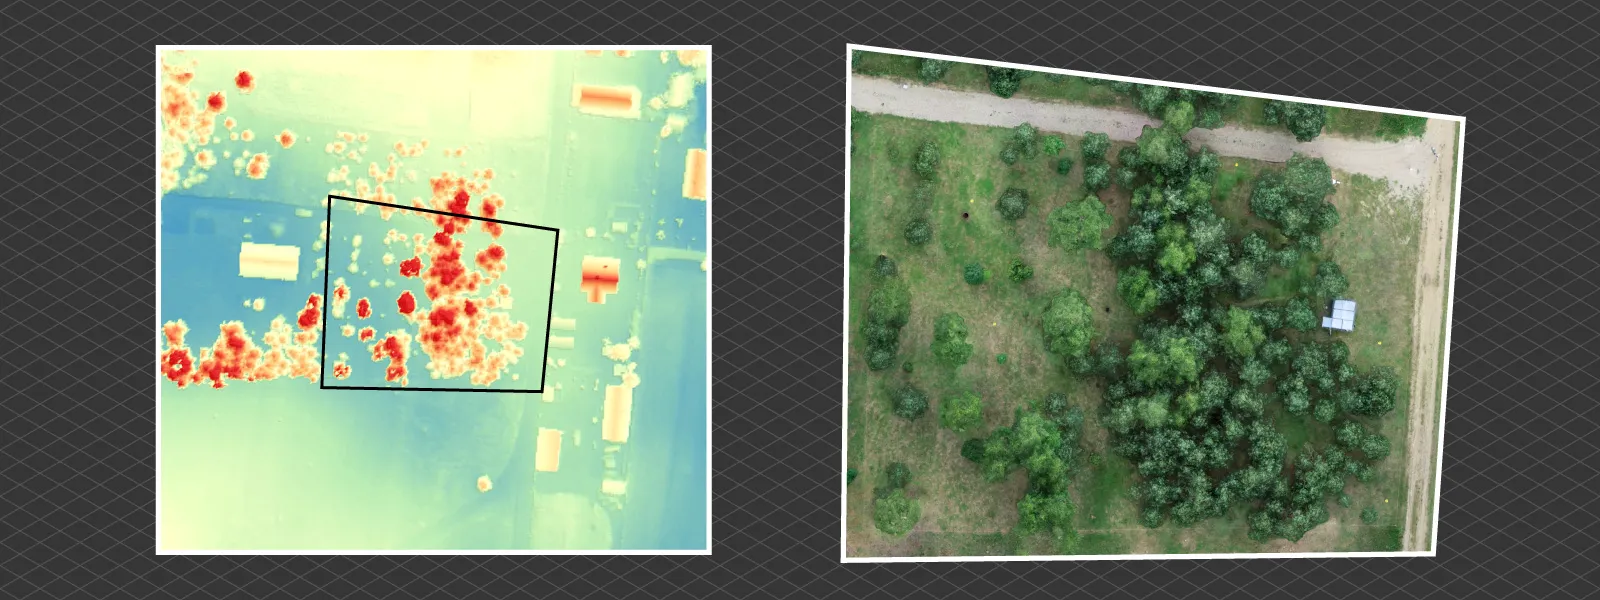
To demonstrate this workflow, we made a simple example: a small property scan with added GCPs. We scattered around 6 Ground control points using 3D-printed disks as markers and did the workflow described above. Below, you can see an unedited process of importing the GCPs and reoptimizing the existing 3D reconstruction.
Our scan was a multi-oriented grid flight, available in the RTK drone. This flight provides photos from all five sides—east, west, north, and south—plus a nadir top-down grid. The 466 photos in total give us maximum detail for such a case.
 For the final result, we created an orthophoto of the property for inspection. We checked the GCP errors compared to the reconstruction; they varied from 14 to 46 millimeters, with only a few projections added per GCP, which is excellent.
Conclusion
If you have an RTK drone, these drone GCPs are a great way of validating and improving the data of any project. RTK-level data on a scene is much better than just having RTK data "behind" the camera. This provides a ground truth that improves a photogrammetry project's absolute and relative accuracy. These may be especially useful for more oddly shaped scans or scans with nadir photos only. We will explore more options for using these GCPs and will do some testing with non-RTK drones.
Photographer - Drone Pilot - Photogrammetrist. Years of experience in gathering data for photogrammetry projects, client support and consultations, software testing, and working with development and marketing teams. Feel free to contact me via Pixpro Discord or email (l.zmejevskis@pix-pro.com) if you have any questions about our blog.
Related Blog Posts
Our Related Posts
All of our tools and technologies are designed, modified and updated keeping your needs in mind

Pixpro 1.7.11 - Seamless Model Sharing
We are keeping the development cycle relatively short these days, so here is a new update to our photogrammetry software. Update 1.7.11 brings improvements related to our cloud service.

Pixpro Version 1.7.10 - New Feature - Inspections
Another new Pixpro version is here, and it brings a singular new feature - an inspection module. Inspections are a large part of photogrammetric scanning because it is the most convenient and long-lasting way of visual remote sensing.
Most Asked Photogrammetry Questions Part 4 - Pixpro Support Picks
I help my team support Pixpro photogrammetry software users on a daily basis and often get forwarded more technical or specific questions. This gives me a good idea of what people ask the most, so I am writing these blog posts to get ahead of many questions.
Ready to get started with your project?
You can choose from our three different plans or ask for a custom solution where you can process as many photos as you like!
Free 14-day trial. Cancel any time.