.svg@webp)
Dealing with Snow and High Contrast - Aerial Construction Site Scan
 Lukas
Zmejevskis
Lukas
Zmejevskis
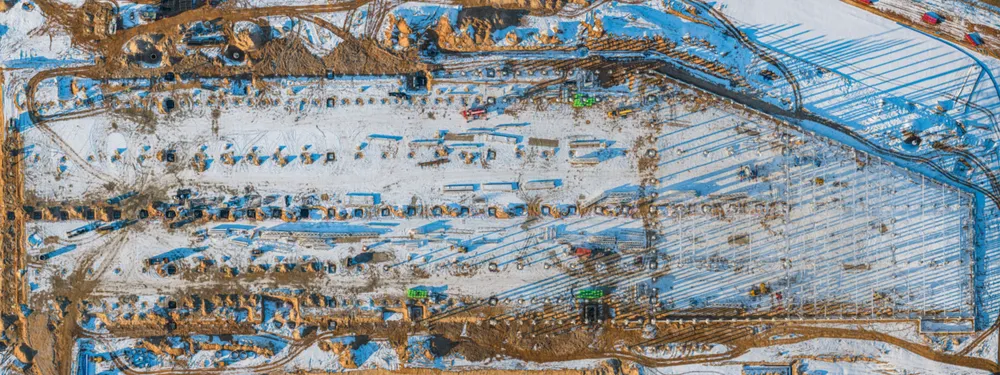
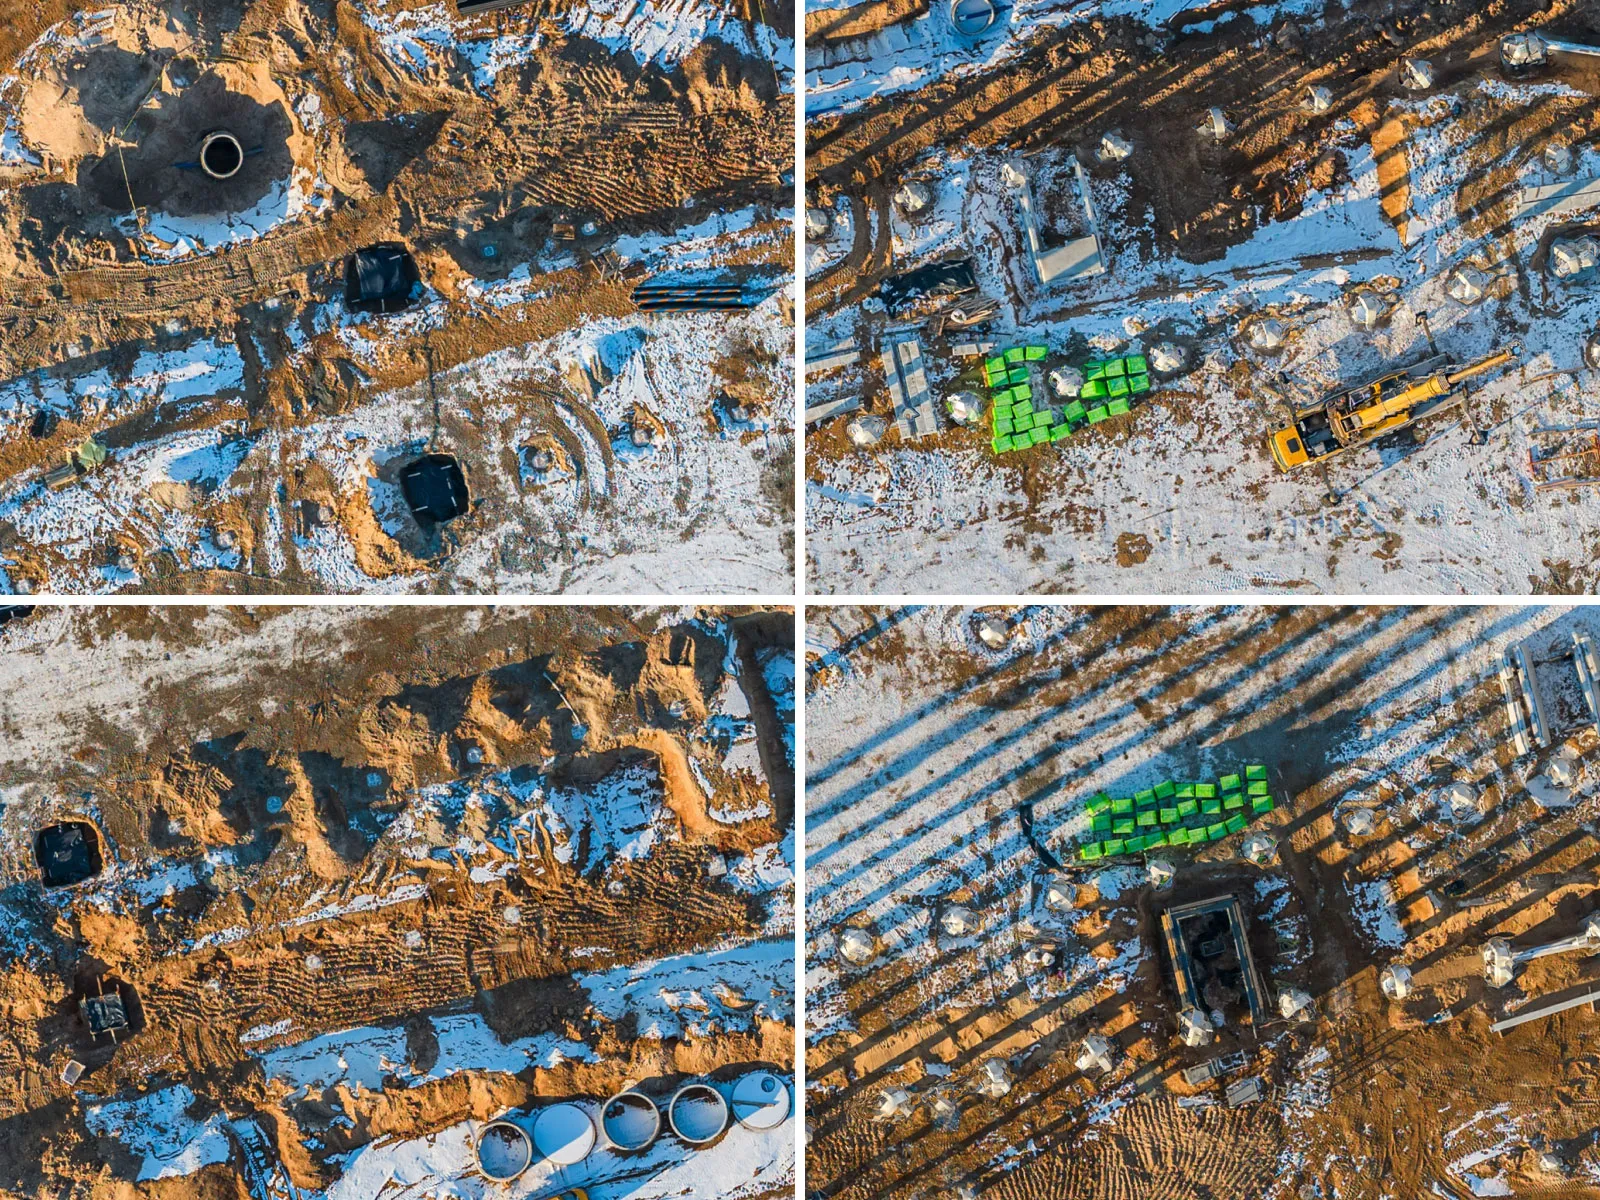
Aerial photogrammetry is dependent on the weather conditions, and there is no other way around it. While we can not fly our drones during extreme weather - dealing with something like a little cold or snow is not that hard. In this article, I have a real-world use case where I was tasked to make orthophoto images of a designated construction site with at least a 5-centimeter GSD resolution. I will explain what I did, and that could help you in the future.
Photo Capture Timing, Settings and Format
I had to work on the weekend because there was no movement on the site at that time. Having no movement is important to avoid artifacts and oddities in the orthoimage, like cloned machinery or people. So that checks our first requirement—a static scene.
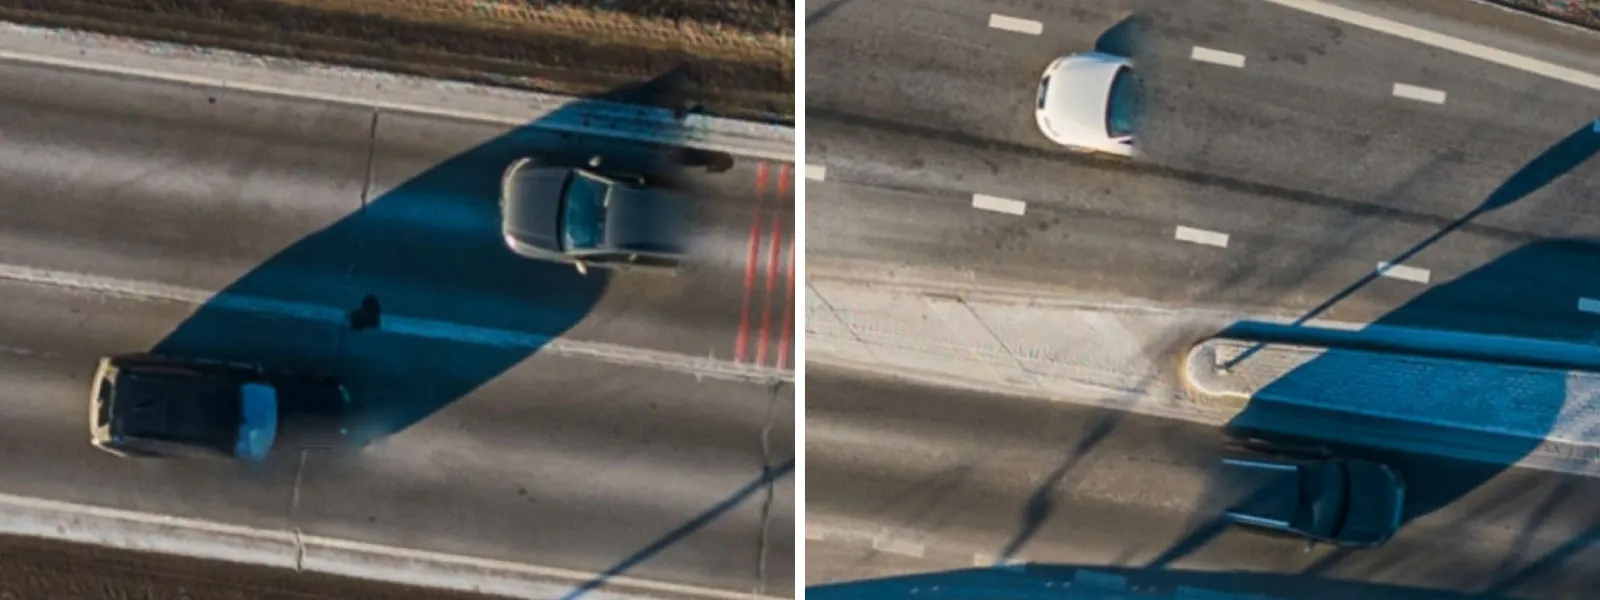 The weather was awful on Saturday and decent on Sunday afternoon. I did not make it on time to capture the site with the sun at the zenith, which would have been ideal, but a couple of hours past that. With the sun being at its highest, lighting looks the most boring. Still, shorter shadows mean a tidier result when we are concerned about quality and not aesthetics. Perfect results are achieved with completely diffused light when there is a thin, uniform cloud cover, but that is something we do not have control over.
 I will deal with the long shadows party in the post, so we must capture as much data as possible. I will capture RAW and JPEG photos at the same time, with manual exposure and fixed white balance. This time, I am also doing ETTR—exposing to the right. This means I intentionally make the photos a little brighter without overexposure (so not “blowing out” any highlights) so the signal-to-noise ratio is even better. In practice, this just means a bit less noise.
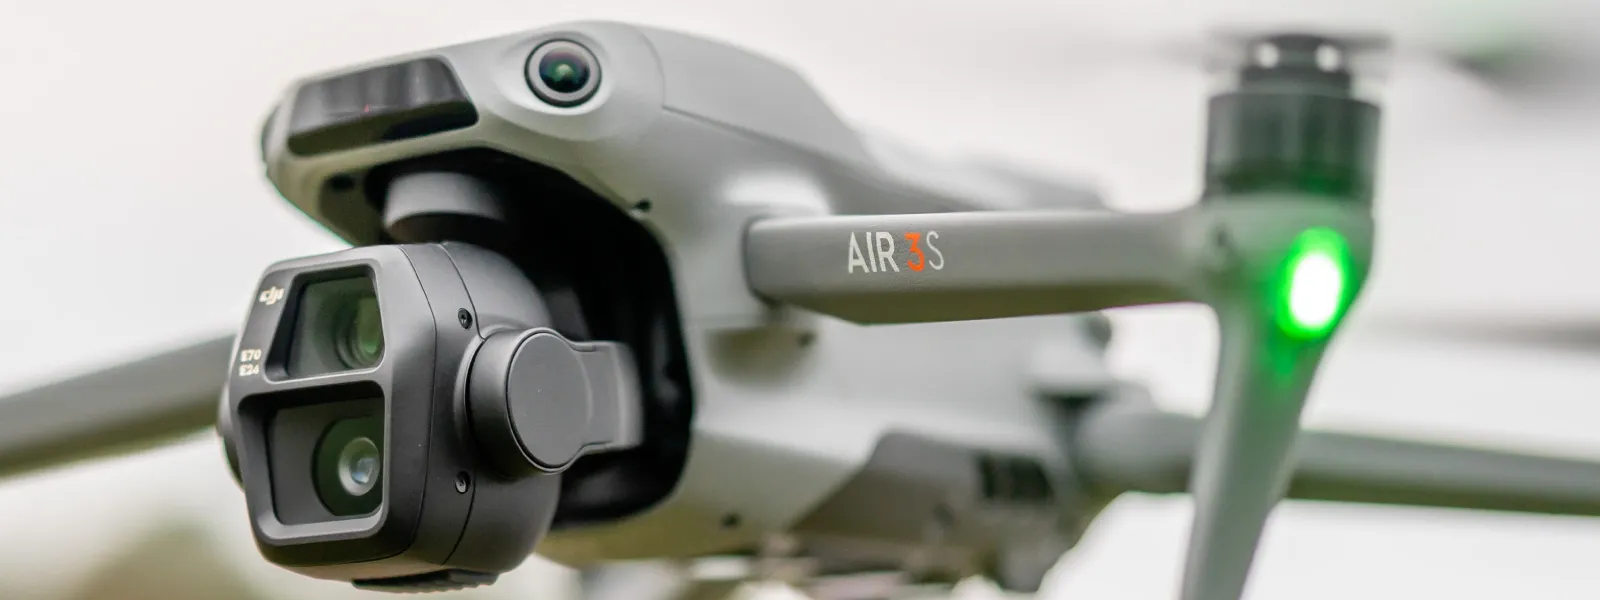
All of that while using the DJI Air 3S and its primary camera in 12-megapixel mode. I am not using the 50-megapixel mode because it slows down the capture, but it is certainly an alternative if we increase the flight height. We will test the two different approaches in the next article. Now, we move on to flight planning with Pixpro Waypoints.
 Pixpro Waypoints with the DJI Air 3S
Using the updated Photogrammetry Calculator, which now has the Air 3S data, I can see that a 90-meter altitude would give me a 3-centimeter GSD when in 12-megapixel mode. A 90-meter altitude is a reasonable middle ground between photo amount and quality, quickly covering the 5-centimeter GSD requirements, so I chose that.
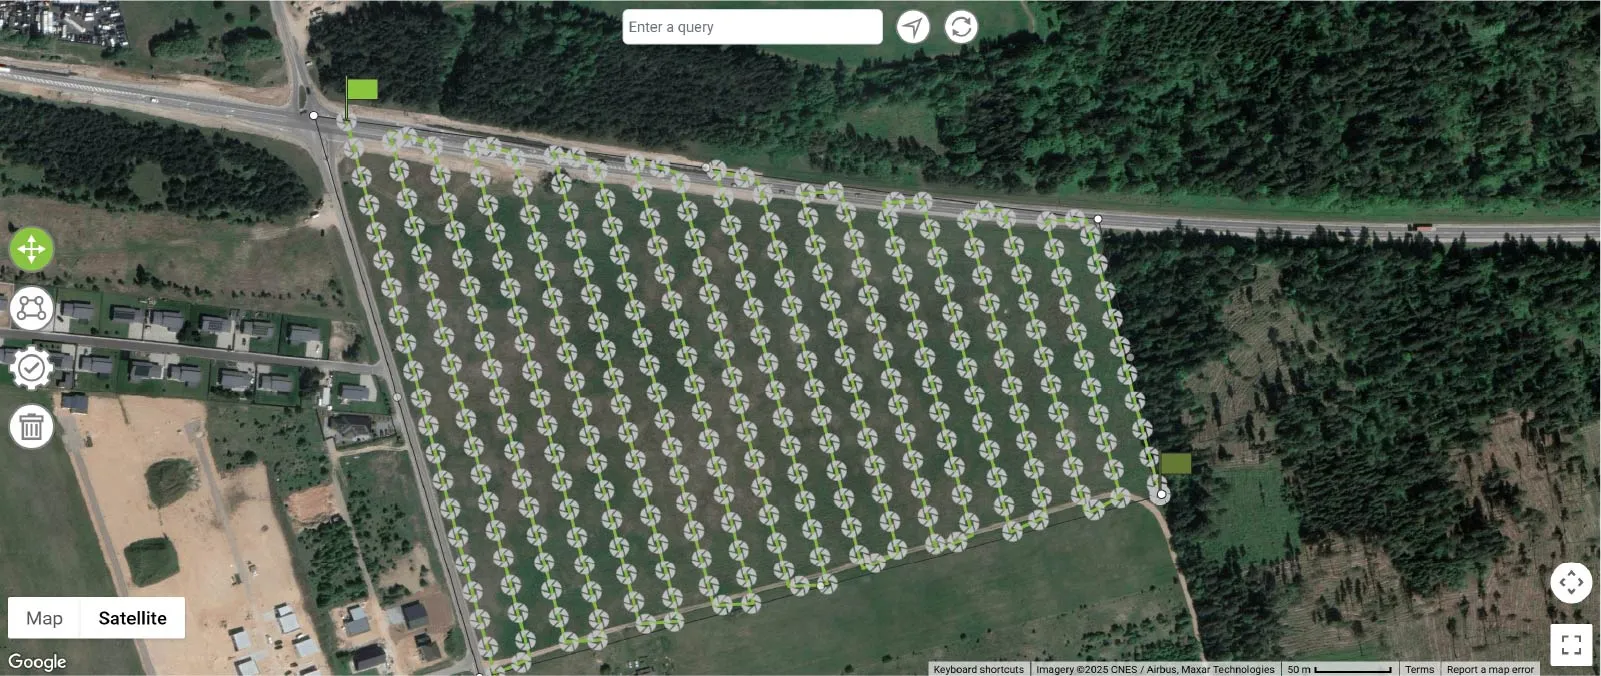
Using Pixpro waypoints, I will do a classic nadir grid + orbitals combo. So, a Single Grid plan covers the entire construction site and a bit more. 80 percent overlap and a 3-second capture interval. This gives me a flight that will produce about 300 photos in 17 minutes of capture. This is easily achievable with a single battery with the Air 3S.
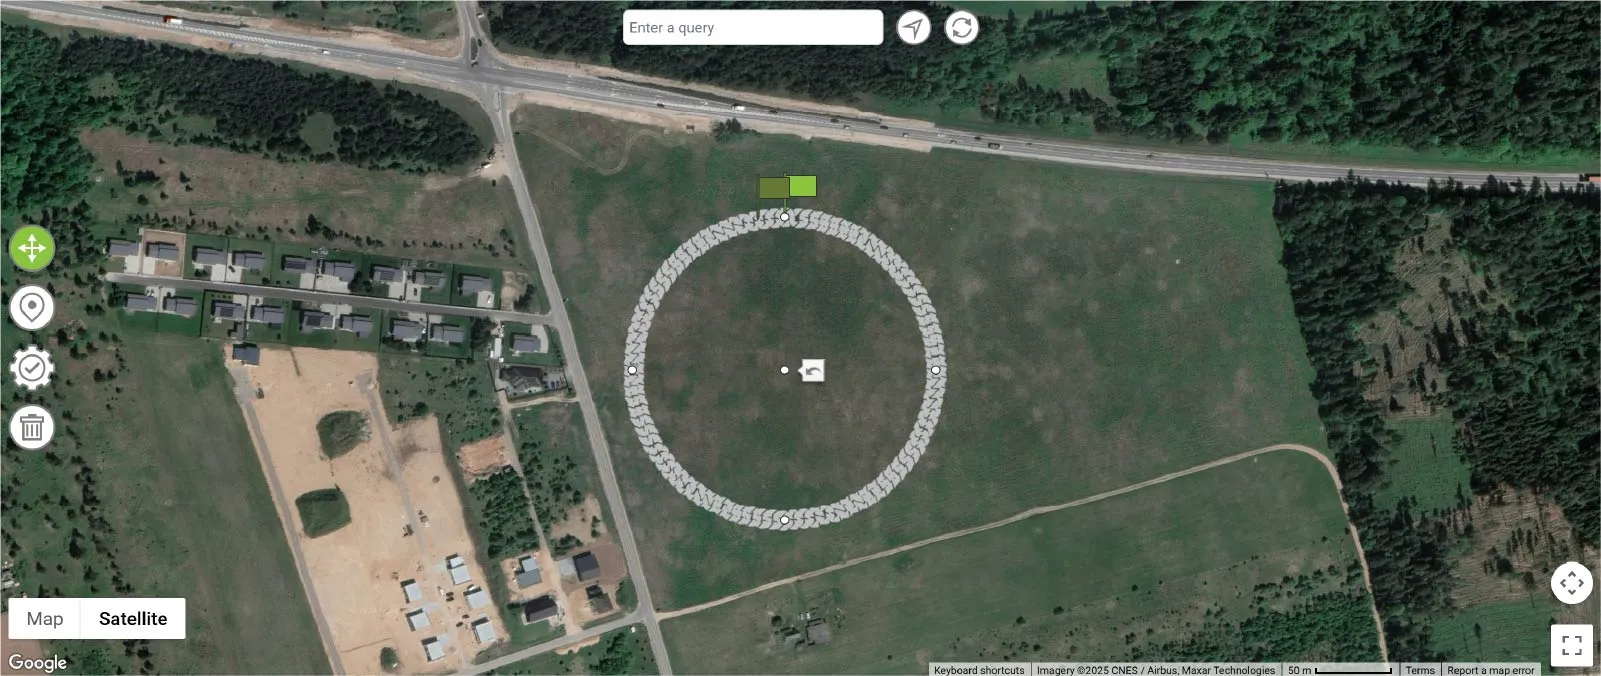
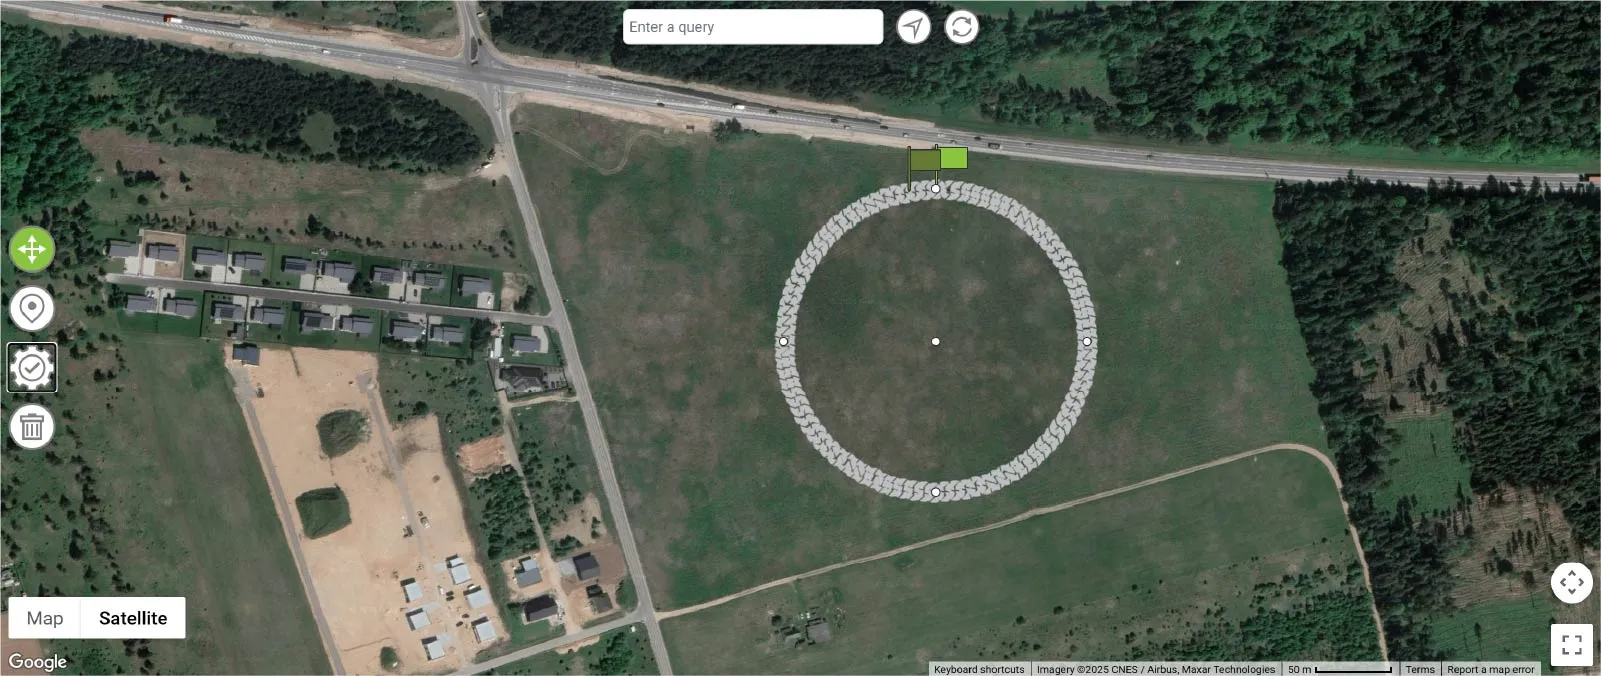
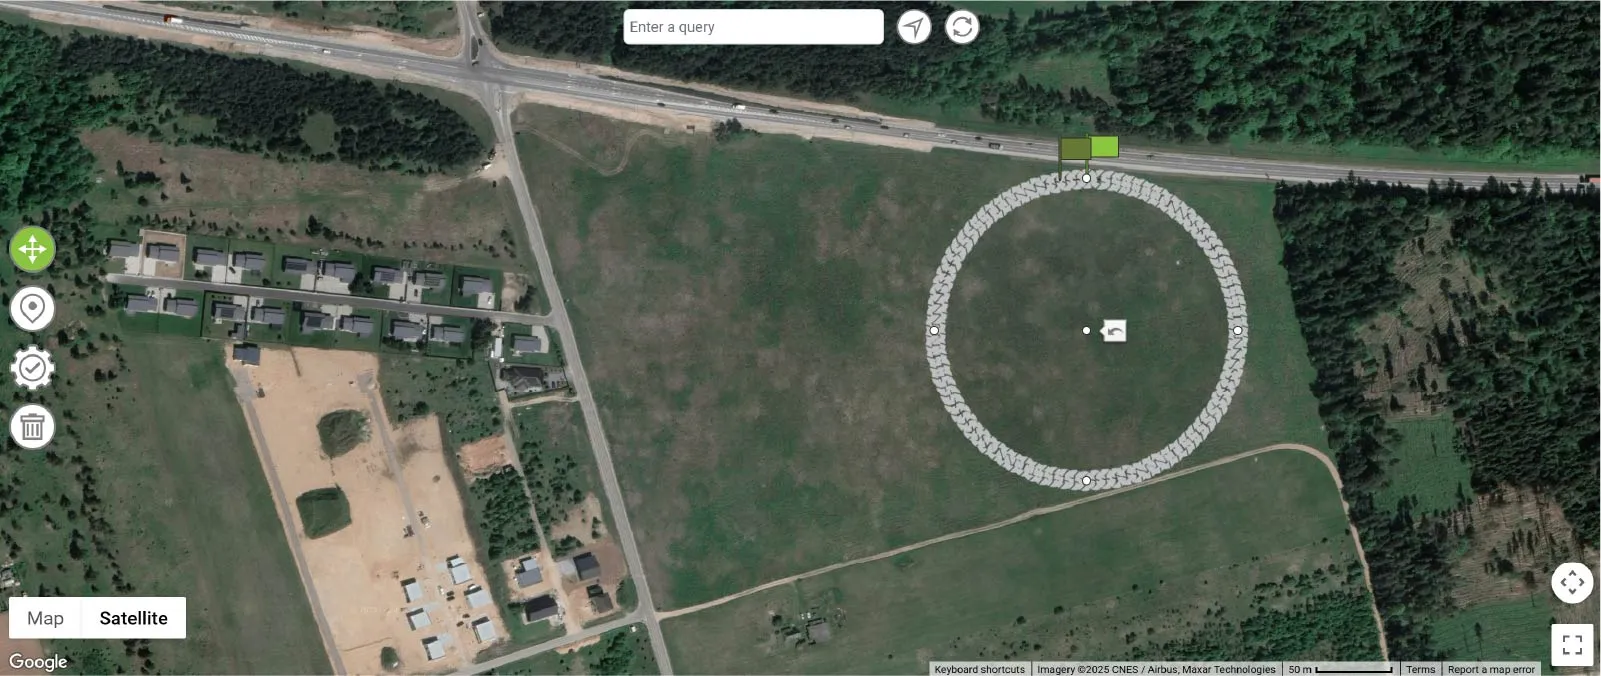
 I will also add three overlapping orbits above the site. These orbits will provide oblique data (oblique just means camera at an angle), which will help eliminate any calibration issues and avoid such results as a bowing effect. A variety of angles in data is a key requirement for good scans. When we are doing a relatively flat construction site, we can not rely on nadir capture only.
Three orbits is an arbitrary number I chose. Still, the point is to cover a large part of the area with additional oblique data. We did this in a previous article. I suggest following the same philosophy in most cases.
I created 4 placeholder plans in the DJI Fly app run by the DJI RC2 controller and replaced them with Pixpro Waypoints flights generated in the service. The replacement process is simple - connect your RC or phone via cable to a PC or any other device, go to the waypoint directory, and replace the plan files (.kmz), giving the new ones the same names. More about waypoints in this article:
Pixpro Waypoints - Automated Photogrammetry Flights for Lates DJI Drones
Executing the flights is as easy as loading the waypoint flight from the list and clicking go. However, waypoints provide only the flight path and speed. You need to trigger and set up image capture yourself. So choose the interval you decided during the planning, initiate the interval capture, and then the drone reaches the destination. When the drone finishes the flight, the shooting.
Executing multiple waypoint flights in a row is not complicated in any way. When a plan finishes, select another one and click go; no landing is necessary. However, remember to change the capture interval settings if necessary. I usually use 3 Seconds for grid flights, while orbitals can do with 2-second intervals to save time. For orbitals, you also need to set the camera angle yourself. Below is a screen capture from DJI RC2 of the process of executing two different orbital flights.
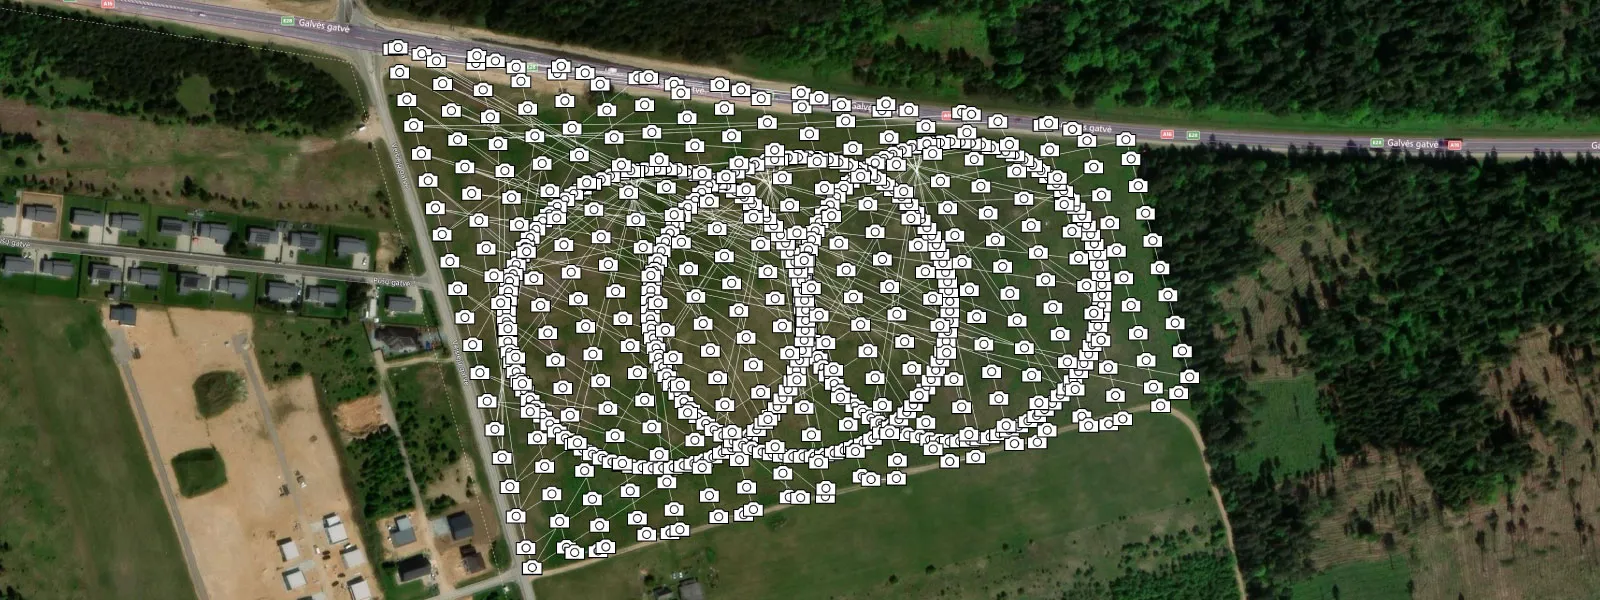 Photo post-processing
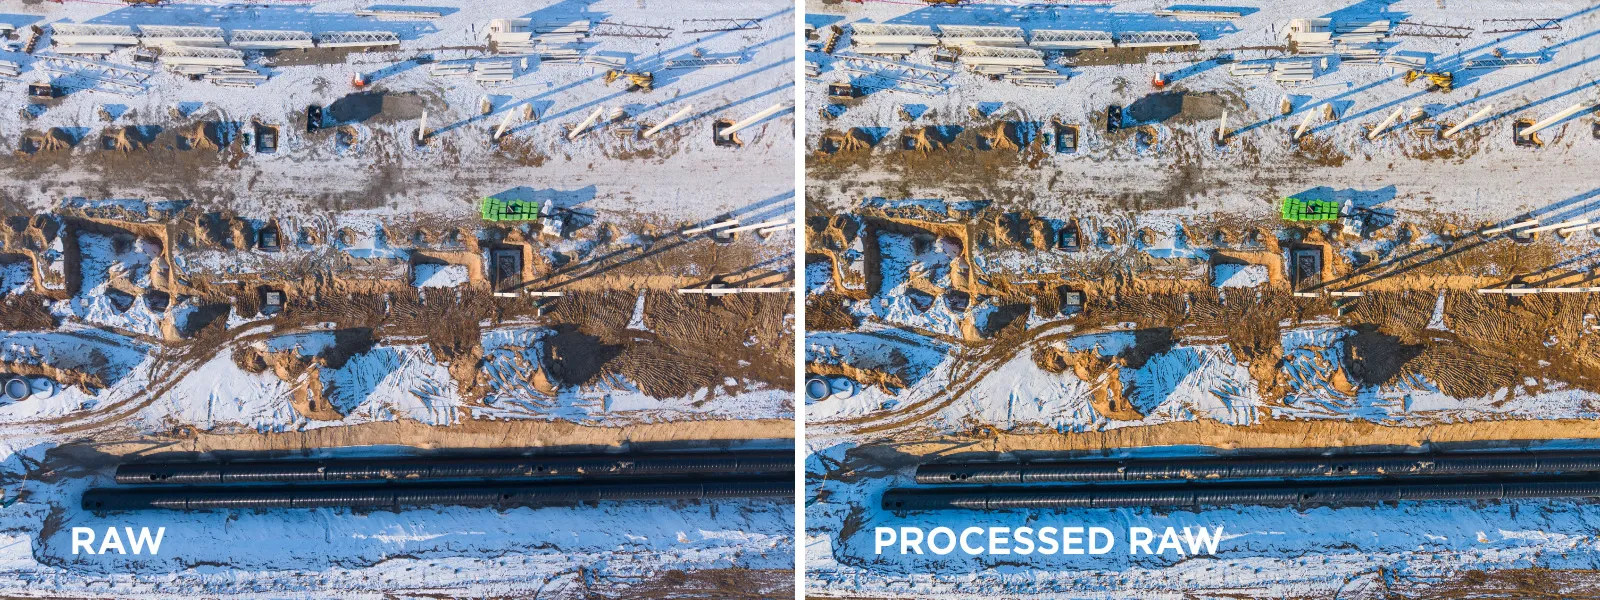
I shot RAW, so I need to convert those files to jpegs. For conversion, I use Lightroom Classic and tweak the photos a bit during the process. If necessary, we can adjust the white balance (doing that for all photos identically, of course) and adjust the contrast. Because I overexposed the images a little, I brought down highlights and brought up the shadows more. Then, I bring back some contrast using curves. Besides that, I also ticked the reduce chromatic aberrations box.
This reserved style of processing is what I recommend for photogrammetry. We can not do artsy and more drastic stuff unless aesthetics are our goal. But some post-processing allows us to ensure that there are no blown highlights or crushed shadows, the contrast is under control, and even with snow and dark objects in the frame, we can see everything clearly.
 You can find more detailed info on how I process raw photos for photogrammetry here. After tweaking all photos identically, I export them full-size, with full metadata, to jpegs of 70 percent quality. We can also rename them in bulk using Lightroom export options. These photos are now ready for Pixpro photogrammetry software.
Photogrammetric Processing
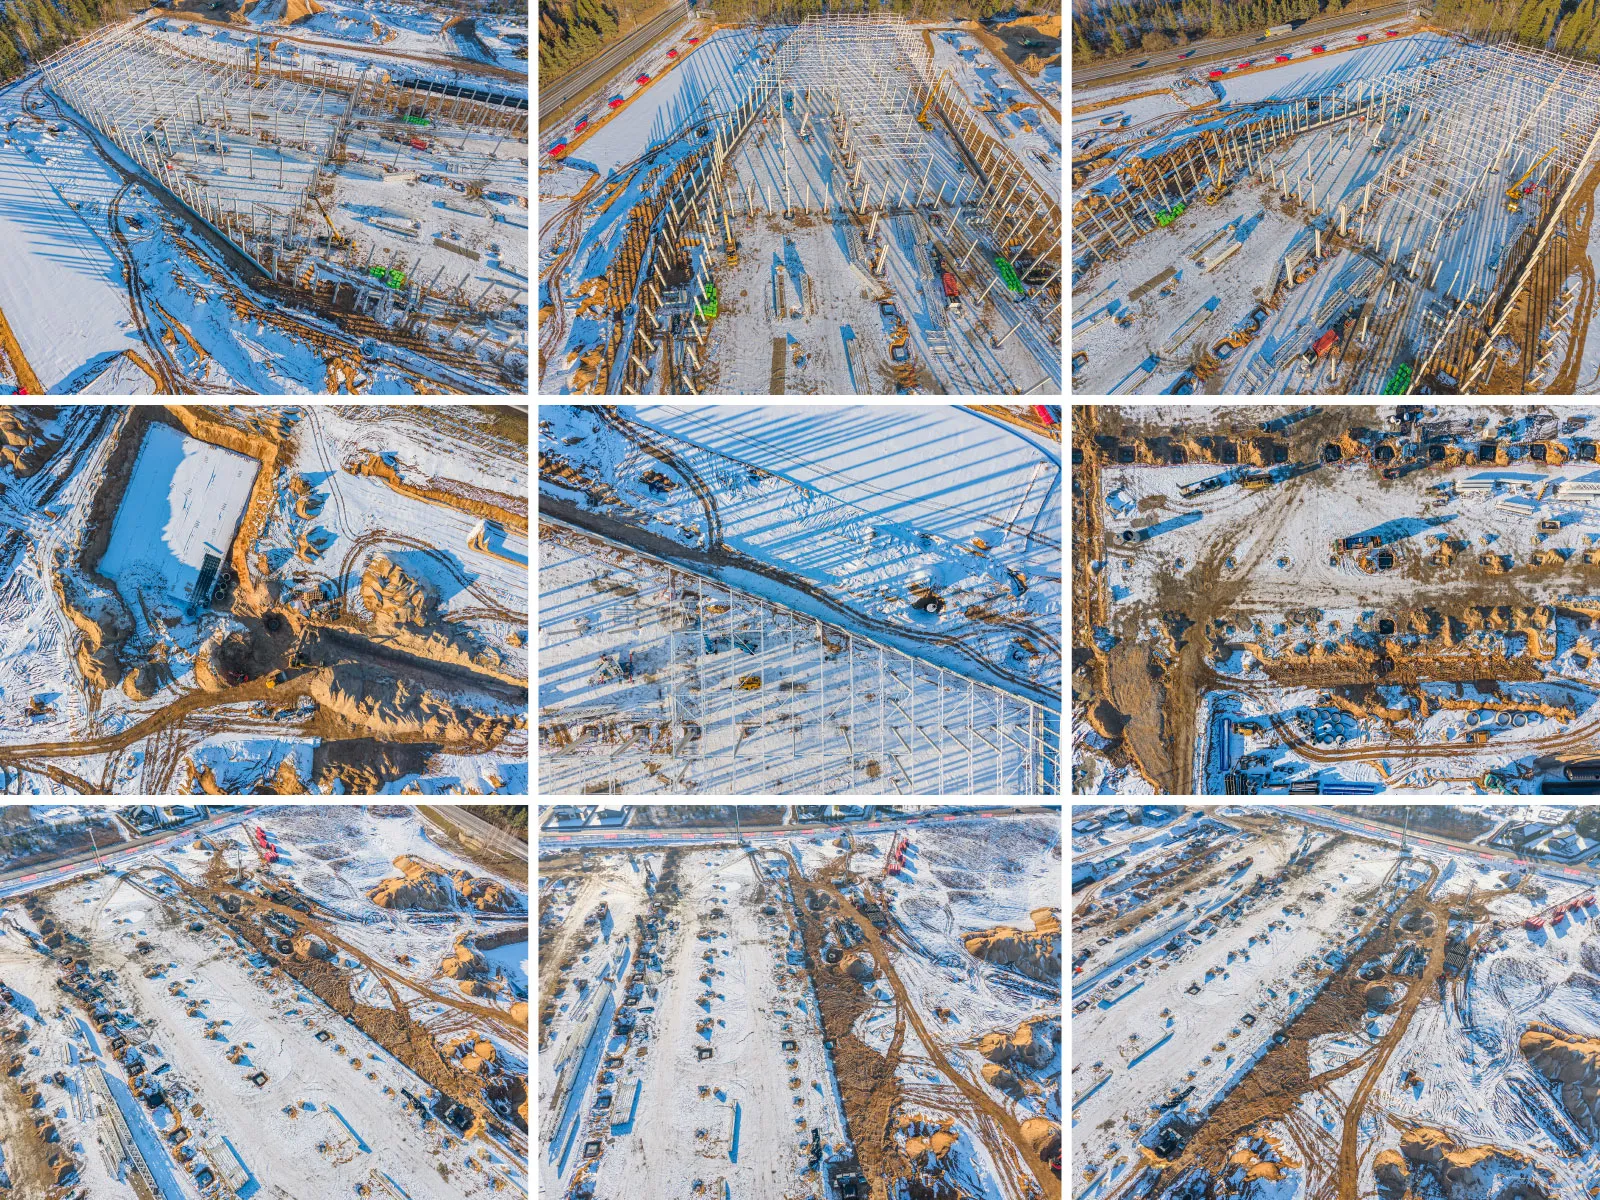
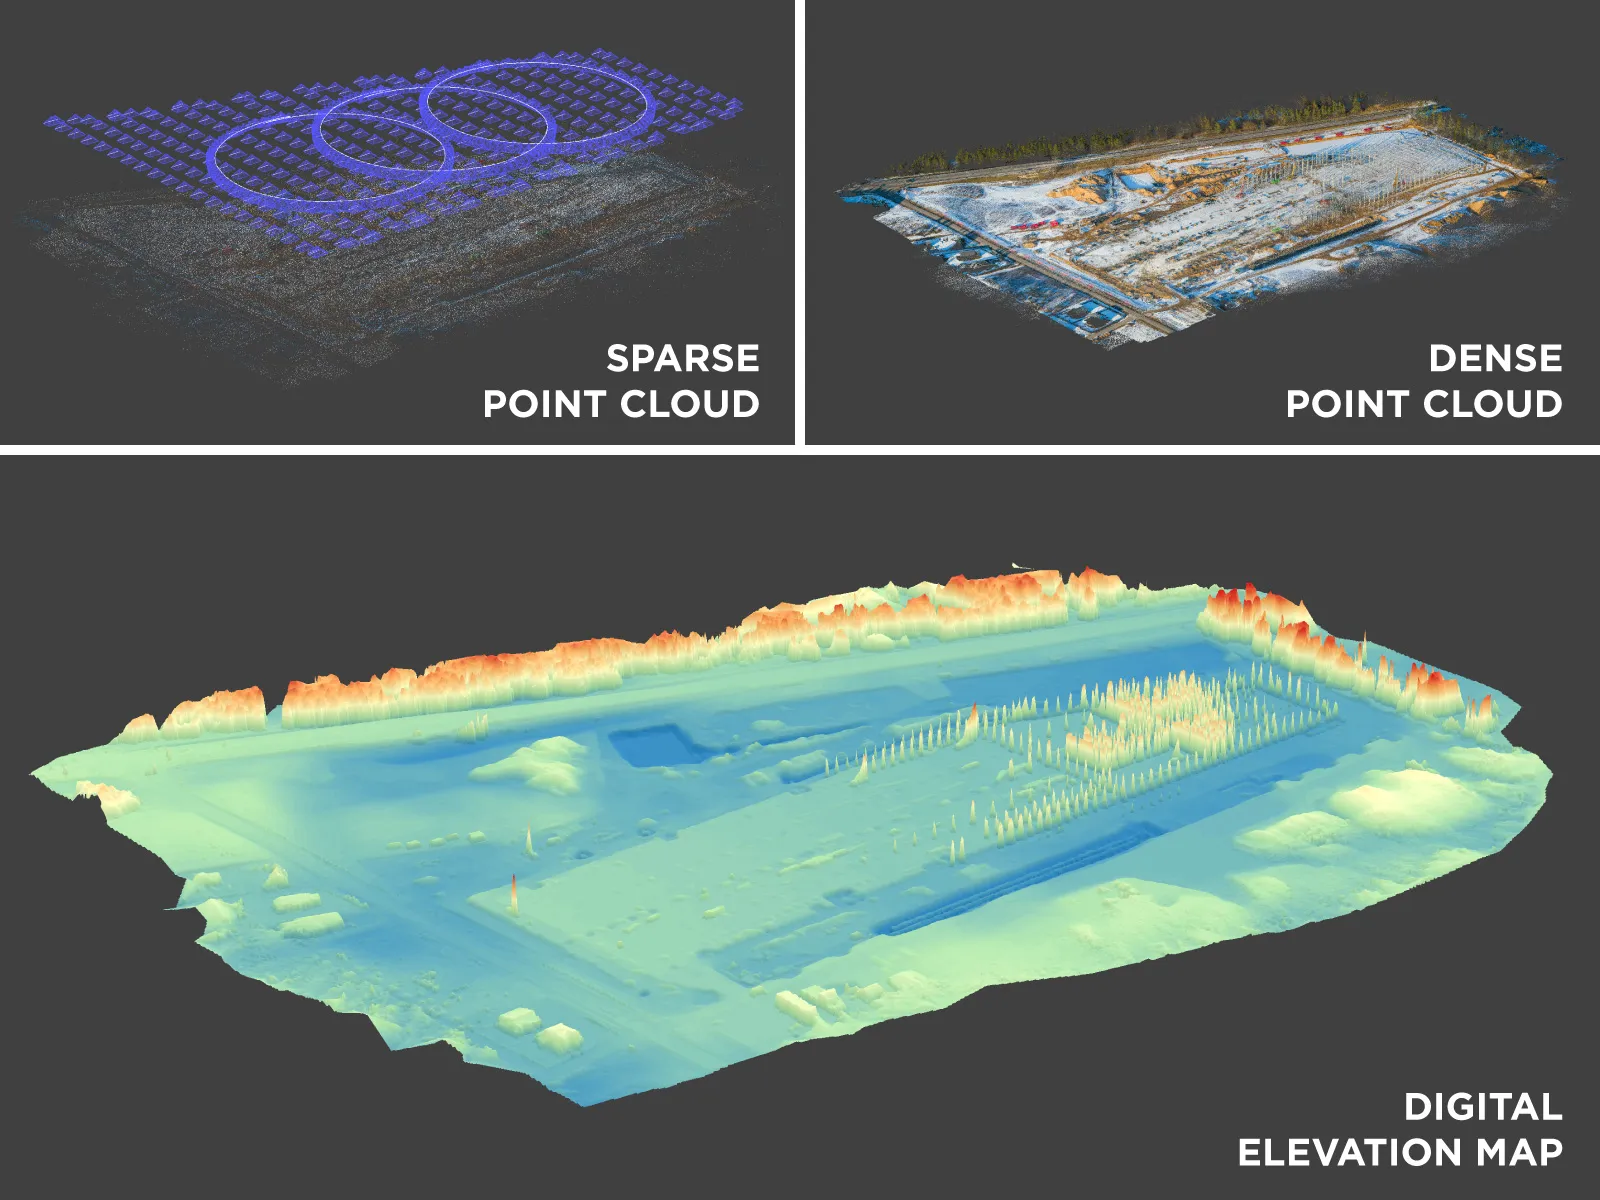
Photogrammetric processing is the easiest part. I uploaded the photos to Pixpro and chose to process 3D reconstruction, dense point cloud, and digital elevation map, which are the layers we need initially.
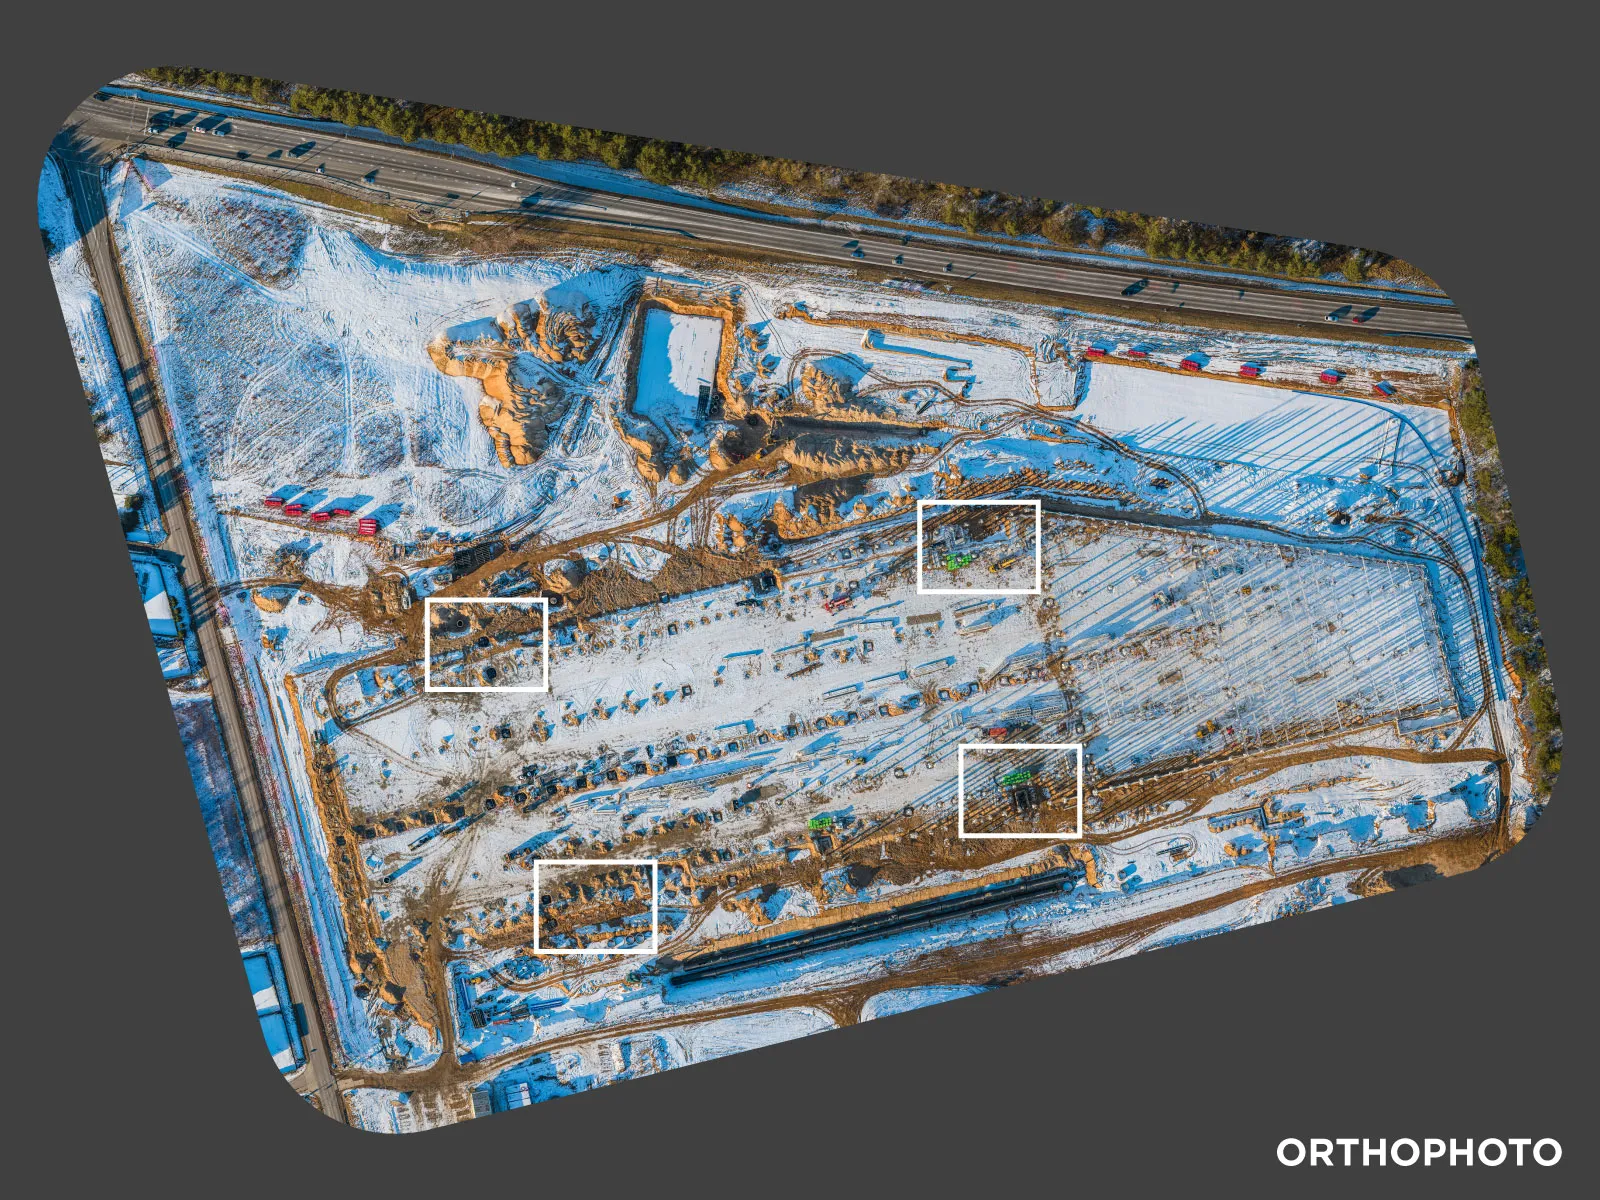
 After those are done, we can make an orthophoto image. Here, we need to do a simple thing - select only the nadir photos for the generation. You can do that easily using the selection tool. It is especially easy if you did not skimp on renaming the images during export. We can also set the GSD resolution of our orthophoto; in this case, we need 5 centimeters. After a bit of processing, we will get our final result.
 Conclusion
In addition to what I did, we can always crop the DEM for neater results. We can export the orthophoto image as a tiff or big tiff or reprocess it with a better GSD resolution if necessary (native photo GSD is the maximum we can do). The orthophoto image is georeferenced and should “lie down” on a map pretty well in any other software. There was no RTK data in this one, but the scale should be correct and absolute positioning quite decent. These orthophoto images are used for inspection, documentation, and detailed plans on construction sites. If you ever need to make one - you have all the tools here.
Photographer - Drone Pilot - Photogrammetrist. Years of experience in gathering data for photogrammetry projects, client support and consultations, software testing, and working with development and marketing teams. Feel free to contact me via Pixpro Discord or email (l.zmejevskis@pix-pro.com) if you have any questions about our blog.
Related Blog Posts
Our Related Posts
All of our tools and technologies are designed, modified and updated keeping your needs in mind
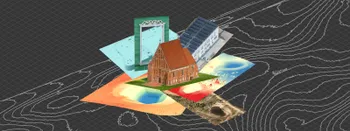
Where do we use Photogrammetry? A list of 3D scanning use cases.
Photogrammetry has revolutionized numerous industries by transforming real world scenes into 3D models, using only simple photographs and processing algorithms.
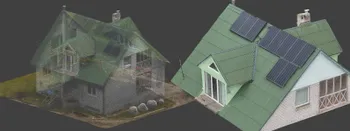
Roof Scan for Inspection and Solar Panel Addition – Use Case
Roof photogrammetry is one of our client base's most common use cases. Obtaining accurate measurements is essential for designing a solar panel layout, determining how many panels fit on a roof, and conducting a prior inspection.
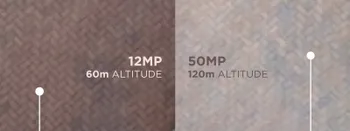
Resolution vs. Altitude: Do 50 Megapixels Actually Matter?
We all know that megapixels are not the only defining factor of image quality, and the megapixel race is long over. However, we need to know their uses when we have two resolution options.
Ready to get started with your project?
You can choose from our three different plans or ask for a custom solution where you can process as many photos as you like!
Free 14-day trial. Cancel any time.