.svg@webp)
Small Scale Scan Part 2 - Cross Polarization for Difficult Objects
 Lukas
Zmejevskis
Lukas
Zmejevskis

I laid out small-scale photogrammetry specifics and challenges in the previous article and did an example of the best-case scenario, where the subject is straightforward to scan and does not require any complicated setup. This time, however, we are tackling a much more difficult object as promised, which could be considered a worst-case scenario, but still scannable. I have an actual use case of reproducing a miniature model to be printed at an even smaller scale. I will not review the main challenges again, so reading the first part is recommended before proceeding with this blog.
The Object
Our object is a miniature-scale train model—more specifically, an Arnold N-scale model (number 2223) of a German series 89 steam locomotive with its coal cart. N scale means the model is 160 times smaller than its real-life counterpart, and its gauge (width of the track) is 9 millimeters. This makes the model approximately 12 centimeters long and 2 centimeters wide on average. The model is made of metal and painted black and red.
 Right off the bat, we have a small object with a simple but irregular shape, reflective and without much color variance. There are a good amount of surface details, but it is all under black or red colors, with some bare metal as well. Without treatment, such a surface would be pretty hard to scan.
The model sits on wheels that can turn. In fact, it is operational and can ride miniature tracks, which would be electrified. There is a motor inside, and it locks the wheels when unpowered. This adds some stability to the locomotive, but the coal cart is connected to the locomotive with a flexible joint. All of this and the fact that there is play in the components makes this object anything but stable.
These are the main factors to overcome to get a successful photogrammetric scan. Of course, these come from the fundamental requirements of getting great-quality, overlapping photos that cover the entire object. That is what we are trying to achieve with the solutions below.
Solutions
Depth of field - depth of field is the thickness of the focus zone where everything is sharp. In an ideal world, we would choose everything to be in focus, but these pesky physics we have to deal with do not allow us. This stems from the fact that our subject is relatively small, and when you focus on something tiny from a close distance - your depth of field becomes super thin. We combat this by closing down the aperture and getting more depth of field at the cost of reducing the light that is let through by the lens. We compensate for that by having long exposure and powerful lighting - this is where stability becomes essential.
Stability - because we need exposure of several seconds, we need our object to stay perfectly still at all times. There is nothing much to do about that but have a stable setup and touch the camera as little as possible. So, the camera sits on a tripod, the object is on a table on a tripod, and each photo is triggered wirelessly with a remote. Once we set the settings, the camera is not touched until the capture is complete. The model train is not touched directly but spun slowly on a heavily damped video head for each shot.
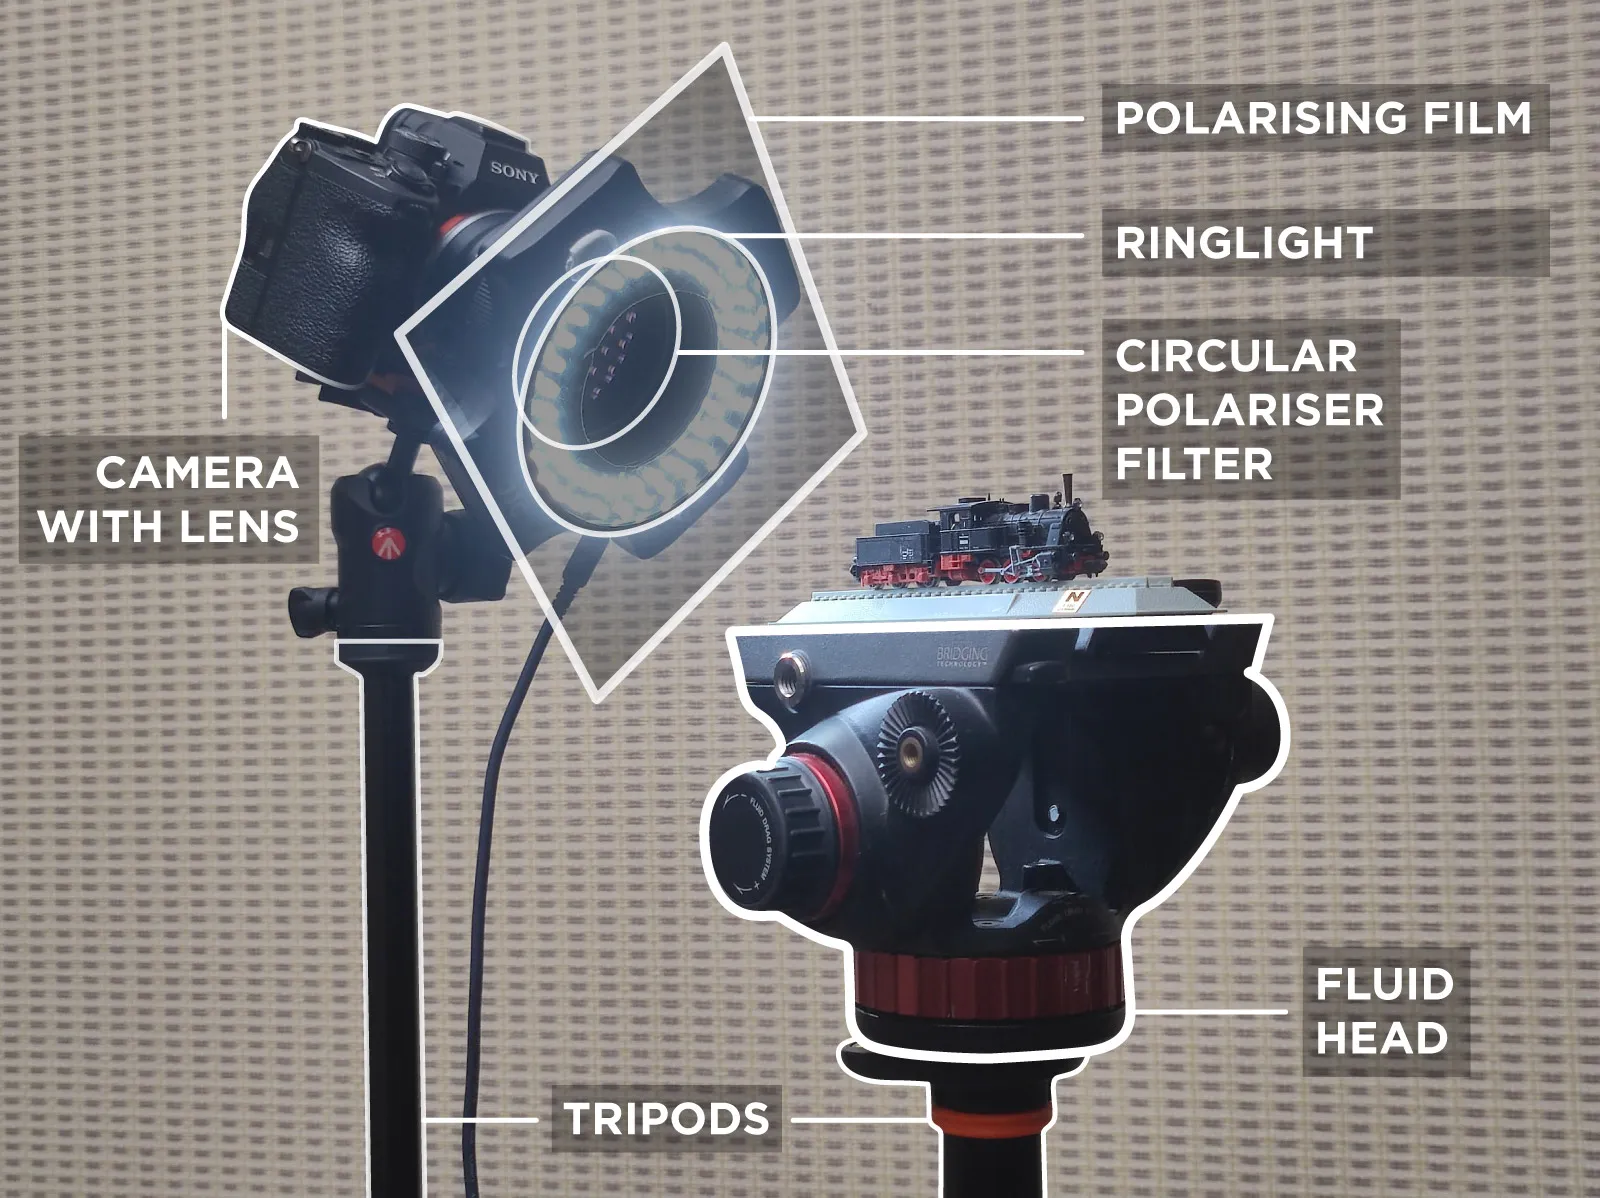
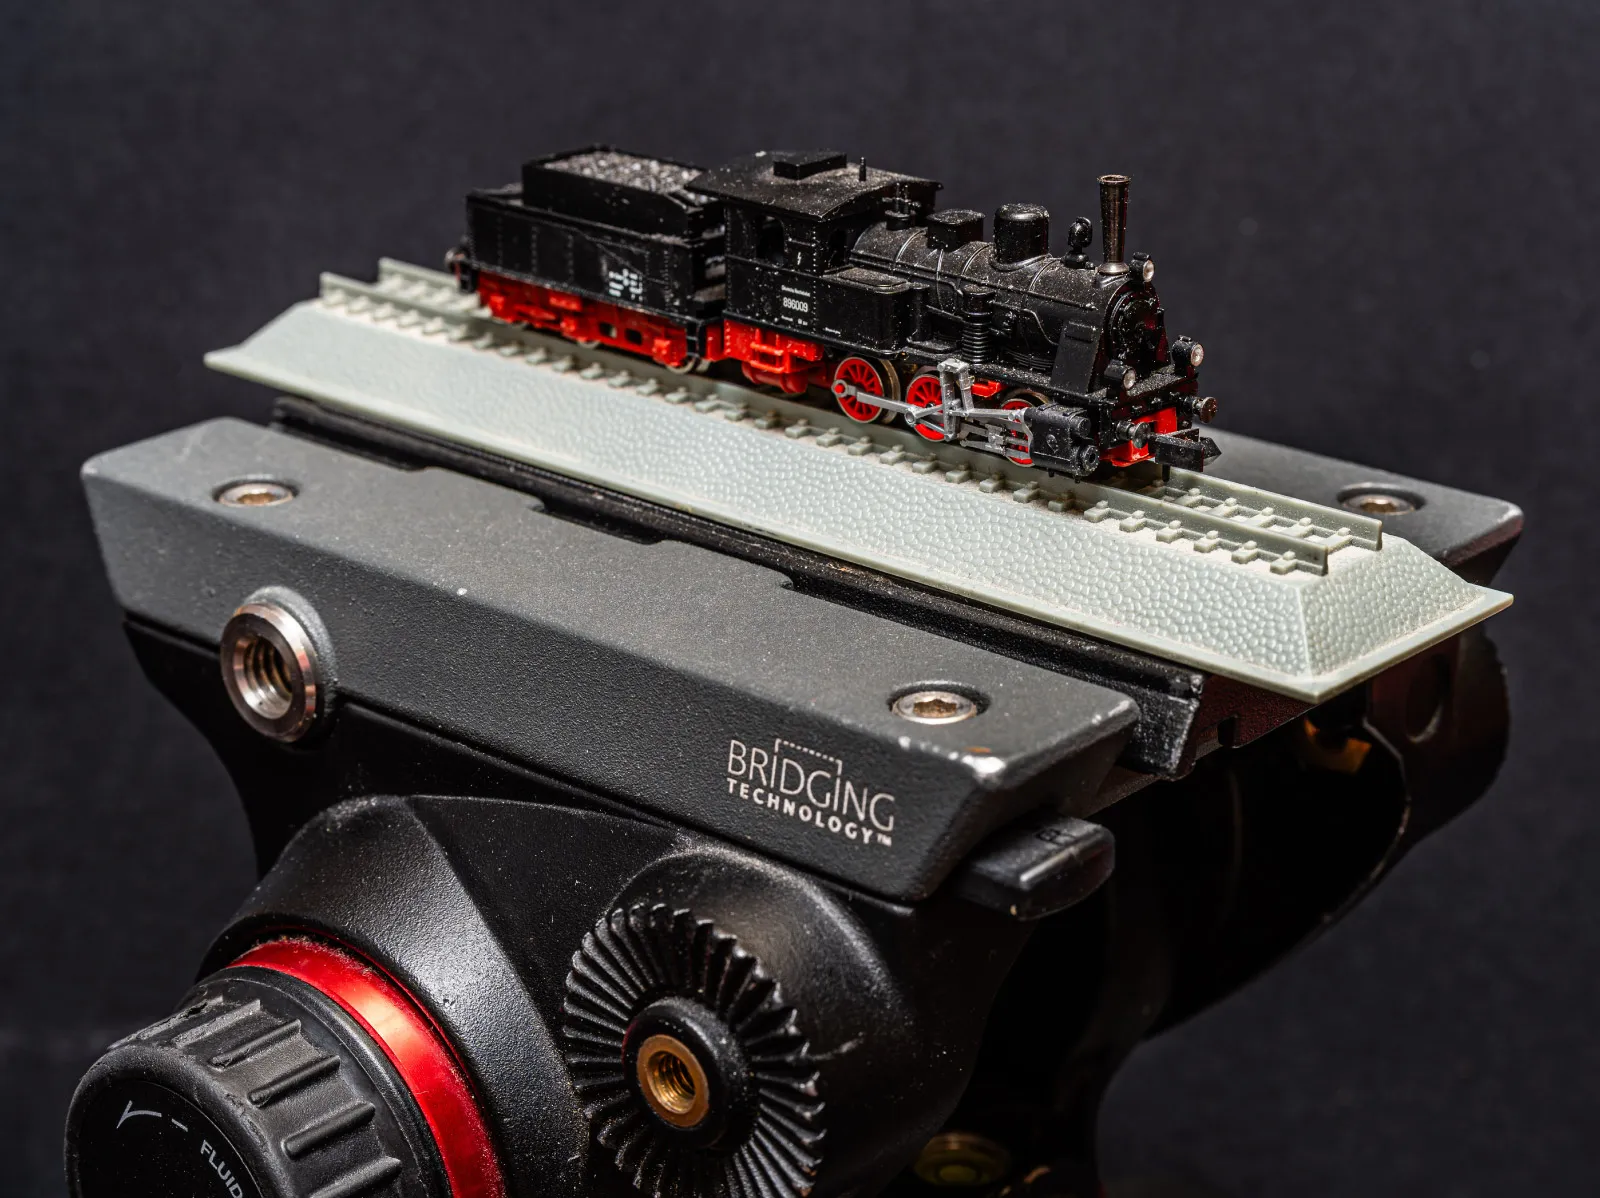 Reflections - to reduce metal reflections, we need to use cross-polarization. This technique requires two filters, one for the light we are using to illuminate the object and the other for the light coming through the camera lens - a filter. By adjusting the filter, we can find an angle at which the reflections on the model are eliminated. For this to work, the background and the base must not be strongly reflective, and all other lights must be turned off so only the polarized light illuminates the object. However, the filters further reduce the amount of light that reaches the sensor.
Surface - the last problem we have is the lack of texture in some parts of the model, mainly in the coal cart's black panels, the locomotive's roof, etc. This time, our solution is the most rudimentary thing ever - dust. Because we are printing this model in resin later - we do not really care about the visual texture, and we can have our model just be dusty. Dust gives it more texture, dirties up the clean black panels, and that is it; these surfaces become scannable. And because dust has static properties, it clings to the model train really well. And when it comes to cleaning it after - it is a simple matter.
 Results
Our final photo settings were:
Aperture: F22 - the highest value available on a lens - closed down as much as possible.
Shutter speed - 1.6 seconds for each shot.
ISO 400 - a relatively small value that still provides low noise. It is also four times more sensitive than base 100, so we do not need 10-second exposures.
RAW image format - converted in Adobe Lightroom to jpegs, according to our simple raw processing guidelines. In total, 182 photos from 3 orbits.
 We chose to do a turntable scan from three different heights because it is the easiest way of using cross-polarization type scans. Just center your object so it remains in the center when it spins, and take a photo every few degrees. The fluid head used to spin the model happens to be marked so that each orbit gives us 60 photos (I accidentally made a couple more somewhere in between, so the final number is 182). 60 photos per 360-degree turn is a good amount on this scale; we recommend never going lower than 36 photos, while more than 100 will not be effective.
A negative of such a scan is that our subject only takes up a part of the frame, so the detail is quite limited. We are using a 33-megapixel camera, which is somewhere in the middle of professional camera resolutions. The same scan with a higher resolution camera would yield better details with the correct processing settings. However, knowing the use case, we do not need more detail now.
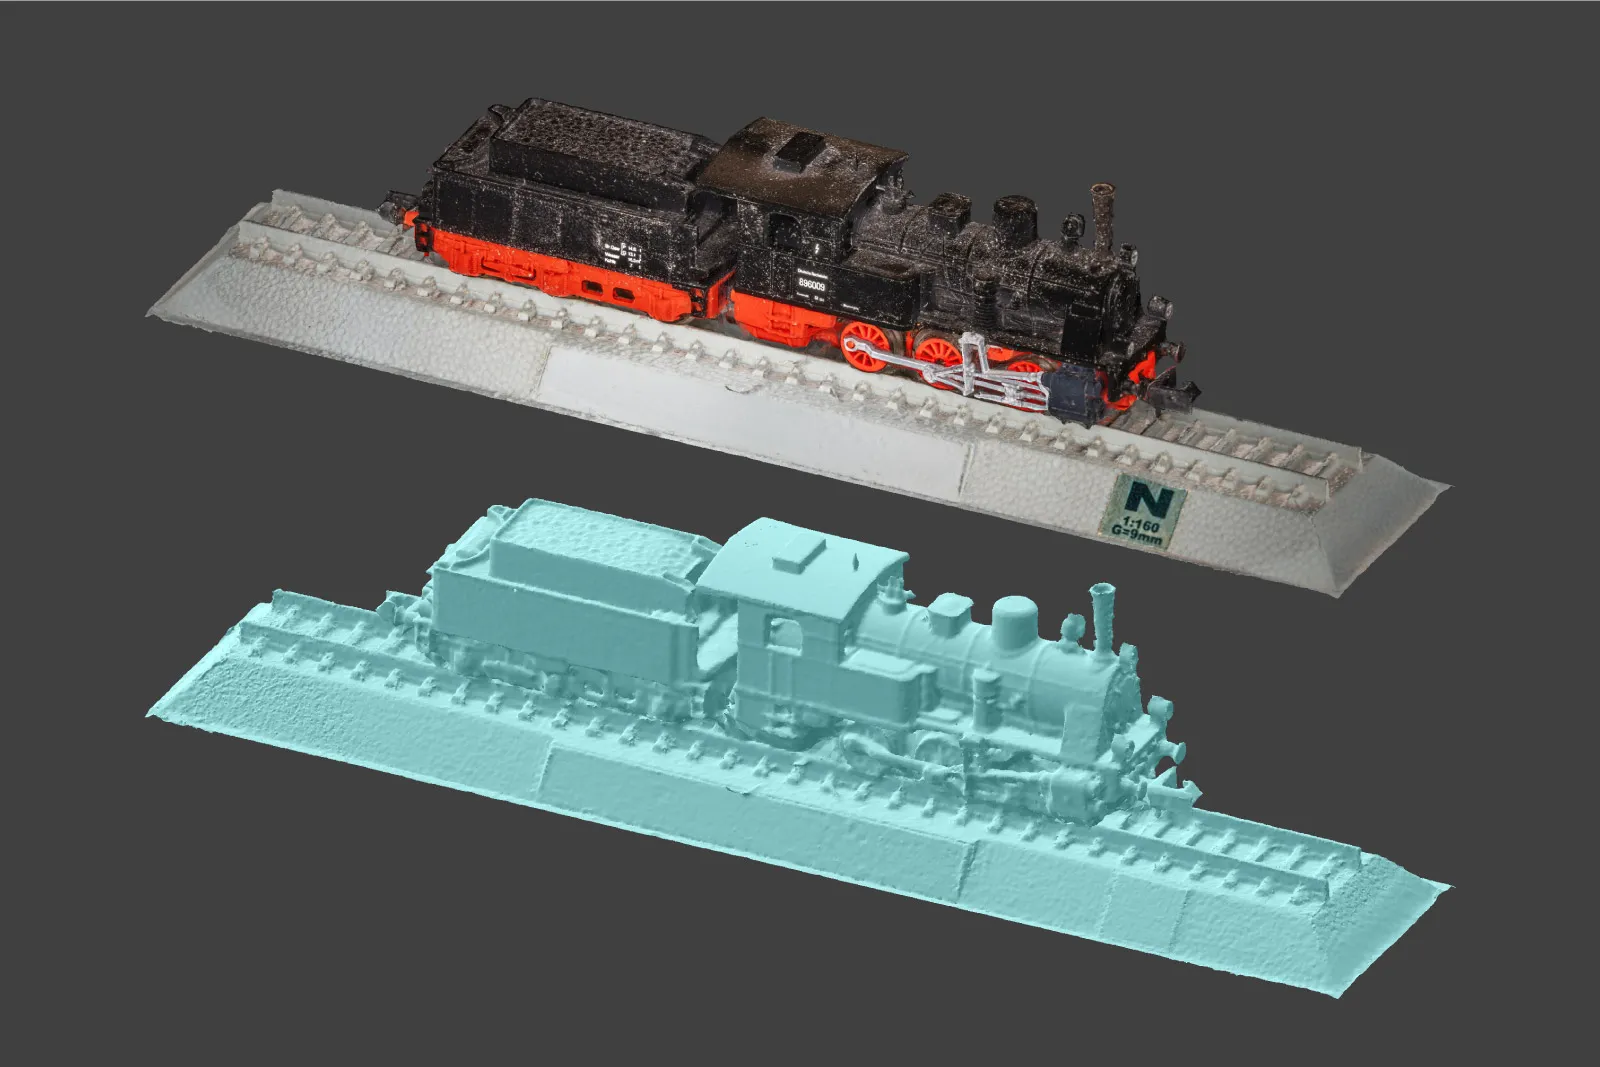 I used Pixpro to process all of the images, running a "Slow" reconstruction while everything else remained on default settings. A bit of cleanup and clipping box action, and we got a 3D model. Looking at the screen, its detail is OK; there are no doubling of surfaces or other weird artifacts, so this is a passable result for our use case. A low polygon version below.
Conclusion
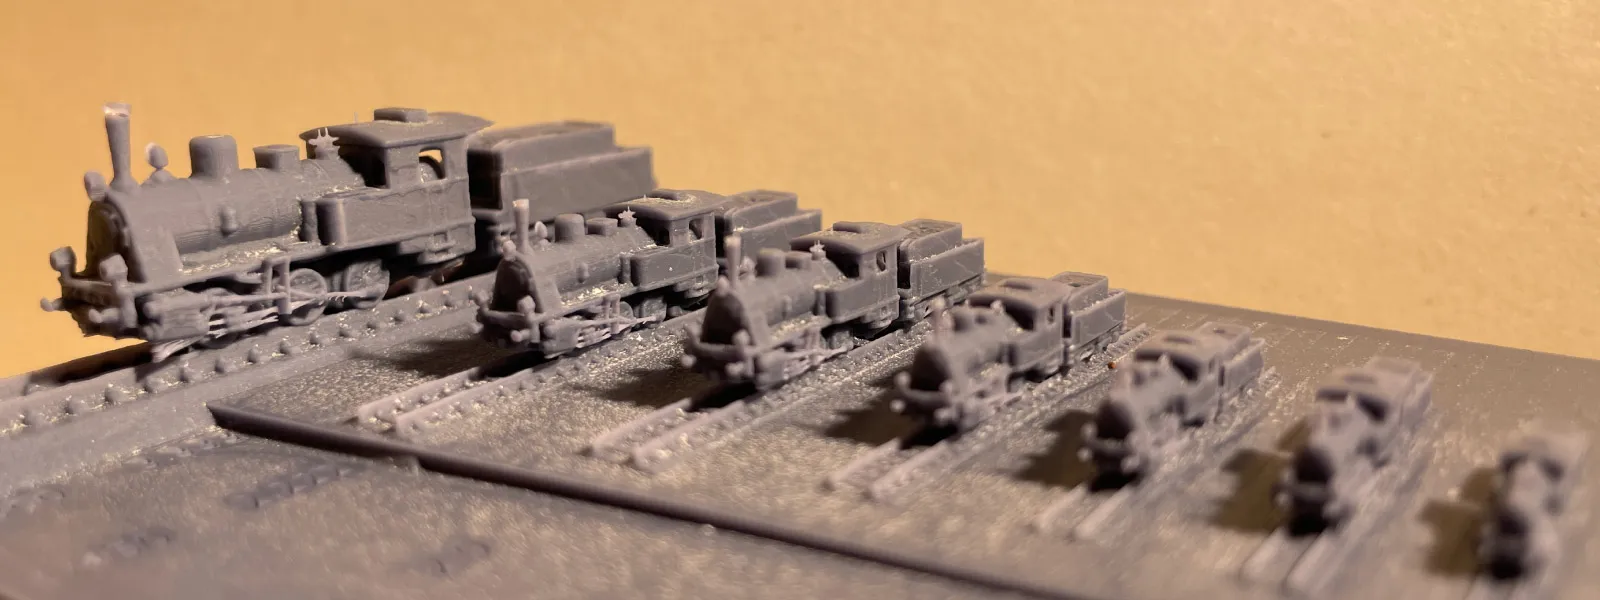
We achieved the set goal of reproducing a good enough model to make a replica half the size. A 1:320 scale model will be inserted in a larger miniature scene and then printed as a part of it on a resin printer. However, we are not entirely done with this. I will do part 3, where we try to increase the scan detail by filling the frame with this or another similarly sized object using a macro lens and maybe even reproducing a decent 1:1 model replica and a better, more detailed result in general.
Photographer - Drone Pilot - Photogrammetrist. Years of experience in gathering data for photogrammetry projects, client support and consultations, software testing, and working with development and marketing teams. Feel free to contact me via Pixpro Discord or email (l.zmejevskis@pix-pro.com) if you have any questions about our blog.
Related Blog Posts
Our Related Posts
All of our tools and technologies are designed, modified and updated keeping your needs in mind
Roof Scan for Inspection and Solar Panel Addition – Use Case
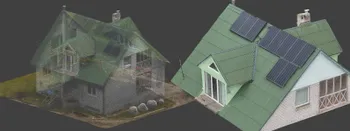
Roof photogrammetry is one of our client base's most common use cases. Obtaining accurate measurements is essential for designing a solar panel layout, determining how many panels fit on a roof, and conducting a prior inspection.

No. 1 Mistake You Are Making in Photogrammetry Right Now
As photogrammetry software developers, we need to troubleshoot multiple projects from our clients every week. The number one mistake, especially when making measuring projects, is using redundant photos. These photos can appear for a few reasons, which I will describe, and they can be quickly dealt
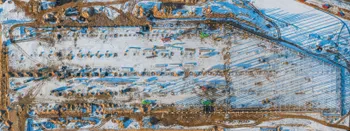
Dealing with Snow and High Contrast - Aerial Construction Site Scan
Aerial photogrammetry is dependent on the weather conditions, and there is no other way around it. While we can not fly our drones during extreme weather - dealing with something like a little cold or snow is not that hard.
Ready to get started with your project?
You can choose from our three different plans or ask for a custom solution where you can process as many photos as you like!
Free 14-day trial. Cancel any time.